Simple Steps to Create a Perfect Time-Lapse Video on Your iPhone
There are various creative ways how you can shoot a video using an iPhone. You may want to slo-mo your video or record a video using the square mode of your camera, and you can even make a time-lapse video. But if you are wondering how you can make a time-lapse video on your iPhone, then we have the solution for you. This article will help you know how to make a time-lapse video using your iPhone’s camera.

Part 1. What Is a Time-Lapse Video
If you wonder what time-lapse videos are and where you can best use them, you probably must not skip this part. Because in this part, you will know what a time-lapse video is and how you can ideally use it.
A time-lapse is a video editing technique where the frame rate per second (FPS) is stretched out, making it faster when you play it. But in a normal video, the video playback speed is the same as the frame rate. A time-lapse video works by capturing numerous frames per second and is shot slower than the normal rate to create a time-lapse video. Moreover, this video technique is perfect if you want to shoot a video about the cloud's movement in the sky, a busy street that many pass by, and even the plant's growth. In addition, time-lapse is a video technique where the frames per second are shot at a slower rate than normal.
Part 2. How to Shoot a Video Time-Lapse on iPhone
When you hear the word time-lapse, it may sound too technical. But worry not because there are many ways to make a time-lapse video. The best and most straightforward way to create a time-lapse video is by using an iPhone or any apple device. Apple devices have a built-in time-lapse recorder that allows you to capture the best video on any occasion.
Steps on how to make a time-lapse video on iPhone:
Step 1. First, open the camera app on your iPhone.
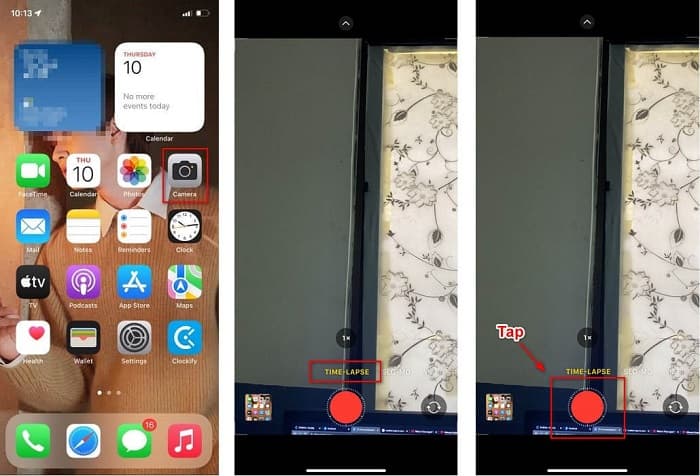
Step 2. Next, find the time-lapse recorder on the camera options by swiping above the shutter button.
Step 3. Prepare the scenery you want to record, and when you are ready, tap the record button.
Step 4. And when you are done recording, tap the red stop button to finish your time-lapse recording.
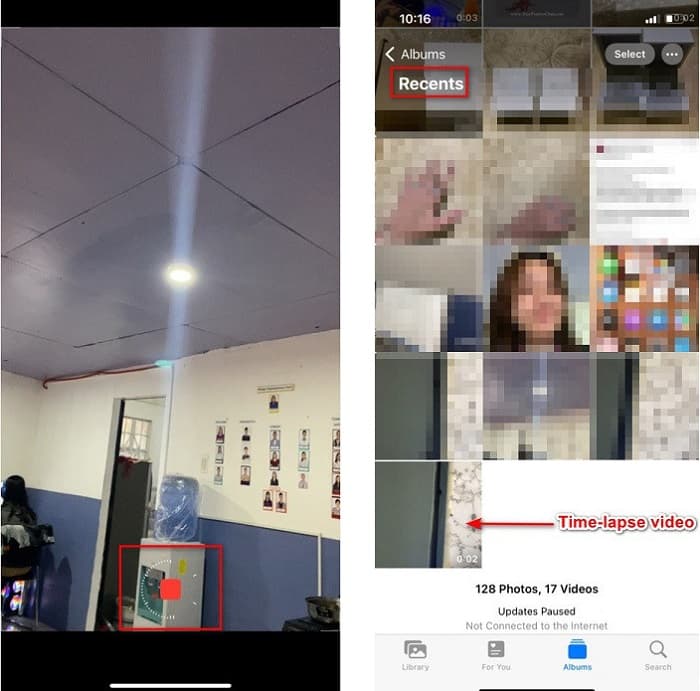
Step 5. Your time-lapse video will be saved automatically in your Photos under the Recents folder.
Related:
How to Speed up a Video on iPhone
How to Make a GIF from Photos on iPhone
Part 3. How to Slow Down a Time-Lapse Video on Computer
Do you think it is possible to slow down the speed of a time-lapse video already taken? Thoroughly, the answer to that question is yes. Supposedly, the time-lapse video you took is faster than you expected, and you want to slow it down. Luckily, we found a tool that can do that job for you. FVC Video Converter Ultimate is not just a tool for converting files. It also has a built-in video speed controller where you can adjust the speed of your time-lapse video.
Furthermore, it also has more tools to use like Video Reverser, Color Correction, Video Watermark, and many more. Plus, it supports numerous file formats like MP4, AVI, MKV, M4V, MOV, and 1000+ more. So if you are looking for the best tool to slow down your time-lapse video, this tool is the best for you.
Pros
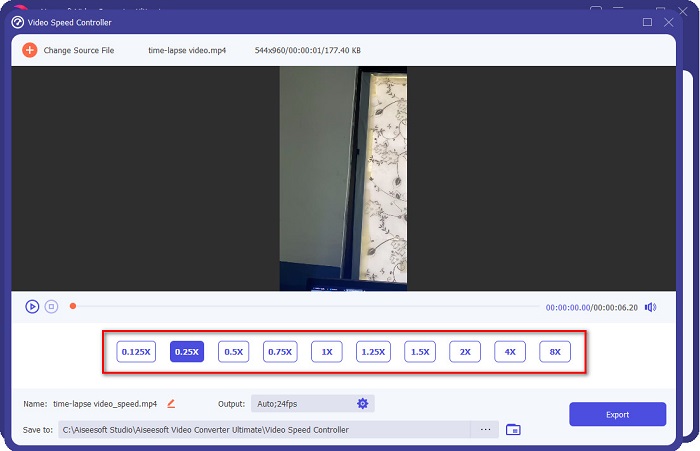
- It allows you to adjust the video playback speed to 0.125x, 0.25x, 0.5x, 0.75x, 1.25x, 1.5x, 2x, 4x, and 8x video speed.
- It has many advanced features that you can use, like GIF maker, 3D maker, and Video Speed Controller.
- It has an easy-to-use software interface.
- Available on all media platforms, including Windows and Mac.
Cons
- Purchase the app before fully accessing its unique features.
How to slow down a time-lapse video using FVC Video Converter Ultimate:
Step 1. Download FVC Video Converter Ultimate by clicking the Download button below for Windows or Mac. After installing the app, run the program.
Free DownloadFor Windows 7 or laterSecure Download
Free DownloadFor MacOS 10.7 or laterSecure Download
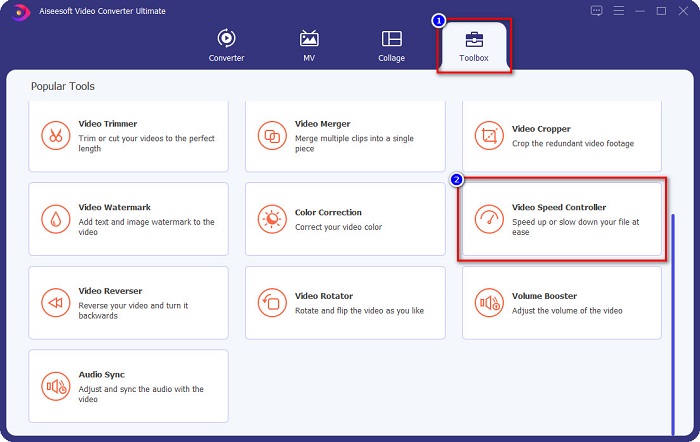
Step 2. After opening the app, click the Toolbox option above the software’s main interface. And on the Toolbox panel, click the Video Speed Controller.
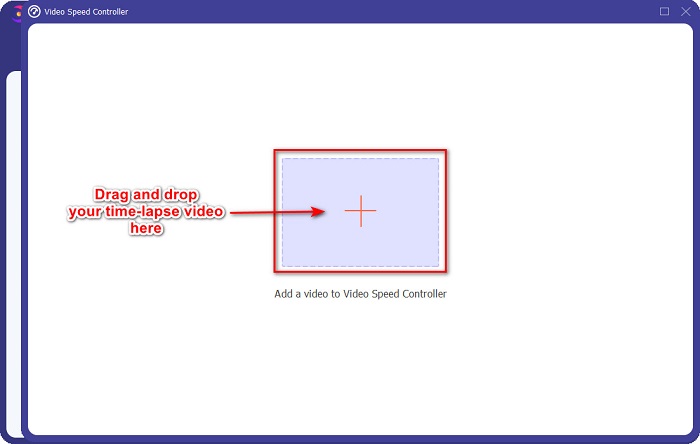
Step 3. And then, click the + sign button to add the time-lapse video that you want to slow down. You can also choose to drag and drop your video file into the + sign.
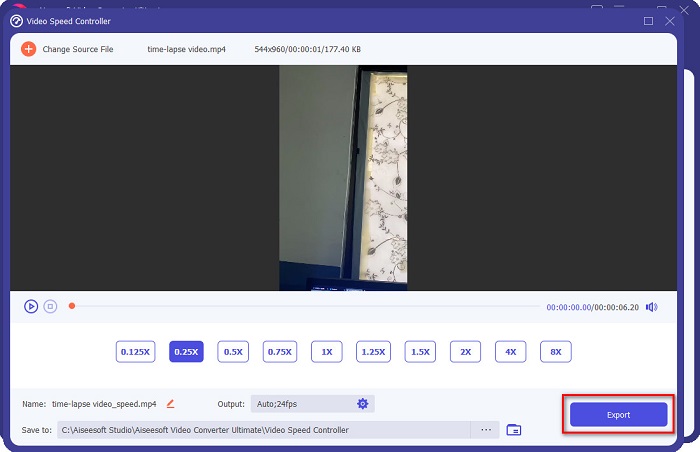
Step 4. You will see the video playback speed options below your uploaded video on the next interface. Then select the preferred video playback speed that you want.
Step 5. Finally, click the Export button to download your video output file. You can locate it on your computer files, and you will see that the video speed has been slowed down.
Part 4. Other Options on How to Make a Time-Lapse Video
Creating a time-lapse video is not just available for Apple device users. You can also make a time-lapse using apps. We searched for the top-used apps on google and found the best apps that can create a time-lapse video. So read this part comprehensively if you are not an Apple user or looking for an app that can shoot a time-lapse video.
Option 1. Framelapse
Framelapse is a time-lapse recorder that allows you to edit the resolution of your video up to UHD 2160p 4K resolution. Moreover, you can set a timer, adjust the white balance, and adjust the exposure compensation of your video. Moreover, this app allows you to set the frame interval of your video.
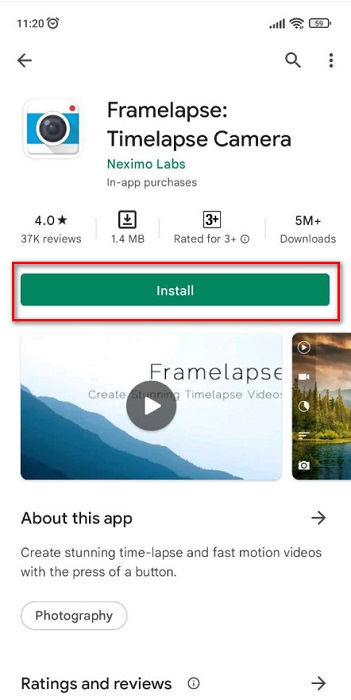
Step 1. Download Framelapse on your AppStore, then open the application.
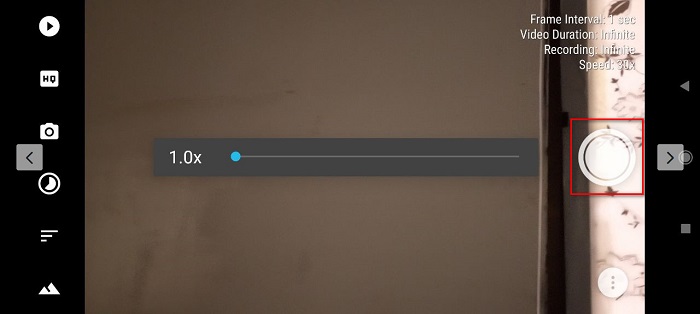
Step 2. In the first software interface of the application, tap the white record button to start recording a time-lapse video.
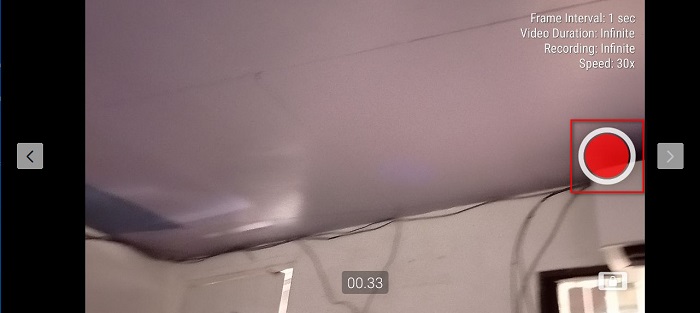
Step 3. Lastly, click the stop button if you are done recording a time-lapse video. You will see your time-lapse video on your Gallery/Photos.
Option 2. Superlapse
Superlapse app is one of the most easy-to-use time-lapse recorders available on the AppStore. This application is perfect for recording the best time-lapse video because you can adjust the frame interval and recording duration of your video. In addition, you can easily share your time-lapse video on the internet using this app. However, it is only available on Android devices.
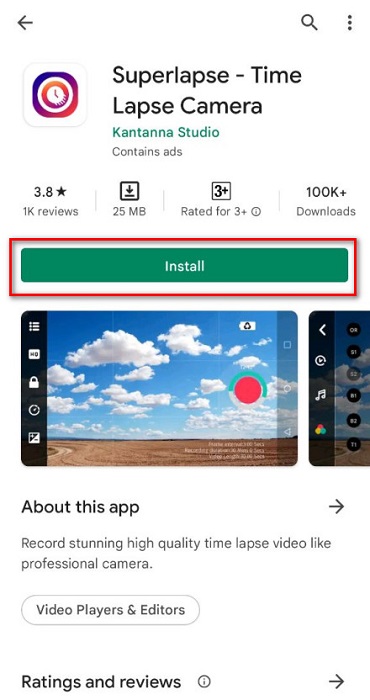
Step 1. For the first step, download Superlapse on your Android AppStore. Then open the application.
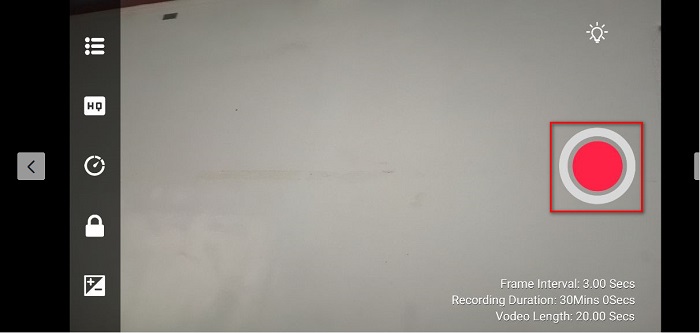
Step 2. And then, tap the record button to start recording a time-lapse video.
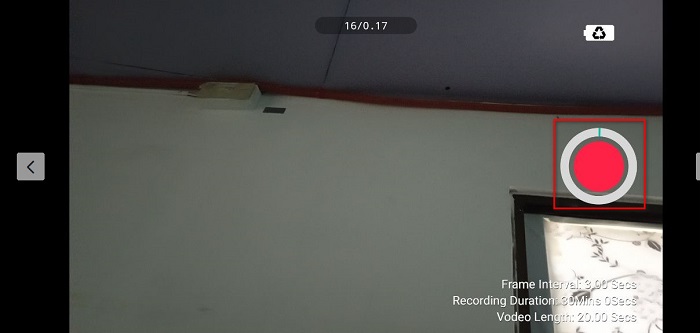
Step 3. When you are done recording, tap the record button again to end the recording process.
Option 3. Time Lapse Camera
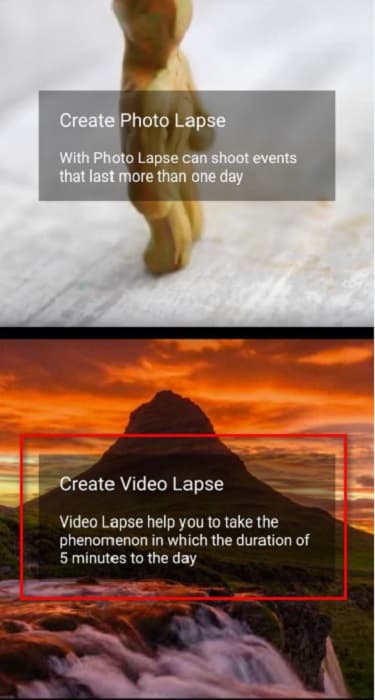
The last time-lapse video maker that we will talk about is Time Lapse Camera. This time-lapse recorder is available free on any android device. It also has a straightforward user interface, making it a beginner-friendly tool. In addition to that, you can choose if you want to create a photo lapse or video lapse. And if you're going to record a video at night, you can select the night mode option. Furthermore, you can adjust the video resolution, frame interval and add a filter to your time-lapse video.
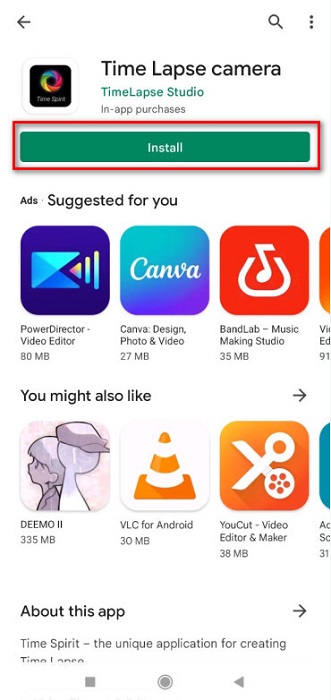
Step 1. Install Time Lapse Camera on your phone. Then run the application.
Step 2. Then on the software’s main interface, click the Create Video Lapse. Then tap Normal mode.
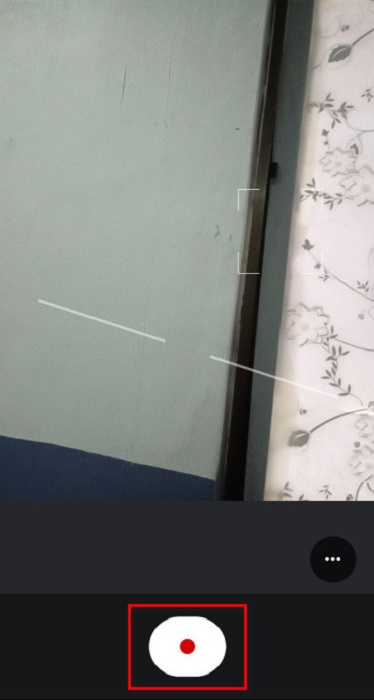
Step 3. Lastly, tap the record button to start recording your time-lapse video. After recording, tap the stop button to finish the recording process.
Part 5. FAQs about How to Make a Time-Lapse Video
Does android devices have a built-in time-lapse recorder?
Yes. Other android devices like smartphones have a built-in time-lapse recorder. But if your android device does not have a built-in time-lapse recorder, you can use a third-party app.
Can you make an ordinary video into a time-lapse video?
Yes. You can make a normal video into a time-lapse video on iPhone, or you can use a third-party tool capable of converting your normal video to a time-lapse video.
What is the maximum time can a time-lapse video have on iPhone?
Regardless of what device you record a time-lapse video, all time-lapse videos have a maximum of 40 seconds.
Conclusion
On the whole, it is easy to record a time-lapse on iPhone. But if you are not an iPhone user, there are applications for you to try. But if you want to make your time-lapse video slow down a little to make it a perfect time-lapse video, then you need a tool that will help you to adjust the speed of your video. And if you are looking for the best tool that would help you with that problem, then FVC Video Converter Ultimate is the best and all-packed tool that you can use.


 Video Converter Ultimate
 Screen Recorder