Helpful Scheme That Concerns OBS Audio Delay Dilemma
You want to record a video presentation so that you can demonstrate it tomorrow to your class or exhibit it in your business meetings. To do that, you use OBS Studio to make the recording happen and save it to your computer. But when you start to edit the video presentation to add some details about the presentation, you notice that the audio was delayed and out-of-sync. In this article, you will know why OBS audio is out of sync. And in case you don't know how to get rid of this situation, we also provide accessible approaches in fixing the audio delay.

Part 1. Why Is OBS Audio Out Of Sync?
The main problem of most streamers is when their audio is out-of-sync, it seems okay at the first couple of minutes but begins to have an audio delay that doesn't match the opening of your lips in the next hour. In desperation to fix the uncertainty of the stream, some will go to the advanced audio properties to adjust the sync offset that can only enter a delay for the audio source in a certain amount of time, which is not advisable. Instead, why OBS audio is out of sync is because of the sample rate mismatch.
Part 2. 7 Easy Steps to Fix OBS Audio Delay
The audio delay happens on any occasion; it can be in streaming platforms, recorded presentations, and even live broadcasts. Most of the reason this happens is the connectivity issues, technical difficulties, and faulty programmed applications. For instance, you're using the OBS studio as a platform for your streaming activity, and it happens that every video output you stream has some delay. Good thing that there are perfect ways to prevent these situations using the same platform. Here are the easy-to-follow steps:
Step 1: Find the Settings
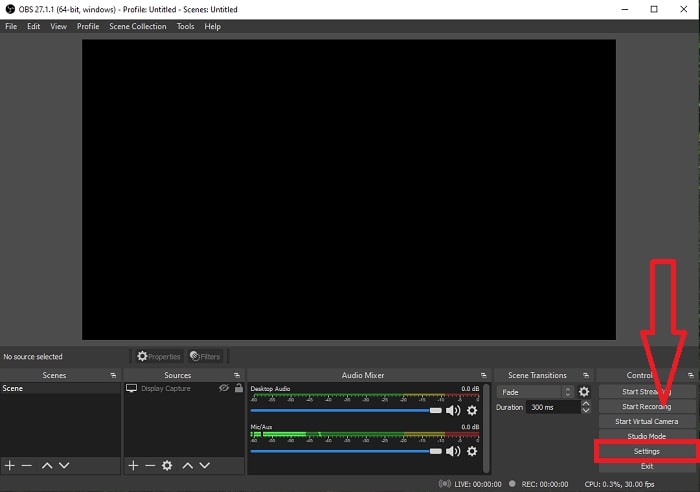
Open the OBS Studio to proceed with the application interface and click the Settings in the lower right corner.
Step 2: Access Audio Settings
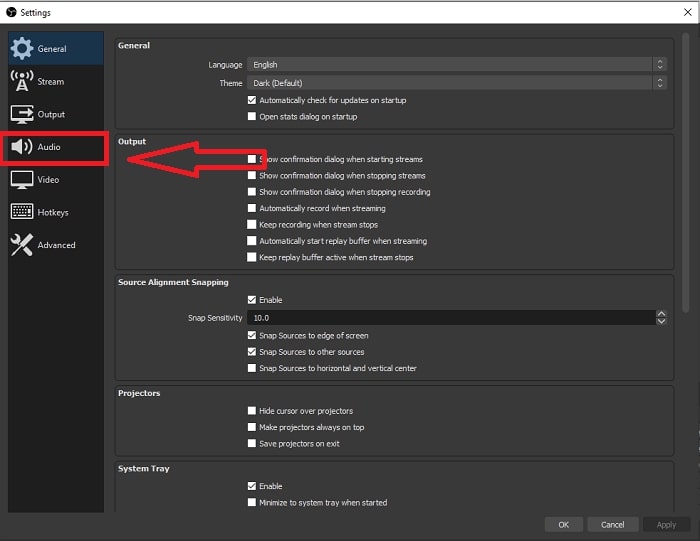
After you click the Settings, another interface will appear on your screen. This interface will give you an overview of the general settings of OBS Studio. But to proceed in fixing the audio delay of OBS Studio, click the Audio in the left corner of the interface.
Step 3: Choose an Appropriate Sample Rate
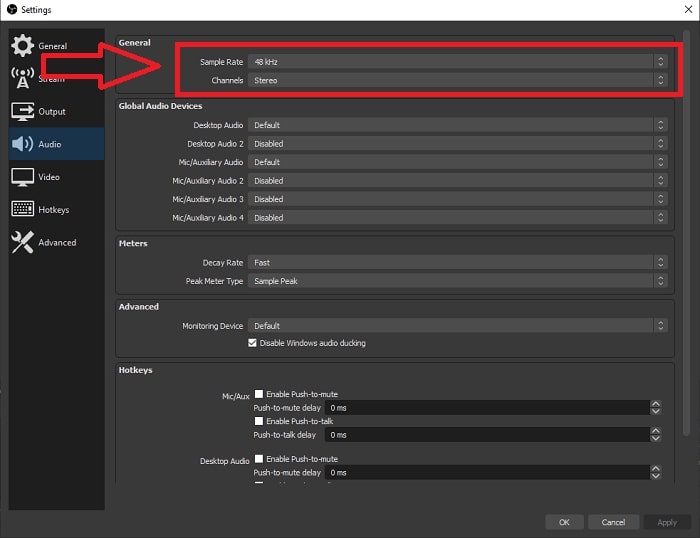
Edit the sample rate based on the preferred sample rate of your desktop and recording devices. Suppose your recording device is a bit ancient, and you have an old setup. In that case, it will be better to lower the sample rate from the standard sample rate of 48 kHz and increase its adjustment from 48 kHz if you want to observe your device's preferred sample rate. Because the higher the video's sample rate increases, the closer it will recreate the original audio. Furthermore, you can only change the channels option depending on what tool you use to play the video.
Step 4: Open the Sound Settings
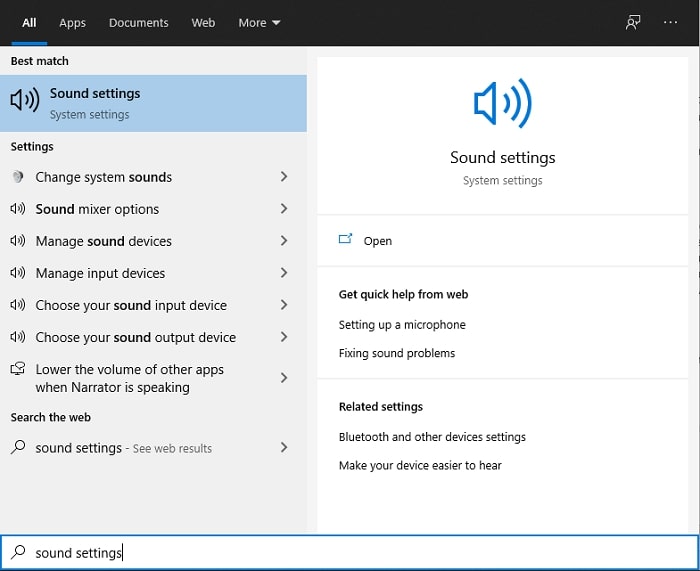
After setting your desired sample rate in the OBS Studio, type Sound Settings in your search bar within the taskbar, locate the Sound Settings and click it to advance in your desktop settings.
Step 5: Locate the Sound Control Panel
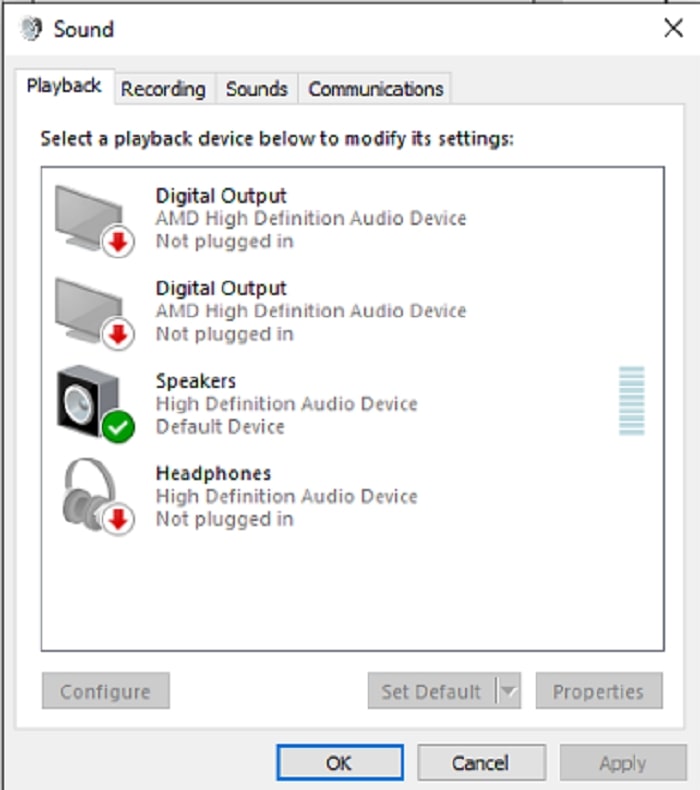
Click the Sound Control Panel. After you open it, another sound interface will appear on your screen—an overview of all the available devices that has something to do with audio outputs.
Step 6: Select Device for Audio Outputs
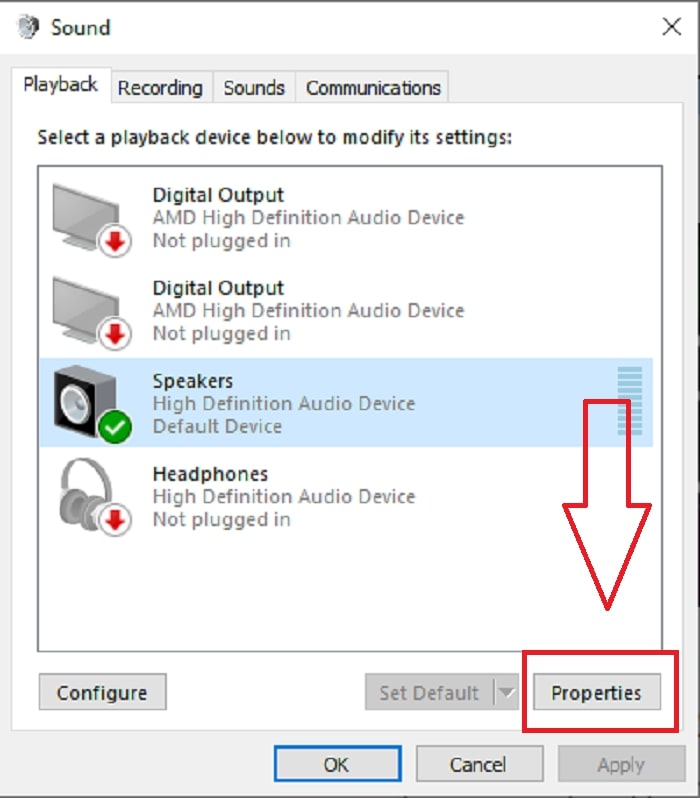
The options present are the devices available in your recording setup, whether a speaker or headphones. Choose which device makes the audio out-of-sync and click the properties afterward.
Step 7: Continue in Advanced Settings
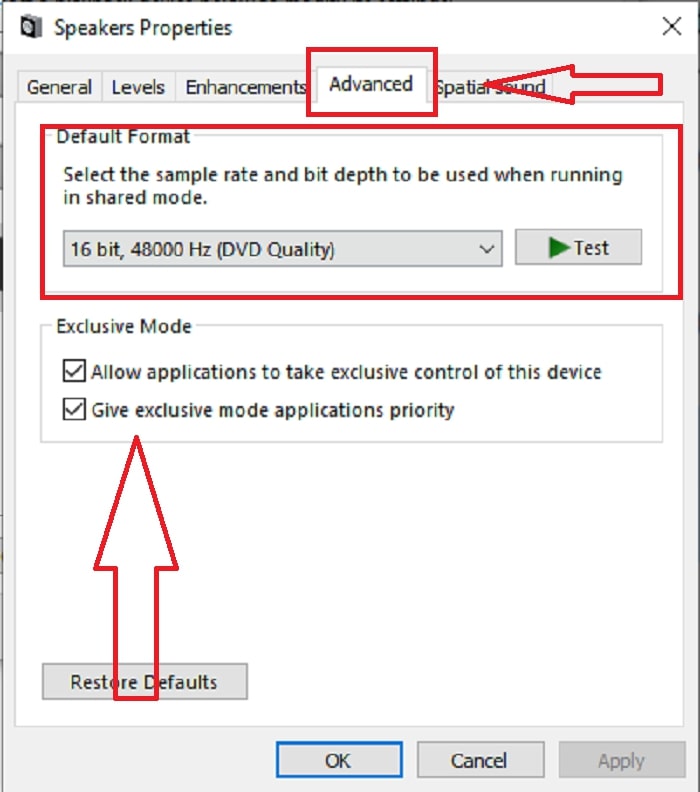
Consequently, after you click the properties of the desired device for the audio output, click the Advance and you will see the default format; test every format in the options and choose the format that does not make the audio out-of-sync.
Part 3. Best Way to Fix OBS Audio Delay
The solution above says how to avoid audio delay using the OBS Studio, but what if the problem is the recorded audio you want to present or upload is out-of-sync? Use the FVC Video Converter Ultimate, a software with various features in enhancing a video clip. One of the features offered can fix the audio sync of a video clip by adjusting its delay. Follow the steps below to know how to use the software:
Step 1: To save the software to your computer's hard drive, click on the Free Download button. Then you can install the software and customize the settings to your liking.
Free DownloadFor Windows 7 or laterSecure Download
Free DownloadFor MacOS 10.7 or laterSecure Download
Step 2: Click the Toolbox feature after you launch the software, and proceed with clicking the Audio Sync.
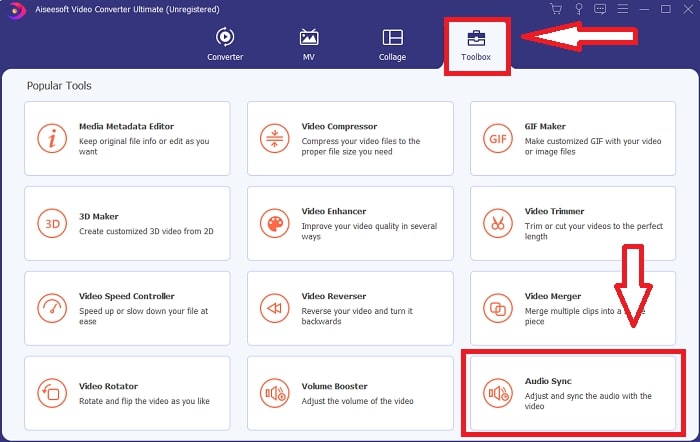
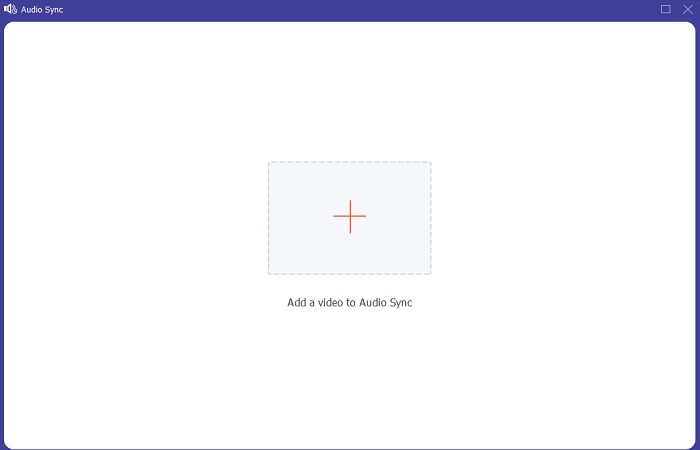
Step 3: Click the + button after clicking the audio sync and start editing the video clip.
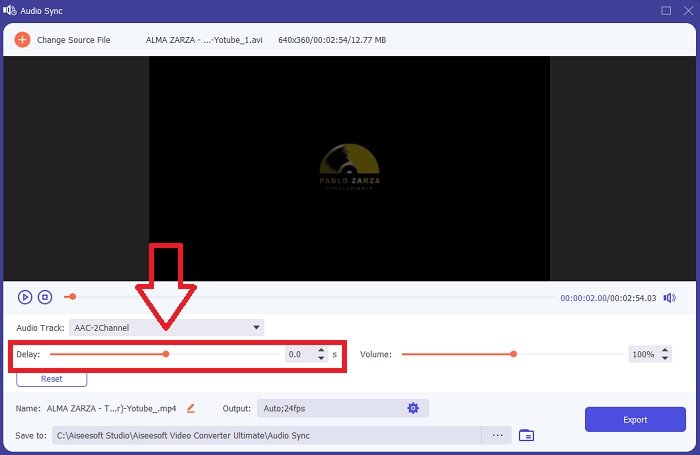
Step 4: Adjust the Slider of the audio to sync its video clip. With this, you can also change the output device and start customizing the volume of your video clip.
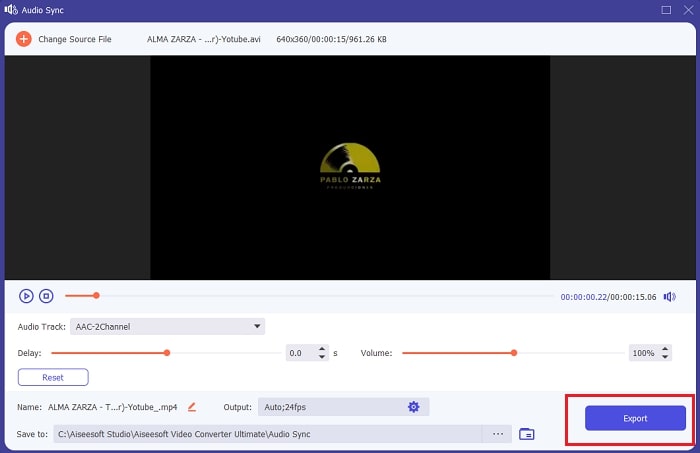
Step 5: Click Export and choose where you will save your file after you finish editing.
Related:
Part 4. FAQs About OBS Audio Delay
What is a sample rate mismatch?
The audio sample rate, expressed in kilohertz, is the speed at which the system takes these measurements. The audio sample rate determines the frequency range you can capture in digital audio—the sample rate changes in your audio preferences in most DAWs. Changing the sample rate affects the quality of your audio. However, sample rate mismatch is an unequal receiving and sending audio sample rate to the source. This incident always happens if the speaker output and the headphone output are not the same sample rate causing an audio delay.
Do I lose the quality of the audio if I adjust the sample rate?
The sample rate is changing if you want to listen to the audio in your video clip and not change it. In using the FVC Video Converter Ultimate, you will only change the audio delay of the video clip to sync its audio. You will not adjust the sample rate anymore and be afraid of losing the audio quality.
What sample rate is preferred if I use low-quality audio output?
The quality of audio depends on the audio output. If your microphone or speaker only supports a low-frequency audio rate, it's better to lower the standard sample rate to 44.1 kHz than to set it to 48 Hz. The sample rate may affect the audio sync delay if there's no equal frequency flow to output and input.
Conclusion
To summarize, the audio delay that always appears in OBS Studio is open in different ways to fix it. We discussed the sample rate mismatch and observed different audio outputs but the best way to show a solution to make the audio out of sync is to use the FVC Video Converter Ultimate. Aside from its feature that can fix audio sync, it has many more features that can help improve your video clip.


 Video Converter Ultimate
 Screen Recorder


