


วิธีการบีบอัดรูปภาพใน Photoshop: ผลลัพธ์ที่ไม่สูญเสียข้อมูล
Photoshop เป็นซอฟต์แวร์แก้ไขรูปภาพที่ได้รับความนิยมอย่างแพร่หลาย เนื่องจากมีคุณสมบัติที่น่าทึ่งและมีประโยชน์ แอปซอฟต์แวร์นี้จึงกลายเป็นเครื่องมือที่นักแก้ไขรูปภาพมืออาชีพใช้เพื่อปรับปรุงรูปภาพของตน
หากคุณกำลังจัดการกับไฟล์ภาพขนาดใหญ่และพบว่าจัดการได้ยาก คุณสามารถบีบอัดไฟล์ได้ บทความนี้จะสอนวิธีการที่แตกต่างกันสามวิธีและทางเลือกหนึ่งวิธี วิธีการย่อขนาดรูปภาพใน Photoshopเราเข้าใจว่าการใช้เครื่องมือนี้อาจดูยุ่งยากสำหรับบางคน แต่คู่มือนี้จะช่วยให้คุณบีบอัดรูปภาพได้ง่ายขึ้น อย่าเสียเวลากับเรื่องนี้เลย มาเริ่มกันเลยดีกว่า!

ส่วนที่ 1. การย่อขนาดรูปภาพใน Photoshop โดยการแปลงรูปแบบรูปภาพ
ใช่! คุณสามารถย่อขนาดรูปภาพใน Photoshop ได้โดยการแปลงรูปแบบรูปภาพ ถือเป็นวิธีที่มีประสิทธิภาพในการบีบอัดรูปภาพ เนื่องจากรูปแบบรูปภาพต่างๆ มีระดับการบีบอัดที่แตกต่างกัน ดังนั้น การเลือกรูปแบบที่เหมาะสมกับความต้องการของคุณจะช่วยให้คุณปรับแต่งรูปภาพให้เหมาะกับวัตถุประสงค์ต่างๆ ได้
นี่คือวิธีที่คุณสามารถย่อขนาดรูปภาพใน Photoshop:
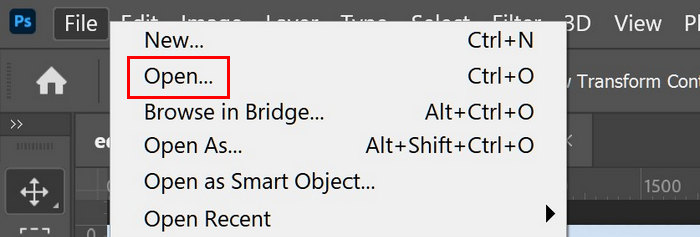
ขั้นตอนที่ 1ใน Photoshop ของคุณ เปิดไฟล์ที่คุณต้องการแปลง เมื่อต้องการทำเช่นนี้ ให้ไปที่ แท็บไฟล์ และคลิกที่ไฟล์ เปิด ตัวเลือก
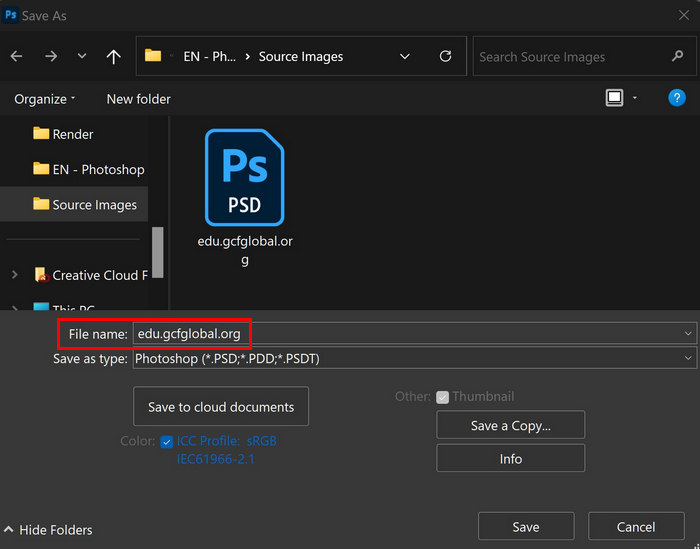
ขั้นตอนที่ 2. ต่อไปให้ย้อนกลับไปที่ แท็บไฟล์เลื่อนลงมาและมองหา บันทึกเป็น ปุ่มในเมนู

ขั้นตอนที่ 3ตอนนี้ให้พิมพ์ชื่อไฟล์ที่คุณต้องการ จากนั้นเลือกตำแหน่งสำหรับไฟล์
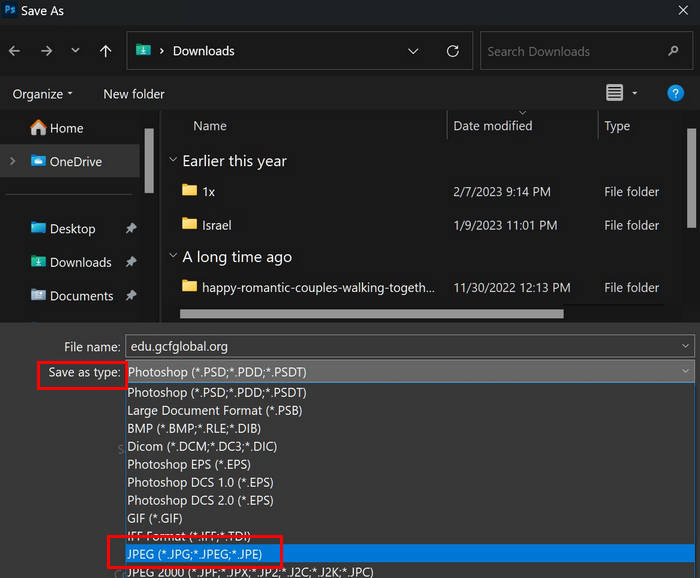
ขั้นตอนที่ 4หลังจากนั้น ให้เลือกรูปแบบไฟล์จากรายการที่คุณต้องการแปลงรูปถ่ายของคุณ
ขั้นตอนที่ 5. เมื่อเสร็จแล้วเพียงแค่คลิก บันทึก.
การแปลงรูปแบบรูปภาพสามารถลดขนาดได้ ดังนั้นวิธีนี้จะช่วยให้คุณปรับแต่งรูปภาพให้เหมาะกับความต้องการต่างๆ ได้อย่างง่ายดาย แต่โปรดทราบว่าหากคุณกำลังจัดเก็บไฟล์ไว้สำหรับใช้วิธีนี้ การแปลงรูปแบบรูปภาพเพียงอย่างเดียวจะไม่ทำให้ขนาดลดลงมากนัก
ตอนที่ 2. วิธีลดขนาดไฟล์ใน Photoshop โดยการลดความละเอียดหรือคุณภาพ
อื่น วิธีการลดขนาดไฟล์ภาพ ใน Photoshop นั้นมีฟีเจอร์การแก้ไขภาพอันทรงพลัง ผู้ใช้สามารถเปลี่ยนขนาดรูปภาพ ตลอดจนการตั้งค่าคุณภาพและรูปแบบเพื่อให้ได้ขนาดไฟล์ที่ต้องการโดยไม่สูญเสียคุณภาพไปมากนัก
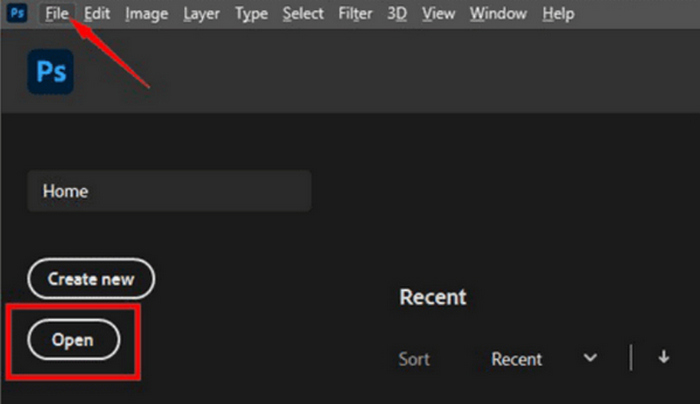
ขั้นตอนที่ 1. เปิดรูปภาพของคุณใน Photoshop โดยการคลิก เปิด หรือไปที่ ไฟล์ และเลือกไฟล์ภาพที่คุณต้องการปรับขนาด
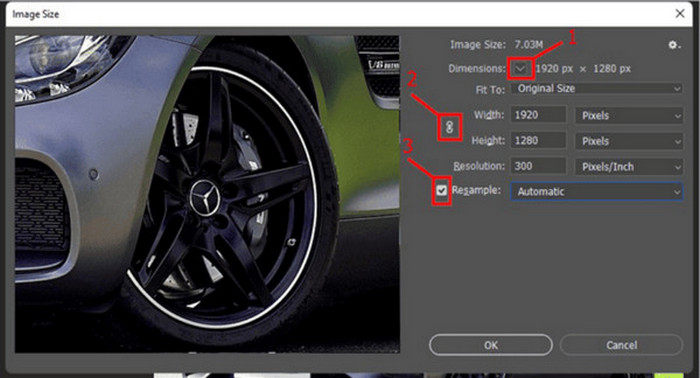
ขั้นตอนที่ 2. ตอนนี้ไปที่ ภาพ แล้วเลือก ขนาดรูปภาพ.

ขั้นตอนที่ 3. ใน ขนาดรูปภาพ กล่องโต้ตอบ เลือก พิกเซล จากเมนูแบบเลื่อนลง หากต้องการกำหนดขนาดเฉพาะในการบีบอัดไฟล์ภาพของคุณ ให้ป้อนค่าลงในกล่องข้อความความกว้างและความสูง แล้วคลิก ตกลง เพื่อปรับขนาดภาพ
ขั้นตอนที่ 4สุดท้ายนี้ ให้บันทึกของคุณ บีบอัด PNG โดยคลิกที่ บันทึกเป็น ปุ่มใต้ ไฟล์ แท็บ
บันทึกไฟล์ PSD ในรูปแบบ PNG ก่อนที่จะบันทึก
ขั้นตอนที่ 1. เปิดรูปภาพของคุณใน Photoshop โดยการคลิก เปิด หรือไปที่ ไฟล์ และเลือกไฟล์ภาพที่คุณต้องการบีบอัด
ขั้นตอนที่ 2. ตอนนี้ไปที่ ภาพ แล้วเลือก ขนาดรูปภาพ.
ขั้นตอนที่ 3. ใน ขนาดรูปภาพ กล่องโต้ตอบ เลือก นิ้ว จากเมนูแบบเลื่อนลง หากต้องการกำหนดขนาดเฉพาะเพื่อบีบอัดไฟล์ภาพของคุณ ให้ป้อนค่าลงในกล่องข้อความความกว้างและความสูง แล้วคลิก ตกลง เพื่อปรับขนาดภาพ
ขนาดภาพ Photoshop เป็นนิ้วขั้นตอนที่ 4. สุดท้ายให้คลิกที่ บันทึกเป็น ปุ่มใต้ ไฟล์ แท็บเพื่อบันทึกภาพสุดท้าย
ทั้งสองวิธีนี้สามารถช่วยบีบอัดไฟล์รูปภาพใน Photoshop ได้อย่างมาก อย่างไรก็ตาม คุณต้องลองผิดลองถูกกับขนาดที่ป้อนในการตั้งค่าเพื่อให้ได้ขนาดและคุณภาพรูปภาพที่ดีที่สุด
ส่วนที่ 3 วิธีการบีบอัดรูปภาพแบบแบตช์ใน Photoshop
อีกวิธีในการบีบอัดรูปภาพใน Photoshop คือทำแบบเป็นกลุ่ม วิธีนี้มีประโยชน์อย่างยิ่งสำหรับผู้ที่ต้องการบีบอัดไฟล์รูปภาพจำนวนมาก เพื่อให้กระบวนการนี้ราบรื่นขึ้น ผู้ใช้สามารถบีบอัดรูปภาพเป็นชุดใน Photoshop ได้ ดังนี้:
ขั้นตอนที่ 1ก่อนอื่นคุณต้องบันทึกภาพถ่ายทั้งหมดที่ต้องการบีบอัดเป็นชุดไว้ในโฟลเดอร์เดียว
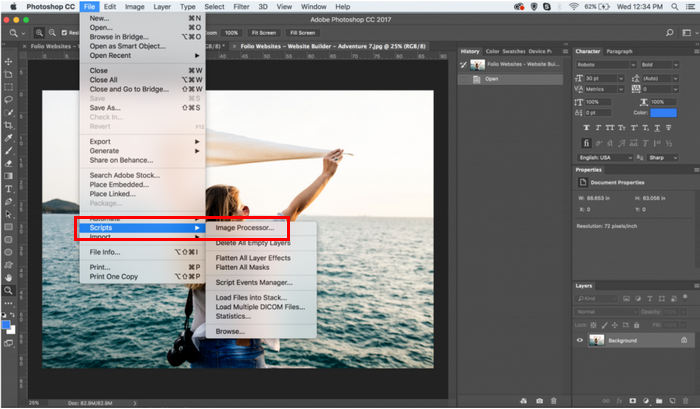
ขั้นตอนที่ 2. เปิด Photoshop ของคุณแล้วไปที่ แท็บไฟล์คลิก สคริปต์และเลือก หน่วยประมวลผลภาพ.
ขั้นตอนที่ 3. จากนั้นนำเข้ารูปภาพที่คุณต้องการบีบอัดโดยคลิกที่ เลือกโฟลเดอร์ ภายใต้เลือกภาพที่จะประมวลผล
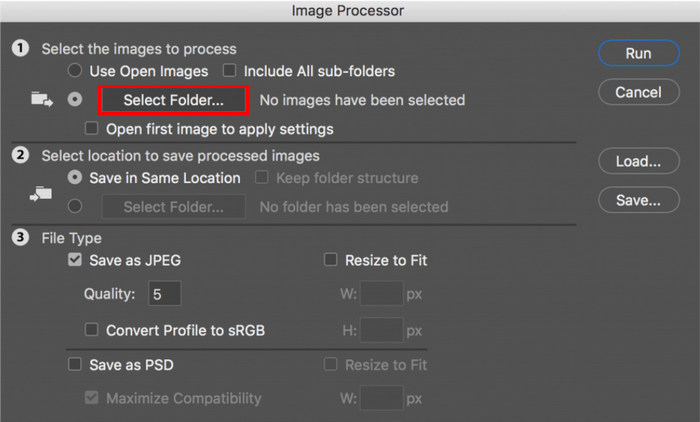
ขั้นตอนที่ 4หลังจากนั้นโฟลเดอร์ใหม่จะถูกสร้างขึ้นในโฟลเดอร์เดิมโดยอัตโนมัติและนี่เป็นที่ที่ภาพที่ถูกบีบอัดจะถูกจัดเก็บหรือบันทึกไว้
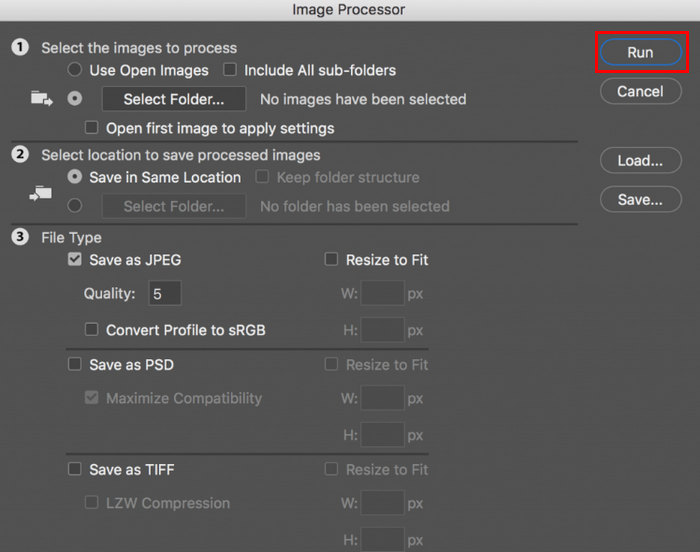
ขั้นตอนที่ 5. ภายใต้ ประเภทไฟล์ ส่วนปรับแต่งการตั้งค่าเพื่อปรับขนาดไฟล์ภาพของคุณ ทำเครื่องหมายที่ ปรับขนาดให้พอดี กล่องและตั้งค่าความสูงและความกว้างสูงสุดของภาพที่คุณบีบอัด

ขั้นตอนที่ 6. ใน คุณภาพ ให้ป้อนตัวเลขระหว่าง 1 ถึง 12 โปรดทราบว่ายิ่งตัวเลขสูง ขนาดไฟล์ก็จะใหญ่ขึ้น ในขณะเดียวกัน หากคุณกำลังบีบอัดไฟล์ในรูปแบบ JPG อย่าลืมทำเครื่องหมายในช่อง Save as JPEG
ขั้นตอนที่ 7- ตอนนี้ให้คลิกที่ การดำเนินการดำเนินการ ปุ่มสำหรับดูการดำเนินการที่สามารถทำได้
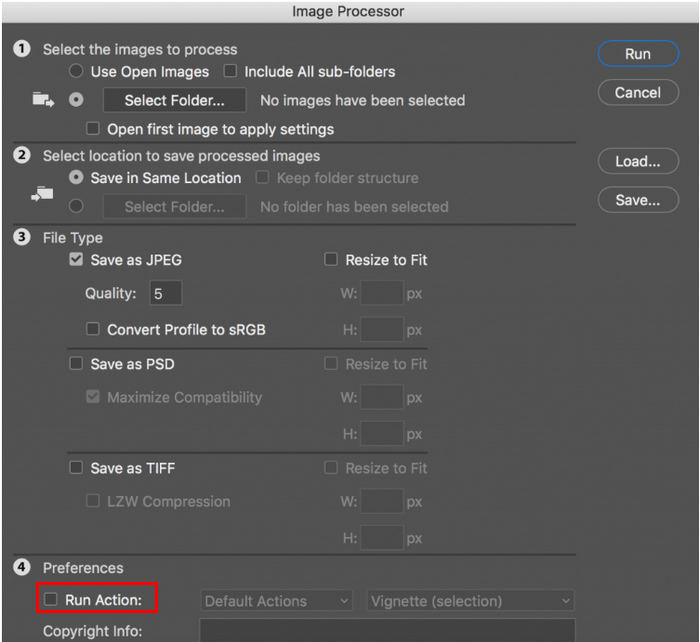
ขั้นตอนที่ 8- เสร็จแล้วให้คลิก วิ่ง ปุ่ม รูปภาพในโฟลเดอร์ของคุณจะถูกประมวลผลและบันทึกไปยังโฟลเดอร์ปลายทางที่ระบุ
วิธีนี้เหมาะมากเมื่อต้องจัดการกับไฟล์จำนวนมากที่ต้องบีบอัด อย่างไรก็ตาม ผู้ใช้บางคนอาจพบว่าวิธีนี้ค่อนข้างท้าทายเนื่องจากอาจต้องมีขั้นตอนที่ซับซ้อน
ส่วนที่ 4. ทางเลือก Photoshop ที่ง่ายกว่าในการบีบอัดรูปภาพ
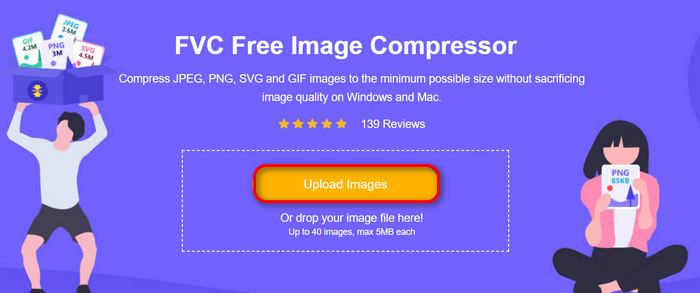
หากคุณกำลังมองหาทางเลือกที่ง่ายกว่าในการย่อขนาดรูปภาพใน Photoshop คุณสามารถใช้ FVC Free Image Compressorเครื่องมือนี้ฟรีและจะบีบอัดรูปภาพของคุณโดยอัตโนมัติ ส่งผลให้ขนาดลดลงอย่างมากแต่คุณภาพแทบไม่สูญเสีย นอกจากนี้ เช่นเดียวกับ Photoshop คุณยังสามารถบีบอัดรูปภาพเป็นกลุ่มได้สูงสุด 40 ภาพด้วยการคลิกเพียงครั้งเดียวโดยใช้เครื่องมือนี้ หากต้องการใช้เครื่องมือนี้ ให้ทำตามขั้นตอนต่อไปนี้:
ขั้นตอนที่ 1บนเบราว์เซอร์ของคุณ พิมพ์ FVC Free Image Compressor และค้นหา
ขั้นตอนที่ 2หลังจากนั้น เมื่อคุณอยู่ในอินเทอร์เฟซหลักแล้ว ให้คลิก อัปโหลดรูปภาพ เพื่อนำเข้ารูปภาพที่คุณต้องการบีบอัด
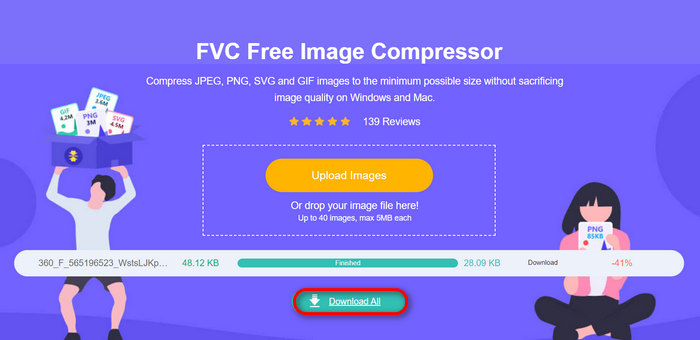
ขั้นตอนที่ 3หลังจากบีบอัดรูปภาพแล้ว คุณสามารถดูตัวอย่างรูปภาพได้โดยตรวจสอบขนาดใหม่หลังการบีบอัด สุดท้าย ให้คลิก ดาวน์โหลดทั้งหมด เพื่อบันทึกภาพของคุณ
เครื่องมือทางเลือกนี้ช่วยคุณได้หลายอย่าง เป็นเครื่องมือฟรีเมื่อเทียบกับ Photoshop ใช้งานง่าย และรองรับการบีบอัดแบบแบตช์ ดังนั้น หากคุณกำลังมองหาเครื่องมือบีบอัดที่ใช้งานง่าย เครื่องมือบีบอัดรูปภาพนี้เหมาะสำหรับคุณ
ส่วนที่ 5. คำถามที่พบบ่อยเกี่ยวกับการย่อขนาดภาพใน Photoshop
จะดูขนาดจริงของรูปภาพใน Photoshop ได้อย่างไร?
หากต้องการดูขนาดจริงของรูปภาพใน Photoshop คุณต้องไปที่แท็บรูปภาพและคลิกที่ขนาดรูปภาพเพื่อตรวจสอบขนาด
ขนาดภาพที่ดีสำหรับ Photoshop คือเท่าไร?
ขนาดรูปภาพที่เหมาะสมใน Photoshop ขึ้นอยู่กับการใช้งานที่คุณต้องการ สำหรับการใช้งานบนเว็บ รูปภาพควรมีขนาดไม่เกิน 2,000 พิกเซล และบันทึกในรูปแบบเช่น JPEG ด้วยคุณภาพระดับกลางเพื่อให้สมดุลกับคุณภาพและความเร็วในการโหลด สำหรับการพิมพ์ ความละเอียดของรูปภาพควรอยู่ที่อย่างน้อย 300 DPI (จุดต่อนิ้ว) และขนาดควรตรงกับขนาดการพิมพ์
ขนาดภาพเริ่มต้นใน Photoshop เป็นนิ้วคือเท่าไร?
ขนาดรูปภาพเริ่มต้นใน Photoshop มักจะขึ้นอยู่กับการตั้งค่าที่กำหนดค่าไว้ระหว่างการสร้างเอกสารใหม่ โดยค่าเริ่มต้น Photoshop อาจเริ่มต้นด้วยขนาดเอกสาร 8.5x11 นิ้วที่ความละเอียด 300 DPI ซึ่งเหมาะสำหรับการพิมพ์
สรุป
ตอนนี้คุณรู้วิธีการที่แตกต่างกันแล้ว วิธีการย่อขนาดรูปภาพใน Photoshopคุณสามารถปรับแต่งรูปภาพของคุณได้อย่างง่ายดายเพื่อการจัดเก็บ ใช้งานบนเว็บ หรือแชร์โดยไม่กระทบต่อคุณภาพ เริ่มใช้เทคนิคเหล่านี้ตั้งแต่วันนี้เพื่อปรับปรุงกระบวนการทำงานของคุณและเพิ่มทักษะการแก้ไขรูปภาพของคุณ
-
 วิธีลดขนาดไฟล์รูปภาพบน iPhone: ขั้นตอนสำหรับ iOS ทั้งหมด
 คุณกำลังประสบปัญหาในการอัพโหลดไฟล์รูปภาพขนาดใหญ่บน iPhone อยู่ใช่หรือไม่ บทความนี้จะเป็นแนวทางในการลดขนาดไฟล์รูปภาพบน iPhone ของคุณ
-
 Google Drive บีบอัดรูปภาพหรือไม่? ความจริงคืออะไร?
 คุณสงสัยอยู่บ้างหรือไม่ว่า Google Drive จะบีบอัดรูปภาพหรือไม่ อ่านบทวิจารณ์ฉบับสมบูรณ์ของเราเพื่อค้นหาความจริงและเรียนรู้ว่าสิ่งนี้ส่งผลต่อคุณภาพรูปภาพของคุณอย่างไร
-
 3 วิธีในการบีบอัดรูปภาพสำหรับ Discord Emoji [คู่มือ]
 หากคุณกำลังมองหาวิธีบีบอัดรูปภาพสำหรับอิโมจิ Discord เนื่องจากมีข้อจำกัดด้านขนาดไฟล์ที่เข้มงวด โปรดอ่านบทความนี้และรับคำแนะนำง่ายๆ 3 วิธี