


4 Simple Ways to Save Screenshots to JPG [2025 Guide]
Screenshot images are usually saved in PNG format. Therefore, changing them to your preferred format will take you some time especially when it is already saved. So, if you experience this and you want to save your screenshots to JPG, this article is for you. In this article, we'll cover various methods and tools you can use, from third-party software to your device's built-in options. This way, you can pick or choose the method that best works for you. Let's get started!

Part 1: Easiest Way to Save Screenshot to JPG on Windows and Mac
If you're looking for an easy way to save screenshots to JPG on both Windows and Mac, FVC Screen Recorder is the perfect solution for you. This screen recording tool is designed to simplify the process of capturing and saving screenshots into any format you prefer. With its intuitive interface, you can effortlessly take screenshots of your Mac or Windows’ entire screen, specific windows, or custom regions and eventually save them to JPG or whatever format you prefer with just a few clicks. Moreover, if you like to enhance or customize your screenshot it has plenty of advanced features that can help you edit your screenshot before saving them to JPG.
Step 1. First, download and install the FVC Screen recorder on your Windows or Mac computers.
Free DownloadFor Windows 7 or laterSecure Download
Free DownloadFor MacOS 10.7 or laterSecure Download
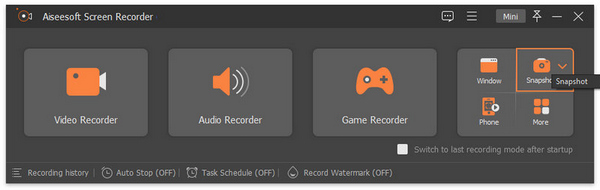
Step 2. Now, after you run the tool, click on the Snapshot icon in the right corner.
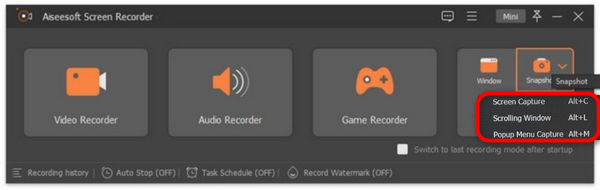
Step 3. After clicking the Snapshot icon, you have three options on how you will take a screenshot. You can choose either from Screen Capture, Scrolling Window, or Pop-up Menu Capture.
Step 4. Now, drag the cursor to the area of the screen on your Windows device to select the part that you want to screenshot.
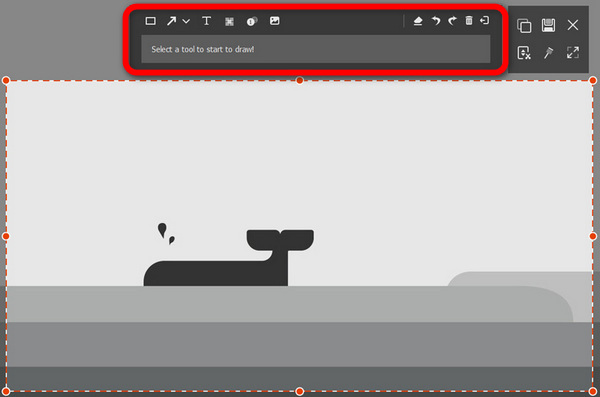
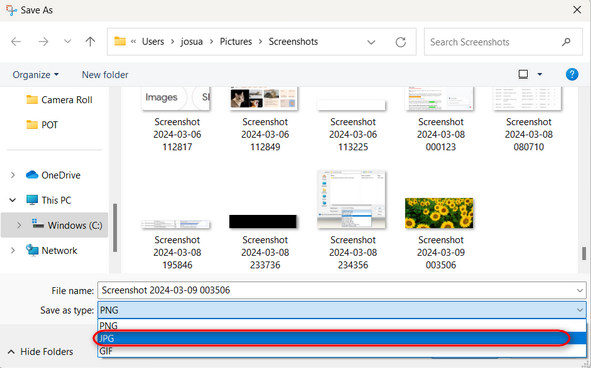
Step 5. After that, click the Save button, go to the Save as Type, and from the drop-down menu, select JPG.

With its user-friendly interface for taking screenshots and saving them to JPG or any format file that you prefer, FVC Screen Recorder is indeed the best choice for anyone seeking a hassle-free way to capture and save screenshots to JPG format on both Windows and Mac platforms.
Part 2: Save Screenshot as JPG on Windows With Snipping Tool
Snipping Tool is one of the most common built-in applications available on Windows operating systems today that is designed to take screenshots. With the use of the Snipping Tool, users can save their screenshots to JPG after capturing them.
Step 1. First, you need to go to the Start on your Windows.
Step 2. After that, proceed to the search bar and look for the Snipping Tool .
Step 3. Now, you’ll see the New button. Click on it to start taking a screenshot.
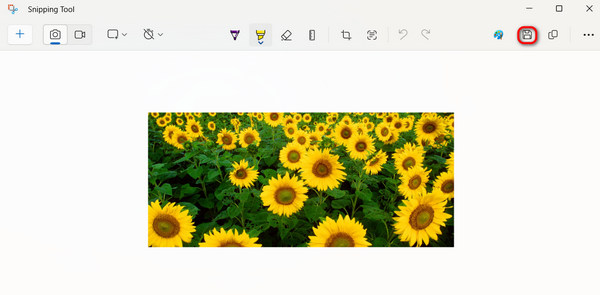
Step 4. Lastly, to save the screenshot image and convert it to JPG, click the Save button and choose JPG in the Save as Type drop-down menu.
So, if you are a Windows user and want to save screenshots to JPG, using the Snipping Tool is definitely a convenient option. However, take note that it lacks advanced features found in third-party tools and may feel outdated to some users.
Part 3: Save Screenshot as JPG on Mac Using Preview
Meanwhile, if you are a Mac user, you can use the Preview tool to save and take screenshots on Mac as JPGs. This tool is built-in in Mac, so this doesn’t need installation to use this tool. You will just need to open the screenshot image using the app and save it as JPG.
Step 1. First, you need to take a screenshot using the built-in screenshot shortcuts on your Mac
Screenshot the entire screen: Press Command + Shift + 3.
Screenshot selected area of the screen: Press Command + Shift + 4.
Screenshot a specific window: Press Command + Shift + 4, then the Spacebar.
Step 2. Once you've taken a screenshot, click on the thumbnail to open it in Preview, which appears at the bottom right corner of your screen.
Step 3. Now, in Preview, you need to go to the File menu.
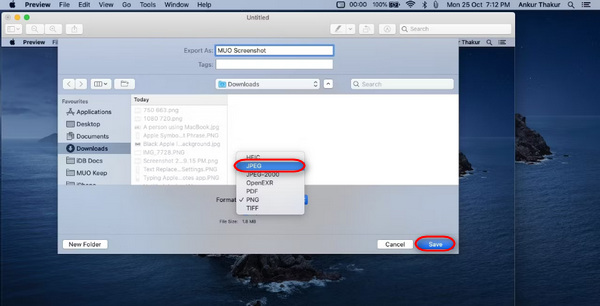
Step 4. From the File menu, select Export or press Command + Shift + S.
Step 5. Lastly, choose JPG as the file format from the dropdown menu, and then click Save.
While this may sound easy and quick to do, taking a screenshot and manually changing its format to JPG in Preview is still inconvenient and will take you some time. However, if this isn’t an issue for you, you can use this method to save screenshots to JPG on your Mac.
Part 4: Tip: How to Convert a Screenshot to JPG Online
If you’re looking for a converter tool online to convert screenshots to JPG, FVC Free Image Converter is the best for you. This tool allows you to convert image formats, like JPG, JPEG, PNG, GIF, BMP, TIFF, WEBP, ICO, and SVG, to JPG, PNG, and GIF. Also, it’s quick and easy to do, and its user-friendly interface makes it more accessible to any type of user.
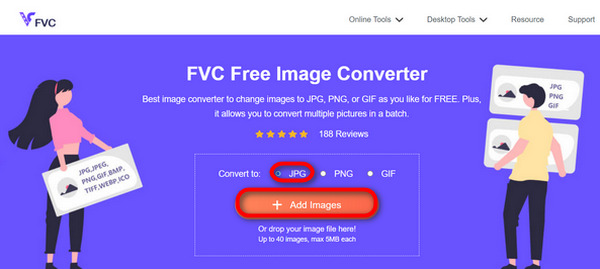
Step 1. Visit the official website of FVC Free Image Converter.
Step 2. Click the Add Images, and in the Convert To option, choose JPG.
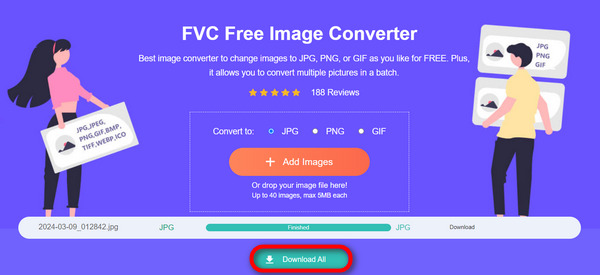
Step 3. Once the process is complete, just click on the Download All button to save your converted screenshot to JPG.
With FVC Free Image Converter, converting screenshots to JPG is quick and easy. It’s the best alternative when you’re having trouble with other methods mentioned above.
Part 5: FAQs about Converting Screenshot to JPG
Can I convert multiple screenshots to JPG format simultaneously?
Yes. You can convert multiple screenshots to JPG format simultaneously using converter tools that have a batch conversion feature like the FVC Free Image Converter. This tool allows you to select multiple screenshots and convert them to JPG format in one go, saving you time and effort.
Does converting screenshot images to JPG affect their quality?
Yes, but not that much. Converting screenshots to JPG will only have a minimal downgrade in quality, but it’s something that is tolerable. When choosing the JPG compression, ensure to balance the file size and the image quality settings to achieve satisfactory results.
Can I adjust the image quality when saving screenshots to JPG?
Yes. There are various image editing software and online converters that have features to adjust the image quality settings when saving screenshots to JPG. This allows them to control the level of compression applied to the image.
Conclusion
There you have it. Whether you're using Windows or Mac, there are several simple ways to convert them to JPG format. With these methods, you can now easily manage and save your screenshots in JPG format. So, the next time you need to save a screenshot, remember these simple methods, especially when you want to save your screenshot to JPG.
-
 Top 5 Leading Tutorials to Convert PNG to JPG Quickly
 If you need to convert your PNG file to JPG format, you can learn the best ways here. You will also learn the difference between PNG and JPG file formats.
-
 How to Solve Screenshot Not Working on iPhone [2025]
 Have trouble taking screenshots on your iPhone? We got you! Learn our comprehensive guide to help you fix screenshots not working on iPhones quickly and easily.
-
 Effortless Methods on How to Convert SVG to JPG Format
 Finding the best way to convert SVG to JPG? This post will give some surefire tutorials you can try. You will also discover the SVG to JPG converter for you.