


3 Best Methods to Crop Screenshots on Mac This 2025
If you are wondering or looking for ways to crop screenshots on Mac easily, fret not! We understand that sometimes, editing screenshot images, such as cropping, takes time, which is not convenient when you want to be efficient with what you’re doing. With that, this article will help you how to modify your screenshot images on Mac effortlessly. Ensuring that you can quickly and efficiently crop your screenshots to perfection. Say goodbye to tedious cropping methods and hello to streamlined workflows with these easy-to-follow ways.

Part 1. How to Take and Crop a Screenshot Directly on Mac With Screen Recorder
Using a screen recorder tool to crop screenshot images on Mac is both easy and convenient for several reasons. Firstly, screen recorder tools often come with intuitive interfaces and simple controls, making the cropping process straightforward even for beginners. Secondly, these tools usually offer a range of editing features, including cropping, resizing, and adding annotations, allowing users to customize their screenshots effortlessly. Additionally, screen recorder tools enable users to capture screenshots directly from their screen recordings, saving time and eliminating the need for separate screenshot tools.
One such tool that Mac users can utilize for cropping screenshot images is the FVC Screen Recorder. This tool makes screenshots resizing a breeze. Users can easily capture any part of their screen and cut down the screenshot to their desired dimensions with just a few clicks. Furthermore, this screen recorder offers additional editing capabilities, such as adding text, arrows, and shapes to enhance the screenshot further.
To use this tool, follow the steps below:
Step 1. Download and install first the Aiseesoft Screen recorder.
Free DownloadFor Windows 7 or laterSecure Download
Free DownloadFor MacOS 10.7 or laterSecure Download
Step 2. After downloading, run the tool and click on the Snapshot button in the right corner. Next, select Screen Capture.
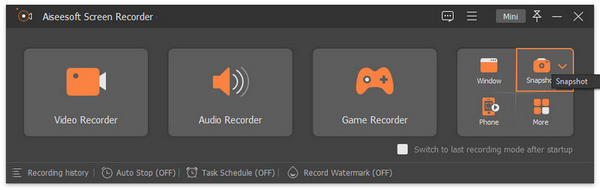
Step 3. Now, drag the cursor to select the area of the screen on your Mac that you want to screenshot.
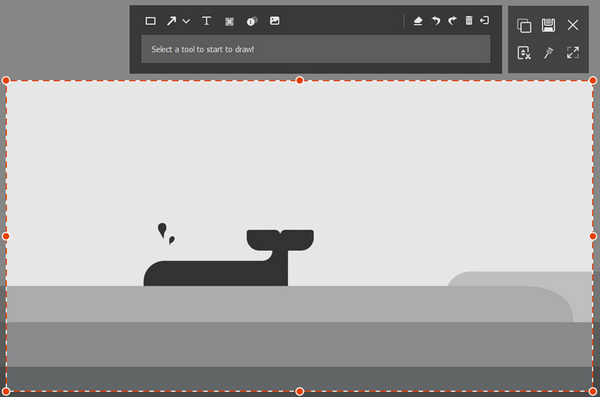
Step 4. Customize the size of your cropping. Also, you can add text, draw, and more.
Step 5. Once done, click the Save button.
Using FVC Screen Recorder can indeed help users easily crop screenshot images on Mac. Aside from this, they can also enjoy a lot of features from this tool.
Part 2. How to Crop a Screenshot on Mac With a Built-in Tool
One other way to crop a screenshot on Mac is by utilizing its built-in tool. To do this, follow the steps below:
Step 1. To capture your Mac screen, simply press Shift + Command + 3 on your keyboard, and a screenshot of the entire screen will be taken.
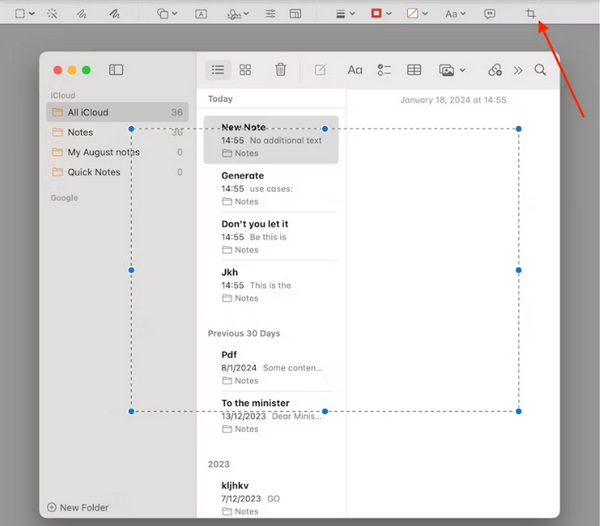
Step 2. Once the picture is saved to your device, navigate to the Photo app to locate the screenshot.
Step 3. Double-click on the screenshot you wish to crop, then click on the Edit button.
Step 4. In the top toolbar, select the Crop option and adjust the selection to crop the Mac screenshot as desired.
Step 5. Finally, click on the Done button to save the cropped Mac screenshot.
Using the built-in tool on your Mac ensures a quick and efficient way to crop screenshots while maintaining the security and compatibility of your system.
Part 3. How to Crop a Screenshot on Mac With Preview
Using Preview for cropping screenshots on Mac is also one of the best things you can do because it's already included in the macOS, making it convenient and compatible with your system. Additionally, Preview is user-friendly and straightforward, making it easy for anyone to crop screenshots quickly. It also offers additional editing tools and supports various image formats, providing versatility and flexibility in editing and saving your cropped screenshots.
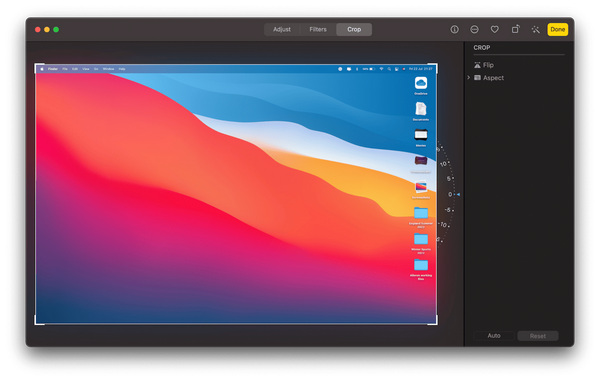
Step 1. Begin by clicking on the screenshot image you wish to view to open it in the Preview tool.
Step 2. In the preview window, click and drag on the image to choose the part or the area you want to retain while excluding any unwanted areas.
Step 3. After selecting the desired portion, access the Tools menu and choose Crop.
Step 4. Ensure to save your cropped image before closing the Preview window to retain your edits.
Using Preview for cropping screenshots on Mac is truly a go-to tool for Mac users due to its accessibility, user-friendliness, versatility, and compatibility with macOS systems.
Part 4. Comparison of the 3 Methods
Let's now take a closer look at the pros and cons of these three methods for cropping screenshots on Mac.
| Method | Pros | Cons |
| Method 1: Cropping a Screenshot Directly on Mac With a Screen Recorder? | • Has an intuitive interface and simple controls to make cropping straightforward. • Offers a range of editing features, including cropping and annotations. | • Requires downloading and installation of additional software. |
| Method 2: Cropping a Screenshot on Mac With Built-in Features | • No need for additional installation of third-party software, as it’s already integrated into macOS. • Quick and efficient for cropping screenshots. | • Limited editing features compared to third-party tools like Aiseesoft Screen Recorder. • It may lack advanced customization options. |
| Method 3: Cropping a Screenshot on Mac With a Preview | • Included in macOS, making it convenient and compatible with the system. • User-friendly interface with additional editing tools and support for various formats. | • Limited to basic editing functions. • It may not offer as many features as dedicated screen recorder tools like Aiseesoft Screen Recorder. |
Each method for cropping screenshots on Mac has its own set of advantages and disadvantages. While using a screen recorder tool offers intuitive controls and advanced editing features, it requires downloading additional software. On the other hand, utilizing the built-in tool is quick and convenient but may lack advanced customization options. Preview, included in macOS, provides basic editing functions with ease of use but may not offer as many features as dedicated screen recorder tools.
Part 5. FAQs about Cropping a Screenshot on Mac
How do you take a screenshot of a specific area on a Mac?
To take a screenshot of a specific area on a Mac, press Shift + Command + 4 on your keyboard. Your cursor will turn into a crosshair. Click and drag to select the area you want to screenshot. Lastly, release the mouse button to take the screenshot.
How do you edit a screenshot on a Macbook?
You can edit a screenshot on a Macbook using the built-in Preview app or third-party editing software. In Preview, open the screenshot and click on the Edit button to access editing tools like cropping, annotating, and resizing. Alternatively, you can use third-party editing software like Aiseesoft Screen Recorder for more advanced editing features.
Can I add annotations to a screenshot on a Mac?
Yes, you can add annotations to a screenshot on a Mac using various tools. In Preview, you can use the Markup toolbar to add text, shapes, arrows, and highlights to your screenshot. Additionally, third-party screen recorder tools like Aiseesoft Screen Recorder often come with annotation features for further customization of your screenshots.
Conclusion
In conclusion, learning how to crop screenshots on a Mac doesn't have to be a daunting task. With the three methods outlined in this guide, you have options that cater to different preferences and needs. Whether you choose to use a screen recorder tool like Aiseesoft Screen Recorder for advanced editing features, the built-in tool for quick and convenient cropping, or Preview for its simplicity and accessibility, you can easily achieve the desired results. By following the step-by-step instructions provided and understanding each pros and cons based on the method, you can efficiently crop your screenshots to perfection. Say goodbye to tedious cropping methods and hello to streamlined workflows with these easy-to-follow ways. Experiment with the different methods to find the one that best suits your workflow, and start cropping your screenshots effortlessly on your Mac today.
-
 How to Screenshot in Windows Media Player Efficiently
 Discover the simplest methods to capture screenshots in Windows Media Player effortlessly. Elevate your screen capture experience with our comprehensive guide.
-
 How to Screenshots on Samsung S23 on the Palm of Your Hand
 All the things you need to know on how to take screenshots on Samsung S23, maximizing flagship device features for a seamless screen capture experience.
-
 How to Screenshot on Toshiba Laptop Effortlessly for Free
 Discover the three simple ways to take a screenshot on a Toshiba laptop and capture all your favorite content on your Toshiba Laptop for free.