ShareX Screen Recorder Review and Its Best Alternative
ShareX screen recorder is an open-source screen recording tool which allows you to record videos and take screenshots on computer free. While due to the unfriendly user interface, many users still don’t know how to record screen with ShareX. Or they may get some recording problems while or after the recording.

This post gives you a detailed review of ShareX screen recorder. You can get its all main features and learn how to capture your computer screen with ShareX. In addition, we like to introduce you with a great screen recording alternative to ShareX screen recorder.
Part 1. ShareX Screen Recorder Review
ShareX screen recorder is a free and open source screencasting program that allows you to capture any activities on your PC. It is compatible with Windows 10, Windows 8.1 and Windows 7. You can’t use it on a Mac. ShareX is a lightweight screen captures and its setup exe file only takes 4-7 MB.
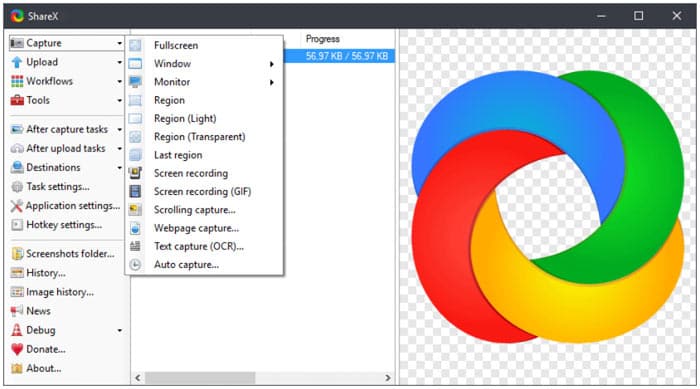
ShareX screen recorder enables you to capture computer screen with full screen, desktop monitor, active window or selected region. It is equipped with an Automated Capture feature for better screen recording. ShareX is able to save your captured video in MP4 or GIF format according to your need.
With the over 9 years of active development, ShareX is designed with more and more functions. It carries many customize after-capture features for you to custom your screen recording files. What’s more, it provides you with a convenient way to upload and share captured content. ShareX screen recorder allows you to upload recorded video, images, text or other types of files to over 80 supported destinations including YouTube, Twitter, Facebook, Google Drive, Tumblr and more.
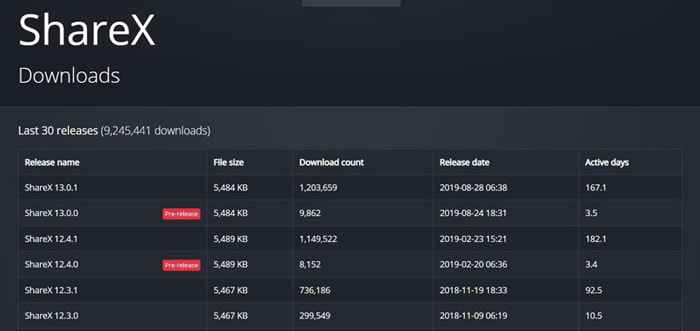
As a free screen recorder, ShareX doesn’t place any file size or time limits. More importantly, it won’t add any watermark to your recording file. You can go to the official site for the free ShareX downloading. Many new released ShareX screen recorder versions are listed there. You can simply click the Download button to free install it on your computer.
Part 2. How to Record Screen with ShareX
Because ShareX screen recorder carries many feature and its unfriendly user interface, you may feel complex to capture computer screen with it. Considering that, this part will show you how to record screen with ShareX in details.
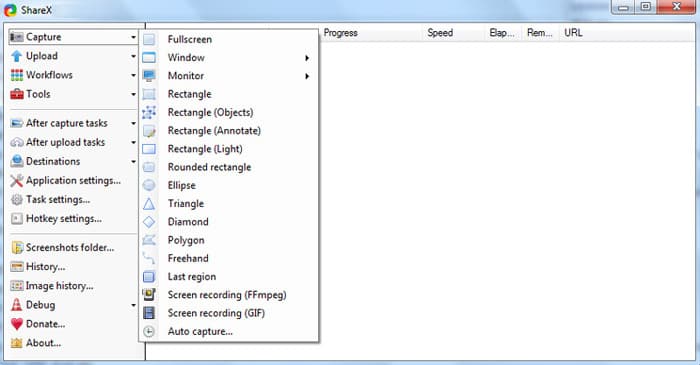
Step 1. Free download, install and open ShareX screen recorder on your computer. Many key features like Capture, Upload, Workflows, Tools and more are listed on the left panel.
Step 2. When you move your mouse on the Capture feature, you can choose the screen recording area from Full screen, Window, Monitor and more. You can pick one based on your need.
Step 3. Click Task settings on the left and then click Capture tab on the right window. During this step, you need to click Screen recorder and then ensure the Output is FFmpeg. FFmpeg enables you to capture both screen and audio at the same time and compress it in real time.
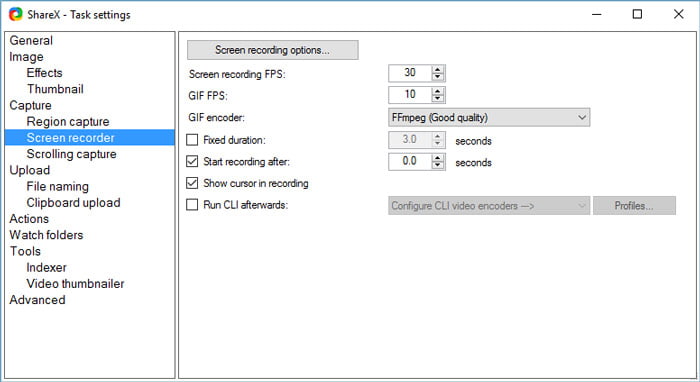
Step 4. Now you can adjust the video and audio recording sources. Also, you need to select the video codec, audio codec and extension format. After all these operations, you can click
Step 5. After all these settings, you can start recording screen with ShareX. Click Capture on the left and choose Screen recording (FFmpeg) from the drop-down list. After you select the recording region, ShareX will automatically start the recording process.
In this way, you can record videos from Vimeo, Facebook, and more.
Part 3. Best Screen Recorder Alternative to ShareX
ShareX is no doubt an all-featured and powerful screen recording tool. But we have to admit that, it’s too complicated for new users to make the recording. If you are looking for an easy-to-use screen capture, you can give the popular Free Screen Recorder a try. This ShareX alternative has the capability to capture high-quality video and audio files on both Windows PC and Mac.

You can navigate to the Free Screen Recorder site and click the Start Recording button to install a small file size launcher. Then a pop-up recording window will appear on the screen for your screen and audio recording. You can freely adjust the recording area and choose the audio source from microphone or speaker.

After that, you can simply click on the REC button to start the video and audio recording process. You are offered some basic editing features to edit your recording file.
Part 4. FAQs of ShareX Screen Recorder
Question 1. Does ShareX have a time limit?
ShareX is an open source screen recorder with no time limits, no ads, and no watermark.
Question 2. Does ShareX automatically upload?
You can set the auto upload from the After upload tasks option in the left sidebar.
Question 3. How to uninstall ShareX screen recorder?
Right click on ShareX icon and choose Open file location. Locate the uninstall process named Uninstall or Uninstaller. Double click on it to start uninstalling ShareX.
Conclusion
ShareX is a good option to capture video and audio on Windows PC. You can get a detailed ShareX screen recorder review from this post. Moreover, a great ShareX alternative is recommended for you.


 Video Converter Ultimate
 Screen Recorder