


Photoshop で画像をすばやくシャープにする方法 - 知っておくべき完全なガイド
最高レベルの画像編集ができるエキスパート向け画像エディターを使えば、手元にあるあらゆる画像をワンランク上に仕上げることができます。Adobe Photoshop は、Windows、Mac、iOS、Android にダウンロードできる、最も長く信頼されてきたソフトウェアです。開発元である Adobe によって、編集機能はすでに最大限まで導入・革新されてきました。その高度な機能ゆえに、新しいユーザーは UI や全体的な操作性に尻込みしてしまうこともあります。難しそうに見えるかもしれませんが、特に画像のシャープ化に関しては決してそうではありません。ここでは、Photoshop で画像を素早くシャープにする方法について、完全なチュートリアルを紹介します。

パート1. Photoshopで画像をシャープにする方法に関する完全なチュートリアル[3つの効果的なシャープの方法]
Photoshop の画像をシャープにすることは、このプログラムを使用したことがない人を圧倒する可能性があります。ただし、チュートリアルに進む前に、Adobe の公式ソフトウェアをダウンロードする必要があります。デスクトップにダウンロードするには、正しいダウンロード ボタンを選択してください。このプログラムをデスクトップにダウンロードしていない場合は、無料試用版を使用できますが、試用版を終了した場合は、月額または年額プランを購入する必要があります。次のすべての後、以下に含まれる選択した方法の手順に進みます。
第一の道。ハイパスを使用して Photoshop で画像をシャープにする方法:
ハイパスを使用すると、画像を強調表示し、Photoshop にアップロードする写真のエッジをシャープにするのに役立つフィルターを画像に適用できます。以下に追加するチュートリアルに従って、所有している画像にハイパスを適用して使用する方法を学習できます。
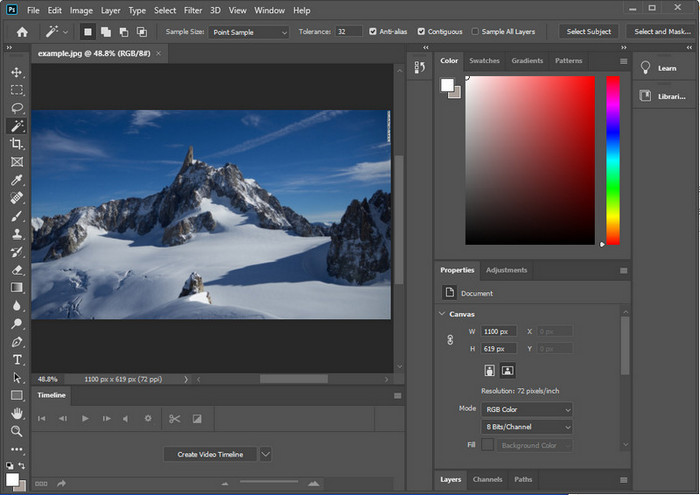
ステップ1 ソフトを起動し、ファイル(File)をクリックしてから開く(Open)を押し、画像を読み込んでシャープ化を開始します。
ステップ2 Photoshop に読み込んだ画像のレイヤーを複製します。
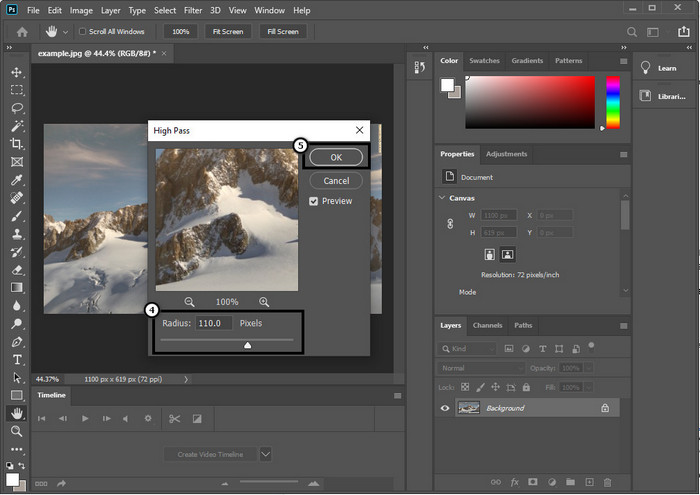
ステップ3 画面上部のメニューからフィルター(Filter)をクリックし、その他(Other)>ハイパス(High Pass)を選びます。ハイパスを適用すると画像がグレーに見えても心配はいりません。そうなるのが正しい動作です。

ステップ4 ポップアップウィンドウが表示されるので、そこでスライダー(slider)をドラッグして半径(Radius)を上げ、画像のディテールがしっかり出るように調整します。終わったらOKを押して反映します。
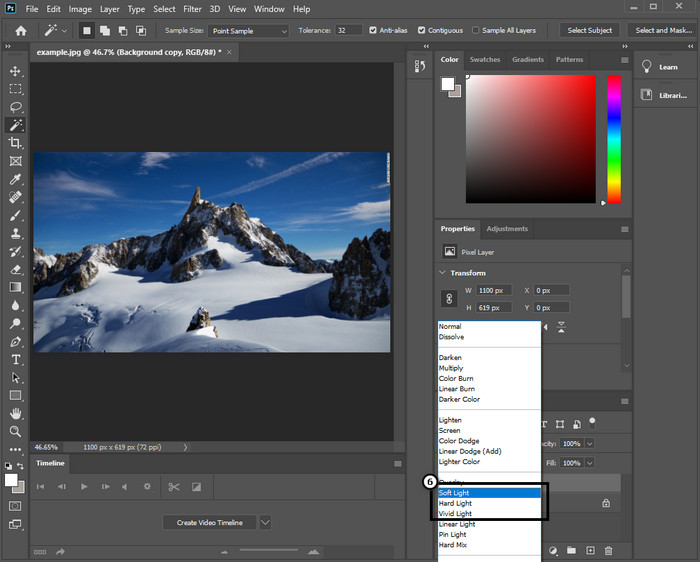
ステップ5 レイヤーパネルに戻り、描画モードのドロップダウンをクリックして、適用したい光の種類を選びます。ソフトライト、ハードライト、ビビッドライトなどから選んでシャープ効果を調整します。画像をさらにシャープにしたい場合は、ステップ3からこのステップまでを繰り返します。
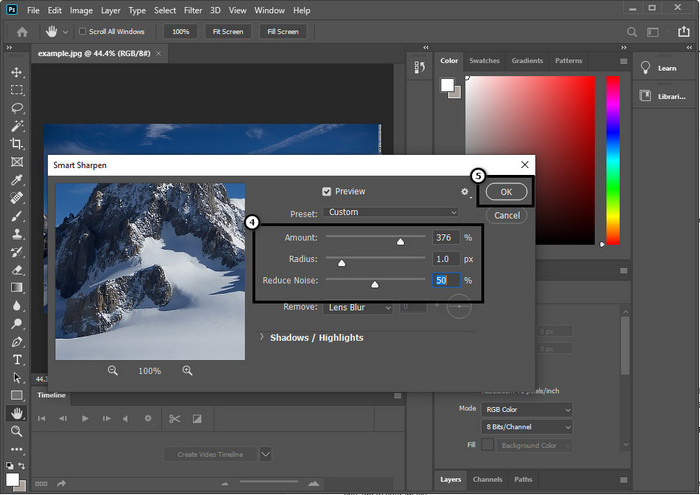
セカンドウェイ。 Smart Sharper を使用して Photoshop で画像をシャープにする方法:
「スマートシャープ」は、Adobe Photoshop で画像内のあらゆる部分をシャープにできる効果的な機能です。この機能は自動でワンクリック完了というわけではなく、くっきり見せるためにはいくつかのパラメーターを調整する必要があります。Adobe のこの機能を使いたい場合は、以下の手順に従ってください。
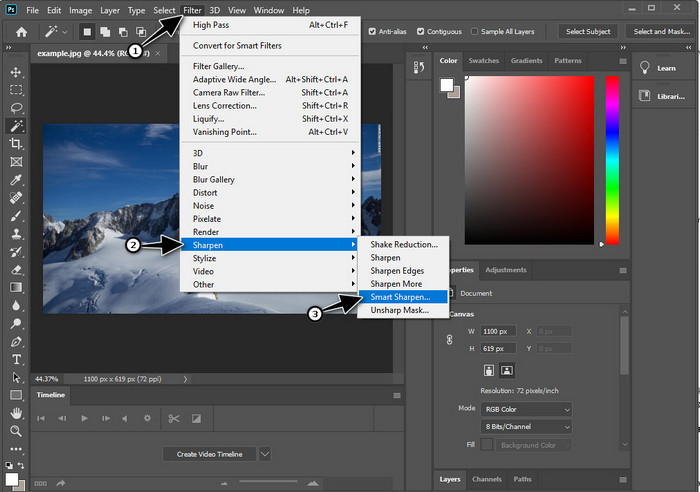
ステップ1 シャープにしたい画像を追加したら、フィルター(Filter)メニューをクリックします。
ステップ2 表示されたオプションの中からシャープ(Sharpen)を選び、続けてスマートシャープ(Smart Sharpen)をクリックします。
ステップ3 お好みに合わせて「量(Amount)」と「半径(Radius)」の数値を調整し、OKを押して変更を保存します。これだけで、このソフトのシャープツールを使って写真をシャープに仕上げることができます。
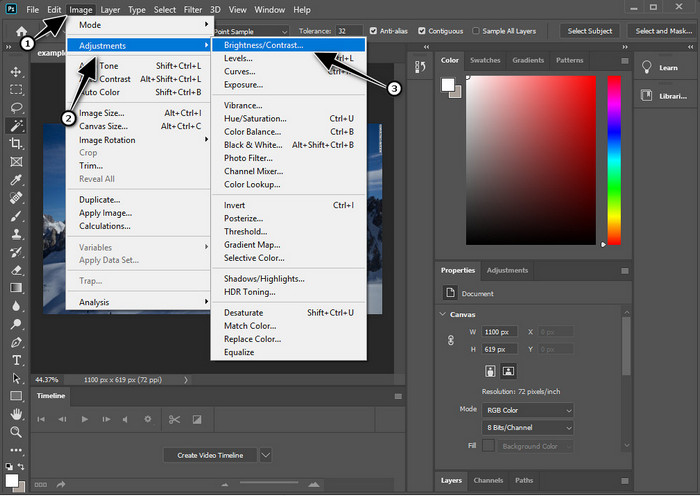
第三の道。明るさとコントラストを調整して写真の画像を鮮明にする方法:
紹介した 2 つの方法とは異なり、明るさとコントラストは、シャープ ツールが行うように、アップロードした画像を強調してより詳細に見せることに重点を置いています。このオプションを知っているユーザーはほとんどいないため、このオプションを使用して画像のシャープ化を開始するには、次の手順に従ってください。
ステップ1 Photoshop に画像をアップロードしたら、イメージ(Image)メニューをクリックして進みます。
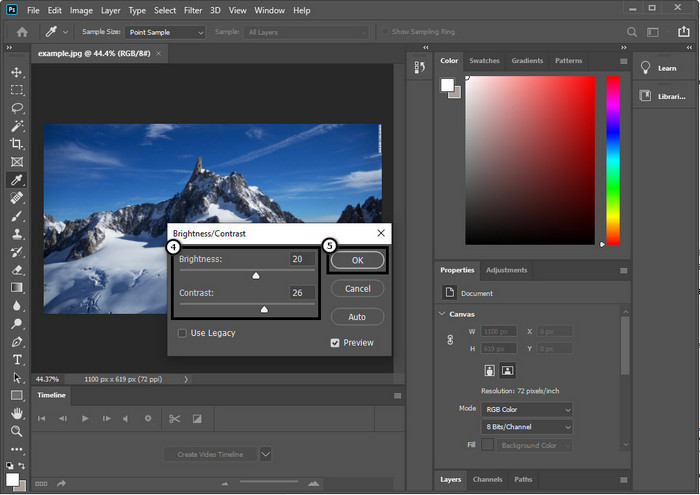
ステップ2 いくつかのオプションが表示されるので、色調補正(Adjustment)を選び、続いて明るさ・コントラスト(Brightness and Contrast)をクリックします。
ステップ3 スライダーをドラッグして明るさとコントラストを調整し、OKを押して画像に加えた変更を保存します。
関連記事:
Photoshopで動画にウォーターマークを素早く追加するシンプルガイド
パート 2. オンラインで画像をシャープにするための Photoshop に代わる最良の方法 [無料サービス]
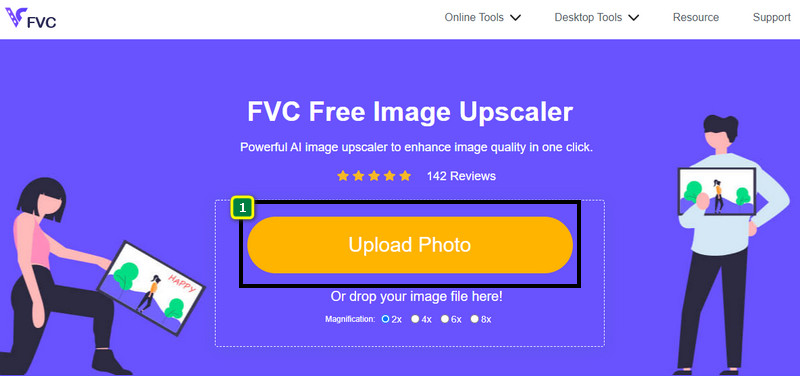
アプリを使わずに Photoshop でぼやけた画像をシャープにするにはどうすればよいでしょうか。そんなときは、FVC Free Image Upscaler を使うことができます。このオンラインツールを使えば、ここで説明したような複雑な操作をせずに済みます。画像をアップロードすれば、あとはこのソフトに搭載された AI 技術が自動的に処理してくれます。また、ソフトウェアのライセンスキーや有料版を購入する必要もなく、今すぐ写真を編集したいすべてのユーザーが無料で利用できます。編集のプロでなくても、下記の手順に従えば画像をシャープにすることが可能です。
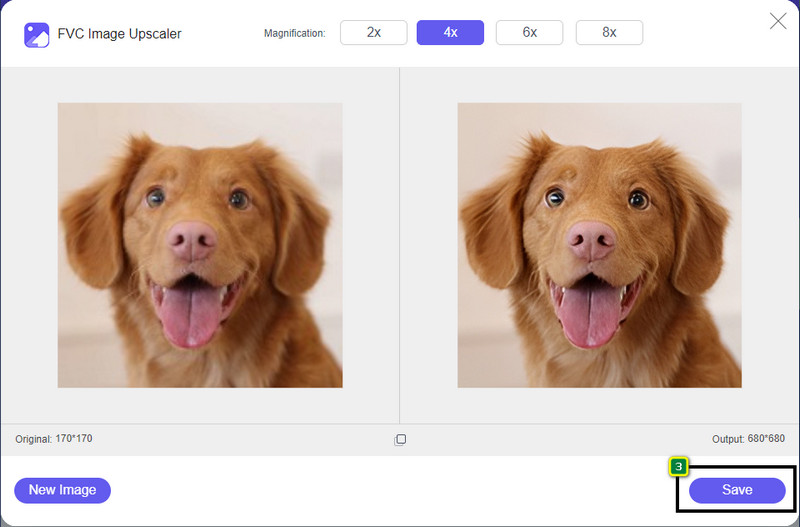
ステップ1 このリンクをクリックしてウェブツールを開き、写真をシャープにします。
ステップ2 サイト上で画像をアップロード(Upload Image)をクリックし、シャープにしたい写真を読み込みます。フォルダウィンドウが表示されるので、画像を選択してから開く(Open)をクリックし、アップロードします。
ステップ3 AI 技術のサポートにより、画像を簡単にシャープにできるように、さまざまな拡大倍率のオプションが用意されています。
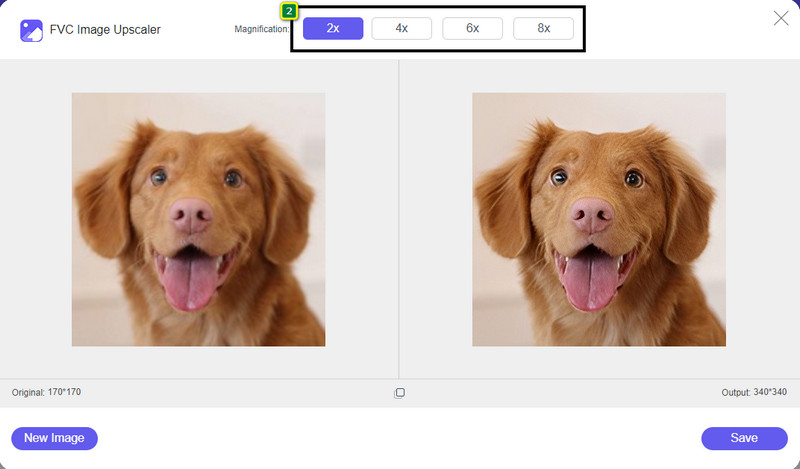
ステップ4 画面下部の保存(Save)ボタンをクリックして、シャープになった画像をローカルドライブにダウンロードします。
パート 3. Photoshop で画像をシャープにする方法に関する FAQ
Photoshop の無料トライアルが終了したらどうすればよいですか?
Adobe が開発したこのプロフェッショナルな画像編集ソフトを継続して使いたい場合は、プランを購入して利用を続ける必要があります。しかし、Photoshop と同様の編集機能を体験したいのであれば、FVC Free Image Upscaler の利用を始めてみてください。
Photoshop で何ができますか?
ここでは、他のエディターでは提供されていない多数の画像およびビデオ編集を行うことができます。これは、2D 画像を 3D に変換するなど、素晴らしいものを作成するために必要な完全な画像エディターです。ただし、このソフトウェアは少し複雑であり、全体的な使用方法を習得するのに時間がかかる必要があります.
Photoshop はどこからダウンロードできますか?
Adobe Photoshop は、64 ビット以降の Windows 10 および Mac 10.15 Catalina 以降をサポートしています。また、モバイル版の Photoshop Express Photo Editor にも対応しています。
結論
本記事で紹介したPhotoshop で画像をシャープにする方法を活用すれば、最高のエディターを使ってさまざまなやり方で簡単に画像をシャープにできます。では、無料体験が終了したあとも画像をシャープにしたい場合はどうすればよいでしょうか。そのようなときも心配はいりません。インターネット環境さえあれば、より手軽かつ無料で画像をシャープにできるオンライン代替ツールとして、FVC Free Image Upscaler を紹介しました。
-
 市場で見つけられる最良の方法で Photo HD を作成
 写真を HD にしようと思っていますか?以下に追加するチュートリアルに従って、使用できるさまざまなソリューションを使用できます。
-
 オンラインとオフラインで使用できる上位 4 つの画質低減ツール
 これらの画質低減ツールは、何らかの理由で画像の品質を下げるのに役立ちます。必要な場合は、この記事をお読みください。
-
 ハンズオン チュートリアルで画像を 4k にアップスケールする公式の方法
 画像を 4k にアップスケールするには、デバイスにソフトウェアが必要です。お持ちでない場合は、ここに含まれているツールを選択する必要があります。