


写真の圧縮率: 画像を効率的に圧縮する
画像圧縮に関しては、圧縮率の概念を理解することが重要です。これは一般的な用語かもしれませんが、常に誤解され、別の文脈では異なる意味に解釈されます。たとえば、ユーザーは、圧縮された画像の出力品質は常に同じで、低い圧縮率を使用するとサイズが大幅に減少すると想定しています。実際には、圧縮率と使用される圧縮の種類によって異なります。
写真の圧縮率と効果的な圧縮方法を包括的に理解するには、この記事を読み、写真の圧縮率が何を意味するのか、その内容にじっくりと目を通すとともに、それを変更する方法についても学びましょう。しっかりと準備を整え、画像を効率的に圧縮する方法を身につけてください。

パート1.写真圧縮率とは何か
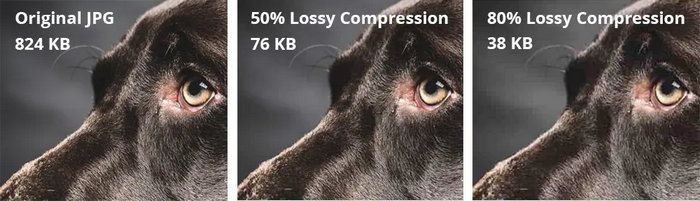
写真の圧縮率とは、圧縮されていない写真のバイト数と圧縮されたときのバイト数の比率です。簡単に説明すると、写真ファイルが元のサイズと比べてどれだけ小さくなるかということです。つまり、写真の圧縮率が高い場合、写真のサイズを小さくできるため、写真がぼやけたり、ピクセル化されたりする可能性があるということです。一方、写真の圧縮率が低い場合、圧縮された写真のサイズはわずかに小さくなります。これをよりよく理解するために、非可逆圧縮と可逆圧縮を比較してみましょう。
非可逆圧縮(Lossy Compression)
これは、写真のサイズと品質を大幅に削減できる画像圧縮の一種です。つまり、写真の圧縮率が高いということです。たとえば、写真の元のサイズが 10 MB で、500 KB に圧縮された場合、写真の圧縮率は 20:1 になります。
長所:
・ファイルサイズを大幅に削減できる。
・Web 用途に最適。
短所:
・特に高い圧縮率にすると画質が低下する。
・元データを正確に再現する必要がある画像には不向き。
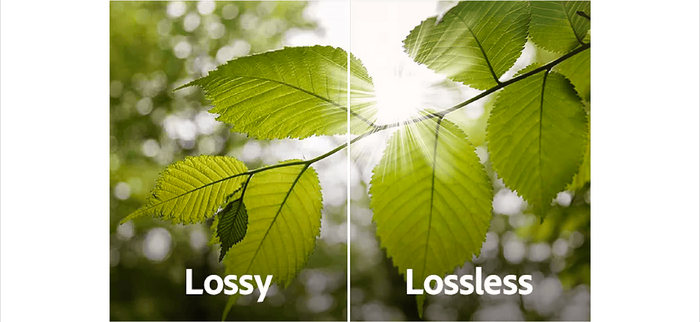
可逆圧縮(Lossless Compression)
非可逆圧縮と比較すると、このタイプの圧縮では情報の損失がなく、画像の品質は元の画像とまったく同じままです。
長所:
・画質の劣化がほとんどない。
・高い忠実度が求められる画像に適している。
短所:
• ファイルサイズの縮小が少なくなります。
パート2.写真の圧縮率を変更する方法
画像の圧縮率を調整すると、画質とファイル サイズのバランスが適切に保たれ、見栄えがよく、スペースも少なくて済みます。これを実現するには、Photoshop を使用します。このツールを使用すると、写真の圧縮率の調整など、さまざまな画像編集タスクを実行できます。この機能を使用すると、特定の要件に合わせて画質を微調整できます。Photoshop を使用して写真の圧縮率を変更する方法は次のとおりです。
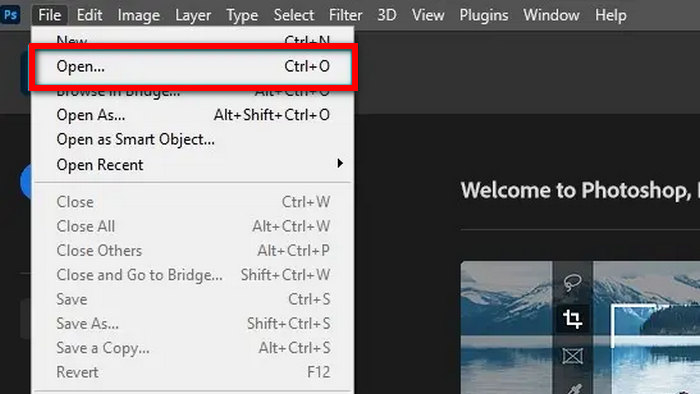
ステップ 1.まず、ファイルタブに移動して開くオプションをクリックし、圧縮率を変更したい画像ファイルをインポートします。
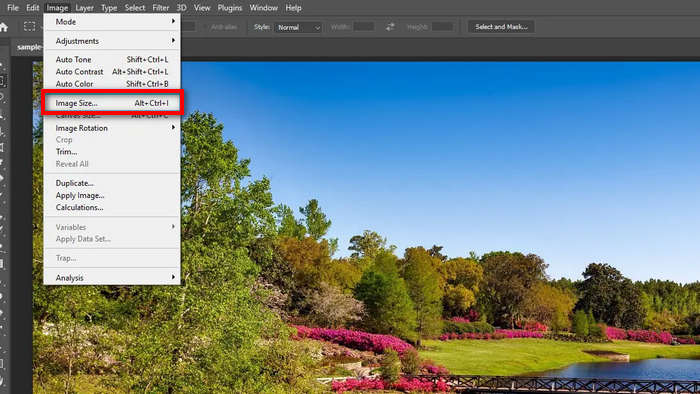
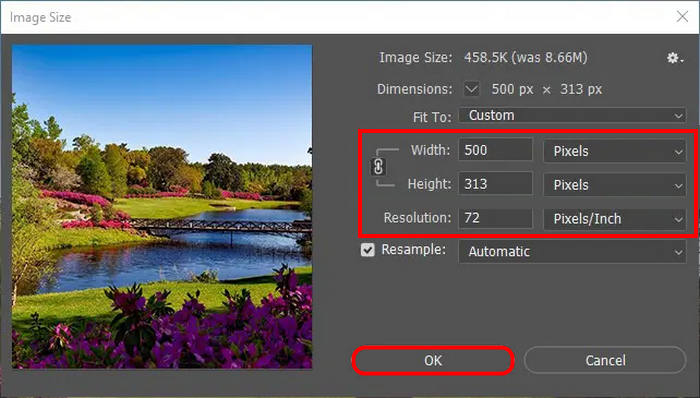
ステップ 2.Photoshop に写真をインポートしたら、イメージタブに移動して画像解像度(Image Size)をクリックします。
ステップ 3.画像ダイアログボックスで、希望する解像度を設定します。その後、目的の高さと幅の値を設定します。これはピクセル単位であることに注意してください。設定が完了したら、OKボタンをクリックします。
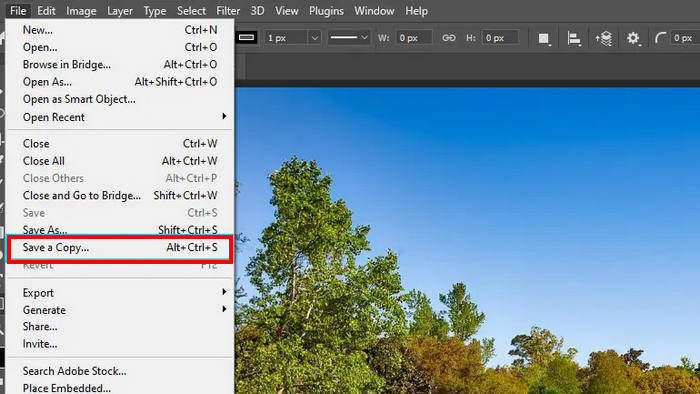
ステップ 4.ファイルを保存するには、ファイルタブに移動し、メニューからコピーを保存を選択します。
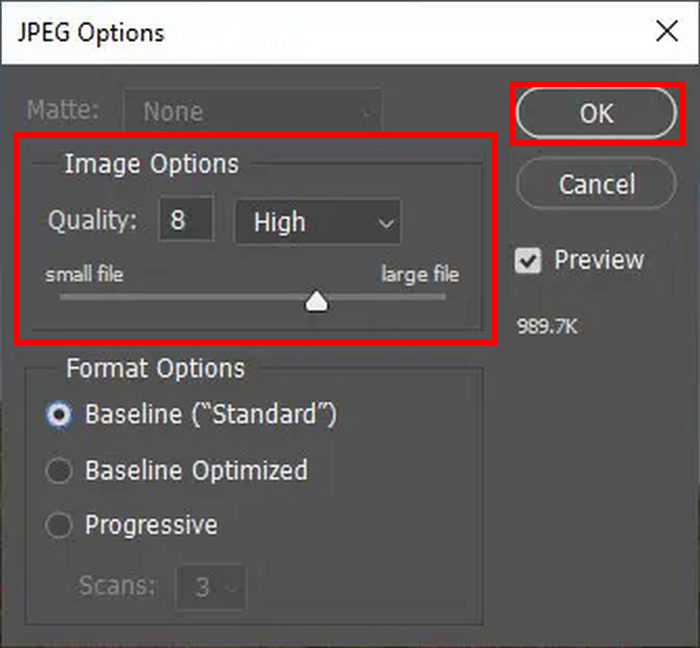
ステップ 5.保存ボタンをクリックすると、JPEG オプションボックスが表示されます。ここで、「画像オプション」セクションのスライダーを動かすことで、画像の画質を簡単に調整できます。設定が終わったら、OKをクリックして保存します。
この方法を使えば、写真の圧縮率を簡単に変更できます。ただし、これは一部の人にとっては少し複雑であり、新しいユーザーは完全な機能を利用するためにサブスクリプションを利用する必要があります。
パート3. ボーナス: 品質を落とさずに画像を圧縮する
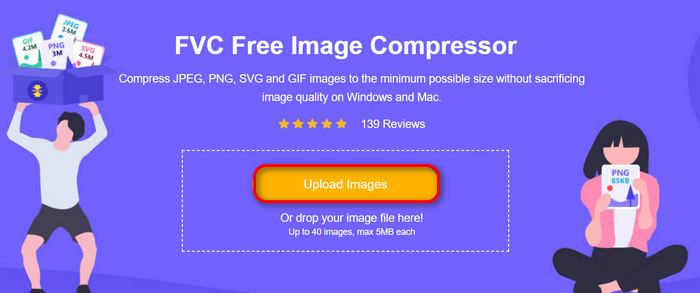
FVC Free Image Compressorは、画質に目立った劣化を生じさせずに画像サイズを削減できる、無料のオンライン画像圧縮ツールです。他の圧縮ツールと比較しても最適化と圧縮アルゴリズムに優れており、圧縮後の写真でも最高品質の解像度を確保できます。
FVC Free Image Compressorを使用して写真を圧縮する方法は次のとおりです。
ステップ 1.まず、FVC Free Image Compressor の公式サイトにアクセスします。
ステップ 2.次に、Upload Imagesをクリックして、圧縮したい写真をインポートします。このツールは、写真を自動的に圧縮してくれます。
手順3. 圧縮処理が完了するまで待ちます。完了すると、進行状況バーに「完了」と表示され、圧縮前と圧縮後のファイルサイズ情報が確認できます。その後、Download All をクリックして画像を保存します。
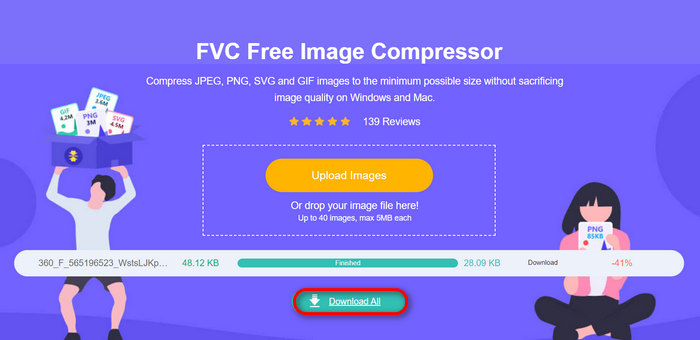
写真を簡単に圧縮したい場合は、FVC の無料画像圧縮ツールを使用するのが最適な方法です。 1 回のクリックで圧縮でき、写真のサイズと品質が適切に圧縮されることが保証されます。
パート4. 写真の圧縮率に関するよくある質問
写真を 20:1 の比率に圧縮するにはどうすればよいでしょうか?
写真を 20:1 の比率に圧縮するには、Photoshop などの画像編集ツールやオンライン コンプレッサーを使用できます。Photoshop では、目的の圧縮率が得られるまで、画像品質設定と解像度を調整します。また、圧縮またはダイなどのターゲット ファイル サイズや圧縮レベルを指定するオプションを提供するオンライン ツールもよくあります。ただし、利便性に関しては、FVC Free Image Compressor ツールも写真を 20:1 の比率で圧縮するのに最適なツールです。
写真の圧縮率を調べるにはどうすればいいですか?
写真の圧縮率を求めるには、元のファイル サイズを圧縮後のファイル サイズで割ります。たとえば、元の写真が 10 MB で、圧縮後の画像が 0.5 MB の場合、圧縮率は 10 MB / 0.5 MB = 20:1 になります。
JPG ファイルの圧縮率はどれくらいですか?
JPG ファイルの写真圧縮率は、圧縮時に使用される品質設定によって異なります。圧縮率が高いとファイル サイズは小さくなりますが、画質は低下します。一方、圧縮率が低いと、ファイル サイズは大きくなりますが、画質は向上します。Web での使用における一般的な JPG 圧縮率は 10:1 ~ 20:1 です。
写真を圧縮できる量に制限はありますか?
はい、画質が大幅に低下する前に写真を圧縮できる量には実際的な限界があります。圧縮率を高くすると、複雑なディテールやグラデーションのある画像では特に、ピクセル化やぼやけなどの目に見えるアーティファクトが発生することがよくあります。
結論
写真の圧縮率を理解し調整できるようになることは、画質とファイルサイズのバランスを最適化するうえで不可欠です。Adobe Photoshop は画像品質を細かくコントロールできる強力な手段を提供します。より簡単な方法を求める場合は、FVC Free Image Compressor のようなツールを利用することで、効率よく画像を最適化できます。
今すぐ画像の最適化をコントロールしましょう。高度な編集には Adobe Photoshop をお試しください。また、すばやく簡単に圧縮するには FVC Free Image Compressor を使用してください。
-
 画像を 20KB にリサイズする 3 つの方法: シームレス圧縮
 画像ファイルのサイズを 20 KB にするにはどうしたらよいかとお悩みですか? この記事では、画像をすばやくシームレスに 20 KB にサイズ変更する 3 つの方法を紹介します。
-
 過度に圧縮された写真:簡単に修正する方法
 画像が過度に圧縮された場合の対処法を知りたいですか? この記事を読んで、この問題が発生する理由と、問題を解決する 2 つの方法を学びましょう。
-
 Windows と Mac で JPEG を圧縮する方法 [究極ガイド]
 Windows および Mac デバイスで JPEG ファイルを圧縮する効率的なツールをお探しですか? 今すぐこの記事を読んで、シームレスな圧縮を実現する 5 つの方法を学んでください。