4 Easy Methods on How to Sharpen Images Online and Offline
Ever had an image that looks dull and unlively? Maybe your photo lacks sharpness and crispness. But did you know? There are many image sharpener applications that you can find on the internet. You do not need expensive desktop solutions to sharpen your image. You will find many applications that can help you sharpen your image by searching on the internet. But you do not need to search anymore because we list the best image sharpening tools and teach you how to use them. Finish this article to learn how to sharpen images online or offline.

Part 1. 4 Best Ways on How to Sharpen Image
Despite that, there are many applications to sharpen an image; it is recommended that you use the safe and most straightforward tool. That’s why we searched for the best image sharpeners and listed them just for you. Moreover, we will demonstrate to you how to use these image sharpener tools.
FVC Free Image Upscaler
FVC Free Image Upscaler is the best tool for sharpening an image. If you are searching for an AI sharpen image tool, then FVC Free Image Upscaler is the tool you are looking for. Additionally, it supports various image formats, like PNG, JPG, JPEG, and BMP. And using its AI (Artificial Intelligence) technology, you can enhance your image for up to 2x, 4x, 6x, and 8x magnification. What’s even fantastic about this online tool is that you can access it on all web browsers, including Google, Firefox, and Safari.
Furthermore, many beginners prefer using this tool because it has a straightforward user interface. Also, although it is an online application, it has a fast sharpening process, making it convenient to use. You can also preview your output image before downloading it to your device. So, if you want to use this tool to sharpen your image, follow the easy instructions below.
How to sharpen an image using FVC Free Image Upscaler:
Step 1. Open your browser, and search for FVC Free Image Upscaler on your search box. You can also click the link directly to their main page.
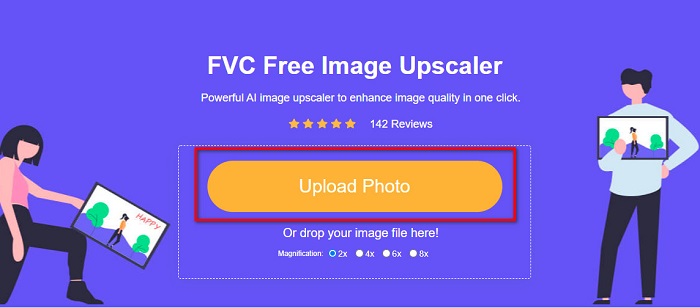
Step 2. Then, click the Upload Photo button on the main user interface to import the image you want to sharpen.
Step 3. Next, choose the magnification preset that you want for your image. You can select between 2x, 4x, 6x, and 8x magnification. And then, you will see the preview of your output.
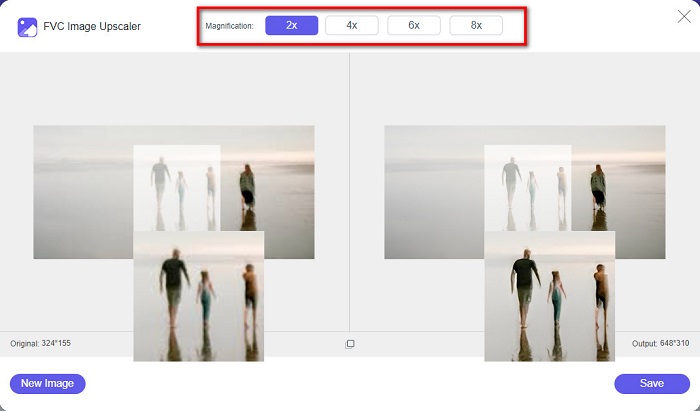
Step 4. Lastly, to save your image output, click the Save button. Then, the application will automatically and quickly save your image on your computer folders.
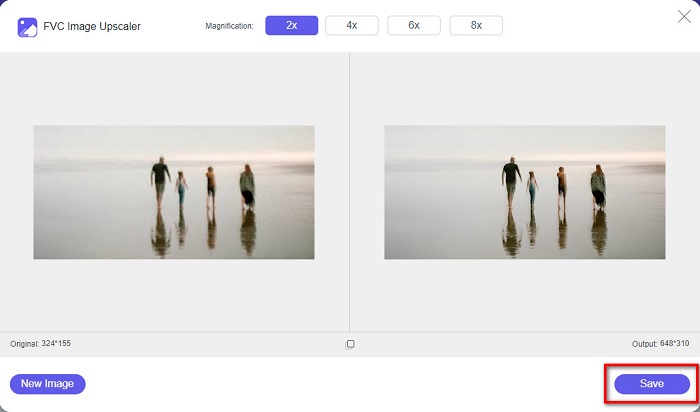
And that’s it! As simple as that, you can easily enhance the blur part of your image and add sharpness to it.
vanceai.com
vanceai.com is an online image sharpener that you can use if you want to sharpen your image or add crisps to it. Indeed when you add sharpness to your image, it will look better. That’s why if you want to sharpen your image quickly, vanceai.com is the tool to use. In addition, you can use it for free on almost all web browsers, such as Google and Safari. Also, it automatically enhances the blur parts of your image in just a few clicks. With its easy-to-use interface, beginners can surely use this application. What’s more is that it supports the most common image formats, like JPG, JPEG, and PNG. However, when you sharpen your image using vanceai.com it will leave a watermark on your image.
How to sharpen a blurry image using vanceai.com:
Step 1. On your browser, search vanceai.com, then go to their main page. Then on the main user interface, click the Upload Image button to upload the image you want to sharpen.
Step 2. After uploading your image, click the Start to Process button at the lower right corner of the interface.
Step 3. Finally, you will see the preview output of your image. Then, click the Download Image button to download your sharpened image.
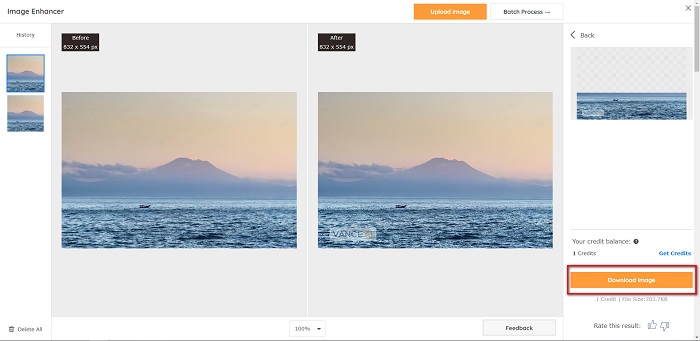
Pinetools.com
Pinetools.com is another online sharpening app that you can easily use. With its simple user interface, beginners can also use this tool to fix picture quality. You can adjust your image's strength or sharpness using its slider option. Moreover, you can select the size of the convulsion mask of your image between 3x3 and 5x5. What’s even great about this online application is that you can access it on almost all web browsers, including Google and Safari. The drawback of Pinetools.com is that it contains many ads that might distract you while you sharpen your image. Nonetheless, many beginners use this tool because it is convenient to use.
How to sharpen a blurry image using Pinetools.com
Step 1. First, search Pinetools.com on your browser, and click the page that leads to its website. Then, click the Choose Files button on the first interface to upload the photo you want to sharpen.

Step 2. And then, on the Sharpen panel, move the mini box to the strength or sharpness you prefer for your image.

Step 3. Then, click the Sharpen button below the interface to sharpen your image. If you want to save your output image, click the image format you wish for, and it will be saved on your device.
GIMP
Unlike the sharpen image app presented above, GIMP is an offline tool you can use if you want to sharpen your image or enhance its quality. Furthermore, many professionals use this tool to sharpen images and improve them. Many people recognize this tool as an alternative to Adobe Photoshop. It supports almost all image formats, like PNG, JPG, JPEG, WebP, and BMP. In addition, it has many editing features that you can use, including photo retouching, changing compositions, and more. But the downside of this app is that it has a hard-to-use interface, making it difficult for beginners to use it.
Nevertheless, if you are a pro in many photo editing applications, you will surely find GIMP a great tool to sharpen an image.
How to sharpen an image in GIMP:
Step 1. Download the GIMP image sharpener on your device. And on the software’s main interface, import your image by clicking File > Open.
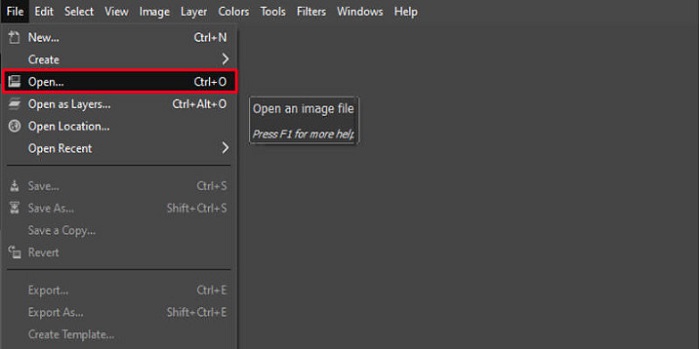
Step 2. Then, create a duplicate layer by clicking the Layer > Duplicate button. You can also use the shortcut keys to duplicate layers. Click the Shift + Ctrl + D then the layer will be duplicated.
Step 3. Next, we will reduce noise by going to Filter > Enhance > Noise Reduction. Then, we will use the High Pass option to apply the sharpness we want. Go to Filters > Enhance > then select the High Pass option.
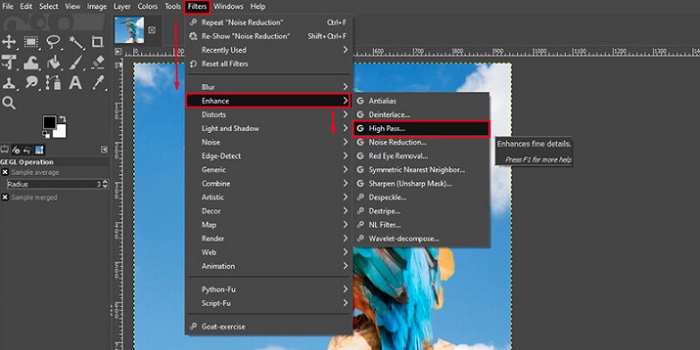
Step 4. And then, we will use the Vivid Light option to lighten our image and add details. Go to Option in the mode section and turn the Normal to Vivid Light.
Step 5. Create a duplicate layer once again for the final touches, then go to Filters > Enhance > Sharpen (Unsharp Mask). And then, you can adjust your image's Radius, Amount, and Threshold. Then, press Ctrl + S on your keyboard to save your output.
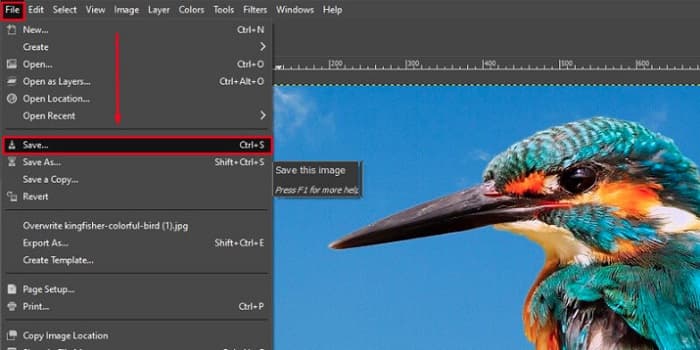
And that’s it! If you are one of the people who search for how to sharpen images with GIMP, then this is the guide for you. Just follow these steps to increase your image quality using GIMP.
Part 2. FAQs about How to Sharpen Blurry Image
Is there an application to fix pixelated pictures?
Yes. You can use apps to adjust the pixel of your image. One of the best tools to fix pixelated pictures is PIXLR. It is also good to unblur your image.
Is GIMP free?
GIMP is an image editing app available on Windows, Mac, and Linux. It is a free-to-use app, in which you can change its source code. However, you must purchase the app to access its other editing features.
Can I sharpen an image using Canva?
Fortunately, Canva has a feature where you can add sharpness to your image. So, Canva might be a suitable tool for you if you have a blurry image.
Conclusion
We expect we have answered your questions about how to sharpen images online. The bonus part is you can also sharpen images offline using the GIMP app. But if you want to use an application that is easy to use and you can use for free, then use FVC Free Image Upscaler.


 Video Converter Ultimate
 Screen Recorder
