


Comment atténuer l'audio dans Premiere Pro de manière professionnelle [2024]
Un synchronisation audio parfaite est essentielle pour une vidéo. C’est toujours exaltant lorsque le son apparaît et disparaît au bon moment dans la vidéo. C’est pourquoi de nombreux utilisateurs, des monteurs professionnels aux passionnés, travaillent avec minutie pour s’assurer que leur bande-son s’adapte parfaitement au timing de chaque scène. Dans ce guide, nous allons vous montrer comment faire un fondu audio dans Premiere Pro, afin de vous aider à créer des vidéos de qualité professionnelle avec un son irréprochable. Commençons.

Partie 1 : Quels sont les effets de fondu entrant et de fondu sortant dans Premiere Pro
Premiere Pro propose plusieurs effets de fondu entrant et sortant. Il est donc essentiel de comprendre chacun d'entre eux pour distinguer chaque objectif unique. Nous explorons ici trois principaux effets de fondu : Gain constant, Puissance constante et Fondu exponentiel.
Gain constant
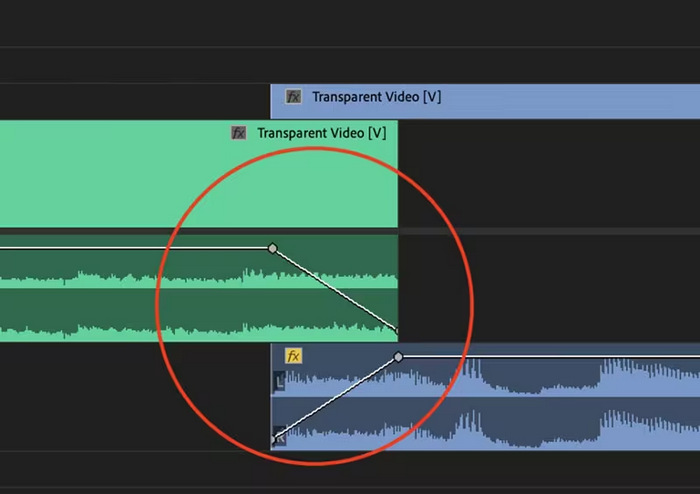
Le gain constant modifie l'audio à un rythme constant au fur et à mesure qu'il s'estompe et disparaît pendant la transition entre les clips. Cette méthode peut parfois entraîner un changement brutal, car elle ne crée pas une transition fluide. En général, ces transitions sont ajustées manuellement à l'aide d'images clés pour mieux contrôler le processus de fondu entrant et sortant.
Puissance constante
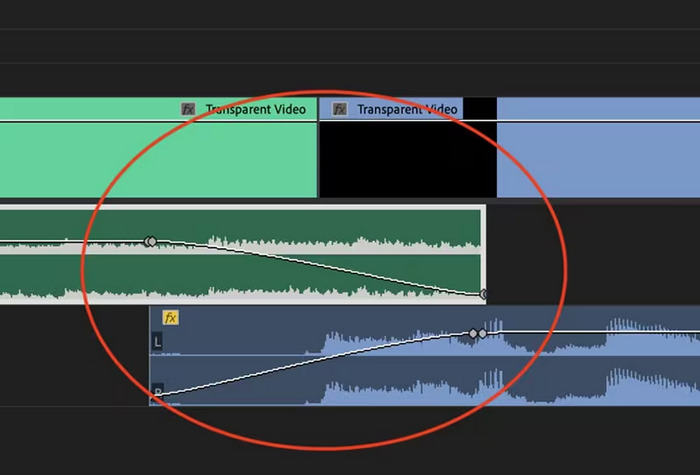
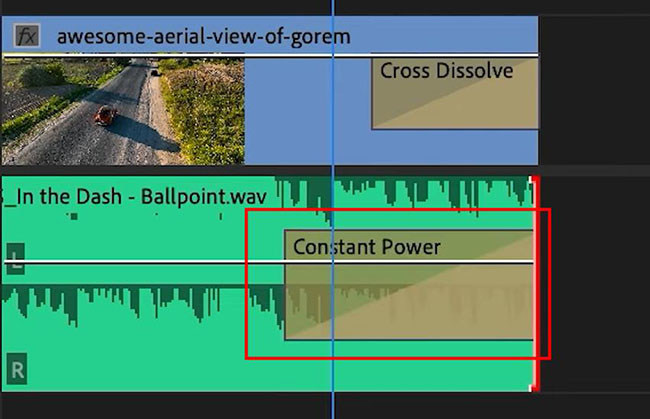
Le fondu enchaîné Constant Power crée un effet de transition progressif et fluide, similaire à une dissolution visuelle entre les clips. Cette méthode atténue initialement l'audio, puis l'atténue à la fin du clip. Comme illustré, les images clés diminuent progressivement dans le premier clip et augmentent régulièrement dans le deuxième clip. Par rapport aux autres fondus enchaînés, Constant Power est souvent considéré comme le meilleur pour les transitions audio en raison de sa capacité à fournir un effet plus fluide et un changement de gain plus progressif entre les clips, sans changement notable pendant la transition.
Fondu exponentiel
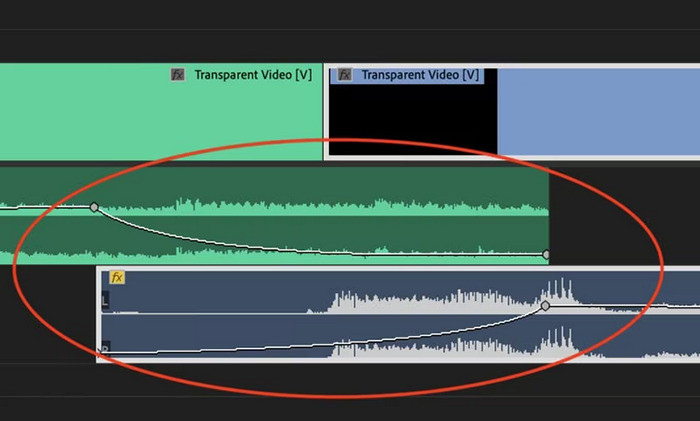
Le fondu enchaîné exponentiel est l'opposé du fondu enchaîné constant. Il disparaît dans le premier clip et disparaît dans le deuxième clip, créant une courbe logarithmique douce. Ce type de fondu offre une expérience auditive différente, ce qui le rend utile pour diverses transitions audio. Il offre un fondu fluide et naturel, particulièrement efficace pour les pistes audio plus complexes.
Partie 2 : Comment appliquer un fondu entrant ou sortant à l'audio dans Premiere Pro
Maintenant que nous connaissons les différents effets de fondu entrant et sortant dans Premiere Pro, voyons comment les utiliser.
Voici comment atténuer l'audio dans Premiere Pro :
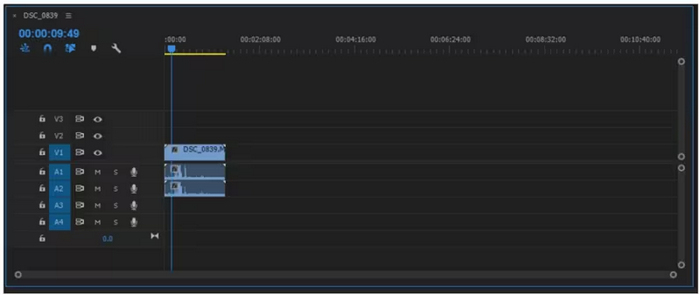
Étape 1. Pour importer dans la timeline le clip audio que vous souhaitez faire disparaître en fondu, allez dans l’onglet Import du File Tab ou faites simplement glisser le fichier vers l’interface principale de l’outil.
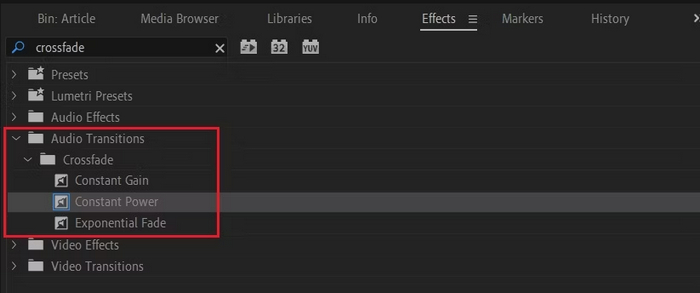
Étape 2. Allez dans le panneau Effect et déployez le dossier des transitions audio pour choisir un effet de fondu enchaîné. Vous pouvez choisir Constant Gain, Constant Power ou Exponential Fade.
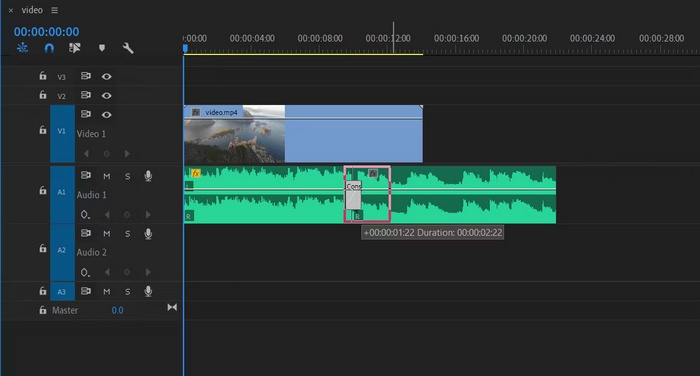
Étape 3. Pour appliquer le type de fondu souhaité, cliquez sur le type choisi ou faites-le glisser dans la timeline.
Étape 4. Saisissez une durée pour le fondu dans la fenêtre pop-up qui apparaît, puis cliquez sur OK.
Les différentes options de Premiere Pro pour le fondu en entrée et en sortie de l'audio en font un outil incontournable pour ceux qui recherchent un moyen professionnel d'éviter les démarrages et les arrêts soudains de leur audio. Ces fonctionnalités permettent des transitions fluides, améliorant ainsi l'expérience auditive globale de tout projet. De plus, cet outil offre flexibilité et précision, ce qui le rend adapté aux utilisateurs débutants et avancés. Cependant, l'utilisation de cet outil particulier peut nécessiter des réglages manuels fastidieux, dans lesquels les débutants peuvent trouver certains effets complexes à utiliser. Néanmoins, il s'agit toujours de l'un des meilleurs outils pour ajouter un fondu en sortie et un fondu en entrée de manière professionnelle.
Partie 3 : Alternative simple à Premiere Pro pour faire apparaître ou disparaître l'audio
Si vous cherchez un outil alternatif en raison de l’interface complexe de Premiere Pro, le Video Converter Ultimate sélectionné par FVC est le meilleur choix. Ce convertisseur tout-en-un pour la vidéo et l’audio possède une interface très conviviale et intuitive, ce qui permet aux utilisateurs de créer facilement et efficacement des fondus d’entrée ou de sortie audio. De plus, cet outil prend en charge un large éventail de formats audio, ce qui réduit fortement les problèmes de compatibilité.
Voici comment atténuer l'audio à l'aide de Video Converter Ultimate :
Étape 1. Sur votre ordinateur, installez Video Converter Ultimate.
Téléchargement gratuit pour Windows 7 ou version ultérieure Téléchargement sécurisé
Téléchargement gratuit pour macOS 10.7 ou version ultérieure - Téléchargement sécurisé
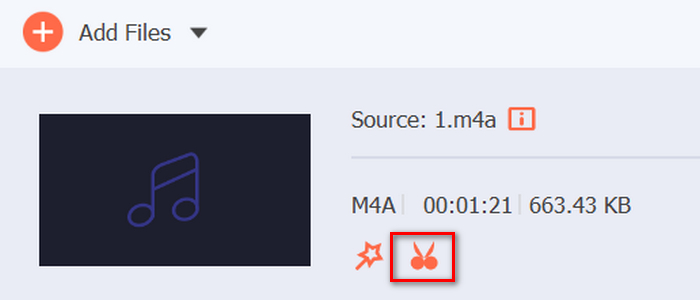
Étape 2. Ensuite, pour importer le fichier audio que vous souhaitez modifier, cliquez sur le bouton Ajouter des fichiers.

Étape 3. Cliquez maintenant sur le bouton Couper. Vous accéderez alors à une nouvelle fenêtre dans laquelle vous pourrez régler le fondu d’entrée et le fondu de sortie de votre fichier audio.
Étape 4. Cochez les cases Fondu d’entrée et Fondu de sortie, puis définissez la durée de chaque effet selon vos préférences.
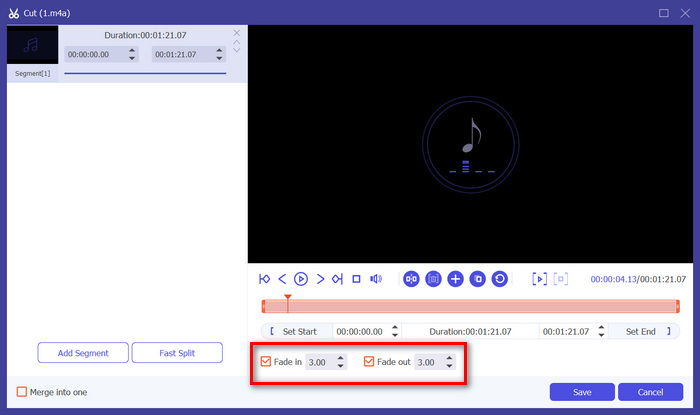
Étape 5. Une fois terminé, vous pouvez préécouter votre audio en le lisant pour vérifier que les modifications effectuées sont correctes et précises.
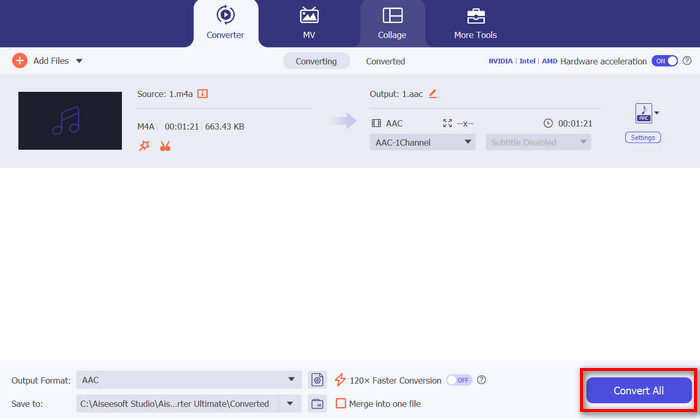
Étape 6. Enfin, cliquez sur le bouton Enregistrer. Vous reviendrez alors à l’interface principale, où vous cliquerez sur le bouton Convertir tout pour exporter le fichier audio.
Ce qui fait de Video Converter Ultimate le meilleur outil alternatif pour réaliser des fondus d’entrée ou de sortie audio, c’est sa facilité d’utilisation et son efficacité. Il permet aux utilisateurs d’obtenir rapidement des transitions audio fluides et professionnelles, sans la complexité des logiciels plus avancés. C’est donc un choix fiable et convivial pour tous ceux qui souhaitent améliorer leur processus de montage audio. En outre, il offre d’autres fonctions d’édition audio, comme la compression audio, la coupe de pistes, l’accélération ou le ralentissement de l’audio, et bien plus encore avant d’exporter le fichier audio souhaité.
Partie 4 : FAQ sur la décoloration du son dans Premiere Pro
Qu'est-ce qu'un fondu entrant et un fondu sortant dans l'audio ?
Les fondus entrants et sortants sont deux techniques d'édition audio utilisées pour augmenter ou diminuer le volume d'une piste audio afin d'obtenir une transition en douceur. Un effet de fondu entrant commence par le silence et augmente progressivement jusqu'au volume maximal, tandis qu'un effet de fondu sortant commence à plein volume et diminue progressivement jusqu'au silence.
Quel est le raccourci pour le fondu sortant dans Premiere Pro ?
Pour Mac, le raccourci pour sortir dans Premiere Pro est Maj+Commande+D, tandis que pour Windows, Maj+Ctrl+D.
Comment faire disparaître progressivement le son sur iPhone ?
Pour faire un fondu de sortie audio sur un iPhone, vous pouvez utiliser l’app iMovie.
Voici comment procéder :
Étape 1. Ouvrez iMovie et chargez votre projet.
Étape 2. Faites un clic droit sur l’audio dans la timeline.
Étape 3. Touchez le bouton Audio.
Étape 4. Touchez Fade pour afficher les poignées de fondu au début et à la fin de votre clip.
Étape 5. Faites glisser la poignée de fondu à la fin du clip pour définir la durée du fondu de sortie.
Conclusion
Premiere Pro est en effet un outil polyvalent, qui permet facilement aux utilisateurs de modifier leurs fichiers audio. Maintenant que vous savez comment faire un fondu audio dans Premiere, vous n’avez plus aucune raison de ne pas créer des transitions fluides et professionnelles pour vos projets. Vous pouvez également essayer Video Converter Ultimate comme alternative si vous trouvez cet outil difficile à utiliser et que vous préférez une expérience plus conviviale. À vous les transitions audio tout en douceur !
-
 Les 10 meilleurs compresseurs GIF pour les utilisateurs de bureau et en ligne
 Dans cet article, vous découvrirez les meilleurs compresseurs GIF pour vous aider à résoudre votre problème avec les gros fichiers GIF. Consultez-les et obtenez les meilleures informations.
-
 5 applications d'enregistrement audio les plus choisies sur Android et iOS [Mise à jour 2023]
 Vous ne savez pas quelle application d'enregistrement audio utiliser ? Si tel est le cas, cet article vous aidera à choisir l'application qui vous aidera dans votre tâche d'enregistrement audio.
-
 Excellents outils de conversion MP4 en MP3 que vous devriez envisager d'utiliser
 Libérez la puissance de la polyvalence audio avec nos meilleurs convertisseurs MP4 vers MP3. Faites l'expérience d'une conversion transparente, d'une qualité sonore exceptionnelle et d'un traitement ultra-rapide.