Loslegen
Herunterladen und installieren
Laden Sie die Video Converter Ultimate-Software herunter und installieren Sie sie mit Schritt-für-Schritt-Anleitungen auf Ihrem Computer. Öffnen Sie das Programm und bereiten Sie sich auf den folgenden Prozess vor.
Registrieren
Ein offizielles Konto für Video Converter Ultimate garantiert Ihnen umfassende Zugriffsrechte auf alle Funktionen. Wir empfehlen Ihnen dringend, sich zu registrieren und dabei zahlreiche Optionen freizuschalten.
Für Nutzer, die einen Registrierungscode auf einer inoffiziellen Website erworben haben:
Für Nutzer, die dieses Tool aus einer garantiert seriösen Drittquelle erworben haben, kann es sein, dass Sie zwar einen Registrierungscode erhalten, aber im Programm kein Feld finden, um ihn einzugeben. In diesem Fall gehen Sie bitte wie folgt vor:
Schritt 1. Nachdem Sie Video Converter Ultimate gekauft haben, erhalten Sie einen Registrierungscode. Klicken Sie nun oben auf die Schaltfläche Anmelden, um zum Anmeldebildschirm zu gelangen.
Schritt 2. Geben Sie Ihre E‑Mail-Adresse und den an Ihre E‑Mail gesendeten Bestätigungscode ein, um sich anzumelden.

Schritt 3. Nach erfolgreicher Anmeldung wird die Schaltfläche "Anmelden" durch ein Profil-Symbol ersetzt. Klicken Sie nun auf die Schaltfläche Schlüssel neben dem Profil-Symbol und dann auf den blauen Ankertext "Aktivieren“, um zum Bildschirm für die Aktivierung des Registrierungscodes zu gelangen.

Schritt 4. Geben Sie Ihre E‑Mail-Adresse und den Registrierungscode ein, den Sie beim Kauf erhalten haben. Klicken Sie auf Aktivieren, um Ihre VIP-Vorteile wirksam zu machen.

Für Nutzer, die im Programm oder auf der offiziellen Website gekauft haben:
Schritt 1. Nachdem Sie Video Converter Ultimate gekauft haben, dient die E‑Mail, die Sie beim Kauf verwendet haben, als Ihr Kontonachweis. Sie können sie daher direkt zur Aktivierung Ihrer VIP-Mitgliedschaft verwenden. Klicken Sie einfach oben auf die Schaltfläche Schlüssel, um den Bildschirm Aktivieren zu öffnen.
Schritt 2. Geben Sie Ihre E‑Mail-Adresse ein und klicken Sie auf Abrufen, um einen Bestätigungscode zu erhalten. Nachdem Sie diesen eingegeben haben, können Sie auf Anmelden klicken, um Ihre VIP-Vorteile direkt zu aktivieren. Beachten Sie nur, dass die E‑Mail-Adresse mit der beim Kauf verwendeten übereinstimmen muss, da die Vorteile sonst nicht mit einer falschen E‑Mail-Adresse synchronisiert werden.

Aktualisieren
Video Converter Ultimate entwickelt sich mit schnellen Updates zu einer zuverlässigeren und leistungsfähigeren Plattform. Um Zugang zu zeitnahen Updates zu erhalten, können Sie diese Kanäle üben:
Kanal 1: Klicken Sie auf das Menü-Symbol und wählen Sie Update überprüfen. Wenn eine neueste Version verfügbar ist, können Sie Ihr Programm sofort aktualisieren.

Kanal 2: Gehen Sie im Menü zu Voreinstellungen; dort sehen Sie Automatisch nach Updates suchen. Aktivieren Sie das Kontrollkästchen und fahren Sie fort.

Kanal 3: Rufen Sie unsere Produktseite auf und laden Sie die neueste Version herunter.
Einstellungen
Öffnen Sie Voreinstellungen über das Menü-Symbol und wechseln Sie links zu dem Bereich, der zu Ihren Anforderungen passt: Allgemein, Konvertieren, MV, Collage, Toolbox und Aufgabenplanung.
Unter jedem einzelnen Teil können Sie zwischen Optionen für detaillierte Konfigurationen wechseln und diese an Ihre Nutzungsgewohnheiten anpassen.

Konvertieren Sie Video und Audio
Video Converter Ultimate verbindet jeden Benutzer mit verschiedenen Video- und Audioformaten und hilft durch einfache Schritte, den idealen Effekt zu erzielen. Führen Sie die folgenden Schritte aus, um die gewünschten Umkehrungen zu erreichen.
Schritt 1. Video-/Audio-Datei(en) hinzufügen
Um die Datei(en) hinzuzufügen, die Sie konvertieren möchten, klicken Sie auf die Schaltfläche Dateien hinzufügen, um das gewünschte Objekt auszuwählen, oder ziehen Sie es direkt in den mittleren Bereich der Hauptoberfläche.

Schritt 2. Ausgabeformat auswählen
Sobald Ihre Datei geladen ist, klicken Sie auf die Dropdown-Schaltfläche neben Ausgabeformat, um Ihr bevorzugtes Format auszuwählen.

Zusätzlich können weitere individuelle Anforderungen über die Profileinstellungen erfüllt werden, wenn Sie mit der Maus über das Symbol Benutzerdefiniertes Profil fahren. Unter dieser Rubrik können Sie Video- und Audio-Parameter abhängig vom Format anpassen.

Schritt 3. Video-/Audio-Dateien konvertieren
Bevor Sie die Video-/Audiodateien konvertieren, können Sie die grundlegenden Informationen auf der Benutzeroberfläche durchgehen, die als Format, Größe und Länge zusammen angezeigt werden. Wählen Sie dann die verfügbaren Optionen aus.
Um die angepasste Version anzuzeigen, können Sie eine Vorschau der Datei anzeigen, indem Sie auf das Video klicken und es abspielen.

Auf dem erweiterten Bildschirm werden Ihnen Schnappschüsse und andere Auswahlmöglichkeiten zur Verfügung gestellt.

Anschließend wählen Sie unten in der Leiste den Zielordner aus. Wenn Sie ein zusammengefügtes Ergebnis als Enddatei benötigen, aktivieren Sie das Kontrollkästchen Zu einer Datei zusammenfügen und klicken Sie unten rechts auf die Schaltfläche Alle konvertieren, um alle Einstellungen zu speichern.

Video mit KI verbessern
Video Converter Ultimate unterstützt jetzt auch die Videooptimierung mit 10 weiteren KI-Modellen, darunter das allgemeine Optimierungsmodell, das Gesichtsmodell, das Anime-Modell, das Modell zur Videoqualitätsreparatur, das Modell zur Detailwiederherstellung, das Modell zur Videorauschunterdrückung, das Modell zur Frame-Interpolation, das Kolorierungsmodell, das SDR-zu-HDR-Modell, das Farbverbesserungsmodell und das Modell zur Verbesserung bei schwachem Licht. Sehen wir uns nun an, wie Sie Ihre Videos mit diesen KI-Modellen auf die nächste Stufe heben können.
Schritt 1. Klicken Sie im Tab Enhancer auf Dateien hinzufügen oder auf der Startseite im Bereich Video Enhancer auf Dateien hinzufügen, um eine Videodatei auszuwählen und hochzuladen.

Schritt 2. Wählen Sie je nach Bedarf ein KI-Modell aus. Wenn Sie die allgemeine Videoqualität verbessern möchten, probieren Sie das Allgemeine Verbesserungsmodell; wenn Sie das Erscheinungsbild von Personen im Video verbessern wollen, ist das Gesichtsmodell Ihre erste Wahl; wenn Sie Ihre Anime-Videos optimieren möchten, verwenden Sie das Anime-Modell; wenn Sie Videorauschen entfernen möchten, wählen Sie das Video-Entrauschungsmodell; wenn Sie Ihr Schwarz-Weiß-Video wieder farbig und lebendig machen wollen, steht Ihnen ein Colorize-Modell zur Verfügung. Insgesamt bieten wir verschiedene Modelle an, um Ihre Anforderungen bestmöglich zu erfüllen.

Schritt 3. Nachdem Sie ein passendes KI-Modell gewählt haben, können Sie auf Vorschau klicken, um den Rendering-Effekt vor dem Export zu überprüfen. Hier bieten wir 2 Vorschau-Modi an, damit Sie den Effekt besser beurteilen können.

Schritt 4. Wenn Sie mit dem Ergebnis zufrieden sind, können Sie im Vorschaufenster direkt auf Gesamtes Video exportieren klicken. Wenn Sie weitere Anpassungsoptionen wünschen, können Sie zum Bildschirm zur KI-Modell-Auswahl zurückkehren und Ausgabeauflösung, Ausgabevideoformat, Videoencoder, Bitrate usw. festlegen.

Schritt 5. Nun können Sie auf Alle exportieren klicken, um mit der Verbesserung Ihrer Videos zu beginnen. Beachten Sie, dass dieser Vorgang je nach Videolänge, -größe und weiteren Faktoren einige Zeit in Anspruch nehmen kann. Bitte haben Sie etwas Geduld.
Bearbeiten Sie Video und Audio
Video Converter Ultimate ist eine Schatzkammer mit verschiedenen Bearbeitungsoptionen, um Ihre Erfahrung bei der Verarbeitung Ihres Videos und Audios zu bereichern.
Video trimmen und teilen
Um ein langes Video in mehrere Clips aufzuteilen, können Sie wie folgt vorgehen.
Schritt 1: Importieren Sie eine Videodatei und klicken Sie auf das Symbol Schneiden, um in das Schneidefenster zu wechseln.

Schritt 2: Wenn Sie die richtige Zeit für Ihren Clip auswählen, können Sie die Zeitleiste nach rechts ziehen
unter dem Video oder setzen Sie die Zeit über die Schaltflächen Start festlegen und Ende festlegen zurück.

Schritt 3: Wenn Sie einen weiteren Videoclip benötigen, klicken Sie auf die Schaltfläche Segment hinzufügen, um den aktuellen Clip zur Liste hinzuzufügen.

Schritt 4: Eine schnelle Lösung für Videoclips wird auch über das Symbol Schnell teilen unterstützt. Klicken Sie darauf und geben Sie die gewünschte Anzahl ein. Sie können zwischen zwei angezeigten Modi wählen: Videos nach gleichen Teilen oder nach Zeit aufteilen. Klicken Sie nach der Einrichtung auf Teilen, um zu bestätigen.

Schritt 5: Nachdem alle Schritte abgeschlossen sind, klicken Sie auf die Schaltfläche Speichern, um das Endergebnis zu erzeugen.

Video drehen und zuschneiden
Diese Software bietet Ihnen einen schnellen Zugriff zum Drehen oder Spiegeln eines Videos.
Schritt 1: Suchen Sie das Symbol Bearbeiten und wählen Sie Drehen & Zuschneiden.Im unteren Bereich können Sie die Drehung in vier Modi ändern. Das Ergebnis wird oben synchron angezeigt, damit Sie es sehen können.

Schritt 2: Gleichzeitig können Sie den zuzuschneidenden Bereich auswählen, indem Sie den Rahmen verschieben oder die Parameter für Zuschneidebereich, Seitenverhältnis und Zoommodus einstellen. Klicken Sie auf Zurücksetzen, um jederzeit neu zu beginnen.
Schritt 3: Klicken Sie auf die Schaltfläche OK, um alles zu speichern.
Passen Sie Videoeffekt und Filter an
Videoeffekte und Filter können auf dieser Plattform einfach und schnell modifiziert werden.
Schritt 1: Suchen Sie das Symbol Bearbeiten und wählen Sie Effekt und Filter..

Schritt 2: Entdecken Sie das Funktionsmenü für Grundeinstellungen und passen Sie Regler oder Werte für Kontrast, Sättigung und Farbton an. Aktivieren Sie Deinterlacing, falls erforderlich.
Schritt 3: Wählen Sie rechts einen Filter aus, um bei Bedarf zusätzliche Effekte hinzuzufügen. Klicken Sie anschließend auf die Schaltfläche OK, um die Änderungen zu speichern.
Wasserzeichen zum Video hinzufügen
Wasserzeichen werden eingeführt, um sie für individuelle Bedürfnisse in Ihr Video zu importieren.
Schritt 1: Klicken Sie auf das Symbol Bearbeiten und gehen Sie dann zu Wasserzeichen..

Schritt 2: Hier haben wir zwei Arten von Wasserzeichen zur Auswahl: ein Text-Wasserzeichen und ein Bild-Wasserzeichen.
Bei einem Textwasserzeichen können Sie den Text auf dem Rohling einfügen und auch die Schriftarten, Farben, Größe und Stile des Textes anpassen.

Für Letzteres klicken Sie auf die Schaltfläche Bild hinzufügen, um ein Bild hochzuladen. Passen Sie dann die Größe an und platzieren Sie es an einer beliebigen Stelle im Video.

Schritt 3: Klicken Sie auf die Schaltfläche OK, um Ihre Einstellungen zu speichern.
Ton anpassen
Audio kann auf der Plattform einfach und schnell modifiziert werden.
Schritt 1: Klicken Sie auf das Symbol Bearbeiten und wählen Sie anschließend Audio..

Schritt 2: Wählen Sie die gewünschte Audiospur aus und entscheiden Sie, ob Sie sie deaktivieren möchten oder nicht. Ändern Sie dann die Audiolautstärke und die Verzögerungszeit, um sie anzupassen.
Schritt 3: Klicken Sie auf die Schaltfläche OK, um die endgültige Datei zu erzeugen.
Untertitel hinzufügen
Dieser Teil führt Sie durch das Bearbeiten und Platzieren von Untertiteln, um weitere Details hinzuzufügen.
Schritt 1: Klicken Sie auf das Symbol Bearbeiten und dann auf Untertitel.

Schritt 2: Klicken Sie auf die Schaltfläche +, um die Untertiteldatei zu löschen. Anschließend können Sie weitere Änderungen an Position, Schriftart, Deckkraft usw. vornehmen.
Schritt 3: Klicken Sie auf OK, um die Anpassungen zu speichern.
Filme machen
Um verifizierten Anlässen und Veranstaltungen gerecht zu werden, stellen wir MV als unabhängigen Teil vor, der auf Video Converter Ultimate verfügbar ist. Dieser Abschnitt führt Sie zu atemberaubenden Effekten mit verschiedenen Themen, Hintergrundmusik und Textdesign. Lesen Sie weiter, wie Sie Ihre eigenen Werke erstellen können.
Schritt 1: Ziel hinzufügen
Gehen Sie zum Menü Weitere Tools und wählen Sie MV Maker. Dort können Sie auf die Hinzufügen-Schaltfläche klicken, um das Video hinzuzufügen, das Sie in ein MV verwandeln möchten.

Schritt 2: Bearbeiten Sie Ihr Video
Nach dem Import der Dateien können Sie deren Reihenfolge ändern, indem Sie sie direkt ziehen oder unten auf der Seite auf die Schaltfläche Zurück bzw. Vorwärts klicken.

Außerdem können Sie das Zielobjekt über die entsprechenden Schaltflächen oben Bearbeiten oder Trimmen.

Schritt 3: Wählen Sie ein Thema
Sie können das beste Thema auswählen, das zu Ihrem Projekt passt, während Sie die Wirkung Ihrer Optionen in der Vorschau anzeigen.

Schritt 4: Weitere Effekte festlegen
Für lebendigere Effekte klicken Sie auf die Schaltfläche Einstellungen in der Liste. Dort stehen Ihnen Optionen für Start- und Endtitel sowie Audiotracks zur Verfügung, um Ihr MV aufzuwerten.

Schritt 5: Ihren Film erstellen
Wechseln Sie nun zum Bereich Export, um den Vorgang vor dem Speichern abzuschließen. Sie können die bearbeitete Datei umbenennen und weitere Optionen wie Format, Bildrate, Auflösung, Qualität und GPU-Beschleunigung festlegen. Wenn alles fertig ist, wählen Sie den Speicherpfad und klicken Sie auf die Schaltfläche Export starten, um Ihr Werk zu erstellen.

Collagenvideos und -bilder
Wenn Sie Probleme mit dem gleichzeitigen Durchsuchen und Bearbeiten von Dateien haben, finden Sie bei Video Converter Ultimate die perfekte Antwort. In der Collage-Funktion haben Sie mehrere Auswahlmöglichkeiten, um sowohl Ihre Videos als auch Ihre Bilder zu verbessern. Befolgen Sie nun diese Schritte, um mit Ihrer Kreation zu beginnen.
Schritt 1: Zum Collage Video Maker navigieren
Öffnen Sie das Menü Weitere Tools und klicken Sie auf Collage Video Maker.

Schritt 2: Dateien hochladen
Importieren Sie das Video oder Bild in den Plus-Bereich, um es vorzubereiten.

Schritt 3: Die passenden Parameter festlegen
Nach dem Import Ihrer Dateien können Sie das Layout weiter anpassen, indem Sie die Trennlinie verschieben. Wechseln Sie dann zu Filter und Audio unter dem Video, um die gesamten Videoeffekte zu optimieren.

Wenn Sie als Nächstes jede eingefügte Datei bearbeiten müssen, wechseln Sie zu den Untereinheiten unter Collage
Videos & Bilder und sehen, was Sie bekommen können. Wenn nicht, fahren Sie mit Schritt 4 fort, gefolgt von ihnen,
a. Video bearbeiten, bevor der Bildschirm geteilt wird
Nach dem Wechsel in die individuelle Videobearbeitung stehen Ihnen sechs Funktionen für verschiedene Zwecke zur Verfügung: ersetzen, bearbeiten, schneiden, Audiospur deaktivieren, Skalierung und Position zurücksetzen und Zoommodus. Sobald Sie eine Funktion auswählen, können Sie detaillierte Anpassungen an Ihren Videos vornehmen.

b. Bild bearbeiten, bevor der Bildschirm geteilt wird
Beim Anpassen Ihrer Bilder gibt es ebenfalls fünf Bereiche zur Verbesserung des Effekts: ersetzen, bearbeiten, Dauer, Skalierung und Position zurücksetzen und Zoommodus. Wählen Sie die gewünschte Funktion, um Ihre Bilder zu optimieren.

Schritt 4: Ihre Werke erstellen und speichern
Wenn alle Einstellungen vorgenommen sind, klicken Sie auf die Registerkarte Export. Bevor Sie die endgültige Datei erzeugen, können Sie unter der Registerkarte Menü weitere Einstellungen wie Name, Format, Bildrate und mehr überprüfen und anpassen. Danach klicken Sie auf Start Export, um Ihre Werke zu erstellen und auf Ihrem Computer zu speichern.

Mehr Werkzeuge
Gemäß unserem kundenorientierten und innovationsgetriebenen Prinzip haben wir eine Reihe leistungsstarker Tools eingeführt, um Ihre Zieldatei zu individualisieren. Bereiten Sie sich mit Hilfe unseres Leitfadens darauf vor, diese Funktionen zu aktivieren.
Medien-Metadaten-Editor
Dies ist ein wunderbarer Editor, der Ihnen hilft, die ursprünglichen Dateiinformationen beizubehalten und wie erwartet zu bearbeiten.
Schritt 1: Klicken Sie auf das zentrale +-Zeichen, um das Ziel auszuwählen.

Schritt 2: Personalisieren Sie Ihre Datei im Popup-Fenster durch Optionen wie Cover, Titel, Künstler, Album, Komponist usw.
Schritt 3: Wenn alle Segmente berücksichtigt sind, klicken Sie auf die Schaltfläche Speichern, um abzuschließen.

Videokompressor
Geben Sie diesen Abschnitt ein und komprimieren Sie Ihre Videodateien mit wenig Aufwand.
Schritt 1: Fügen Sie im mittleren Bereich ein Video hinzu.

Schritt 2: Setzen Sie die zugehörigen Indizes Ihrer Datei neu, von Name bis Dauer. Klicken Sie auf Vorschau, um den Effekt zu prüfen.
Schritt 3: Wählen Sie einen geeigneten Kanal für Ihre Werke und klicken Sie auf die Schaltfläche Komprimieren, um zu speichern.

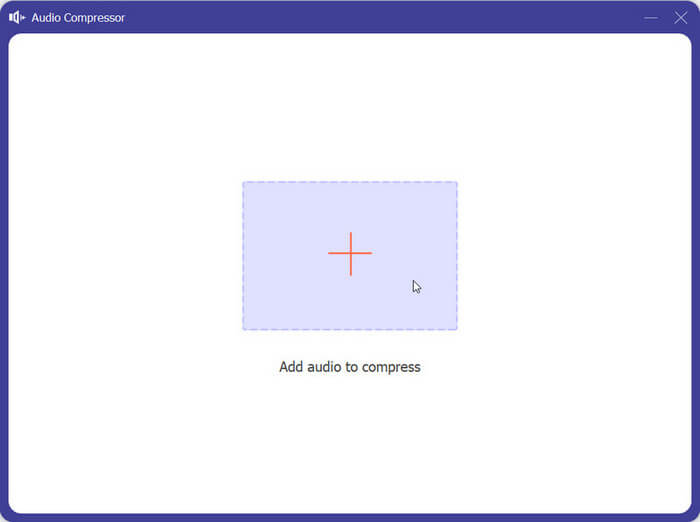
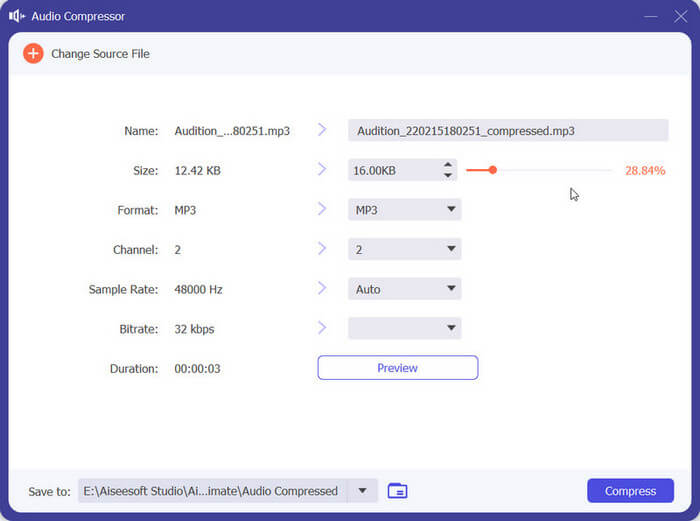
Audiokompressor
Audiodateien können komprimiert werden, wenn Sie dieses Tool wählen.
Schritt 1: Importieren Sie Ihre Datei im zentralen Bereich.
Schritt 2: Öffnen Sie den Bereich Größe, um Ihre Datei nach Wunsch anzupassen. Nehmen Sie dann der Reihe nach die restlichen Einstellungen vor und klicken Sie auf die Schaltfläche Komprimieren, um zu speichern.
Video-Wasserzeichen-Entferner
Sie können dieses Tool nicht verpassen, wenn Sie nach einer einfachen Lösung suchen, um Wasserzeichen in Ihrem Video zu entfernen.
Schritt 1: Wählen Sie ein Video aus, das Sie dem Funktionsbereich hinzufügen möchten.

Schritt 2: Klicken Sie auf die Schaltfläche Wasserzeichen-Bereich hinzufügen, um den Bereich festzulegen, den Sie aus Ihrem Video entfernen möchten. Passen Sie dabei Größe und Position an, bis der Effekt Ihren Vorstellungen entspricht.

Wenn alle Elemente an der richtigen Stelle sind, klicken Sie auf die Schaltfläche Export, um die Änderungen zu speichern.

GIF-Ersteller
Erstellen Sie jetzt Ihr einzigartiges GIF mit Ihren Video- oder Fotodateien und haben Sie Spaß.
Schritt 1: Fügen Sie Ihre Datei basierend auf ihrem Format zu GIF Maker hinzu.

Schritt 2: Für einen Video-GIF-Maker klicken Sie auf die Schaltfläche Bearbeiten, um verschiedene Funktionen wie Drehen & Zuschneiden, Effekt & Filter, Wasserzeichen, Audio und Untertitel anzuwenden, oder auf die Schaltfläche Schneiden, um den Bereich für das GIF festzulegen.

Wenn Sie ein Foto als Ausgangsformat wählen, folgen Sie einfach den Bildschirmanweisungen, um Ausgabeeinstellungen wie Format, Auflösung, Zoommodus und mehr festzulegen. Danach können Sie Dateien über die Schaltfläche Hinzufügen einfügen oder sie über Vor bzw. Zurück. einfügen. Außerdem können Sie die Reihenfolge der Fotos über die Schaltflächen Vorwärts oder Rückwärts ändern.

Wenn Sie die Dauer einzelner Fotos ändern möchten, fahren Sie mit der Maus über das gewünschte Bild und klicken Sie auf Dauer ändern, um das Timing neu festzulegen.

Schritt 3: Klicken Sie auf GIF erstellen für Videos oder auf Export für Fotos, um Ihr animiertes GIF zu erzeugen.
Bildkonverter
Probieren Sie dieses Tool aus, um Ihre Bilder ohne Blöcke zu konvertieren.
Schritt 1: Wählen Sie das Zielbild aus, das in der Mitte hinzugefügt werden soll. Stapelkonvertierung wird unterstützt, wenn Sie eine Gruppe von Dateien zu erledigen haben.

Schritt 2: Klappen Sie die Liste neben Alle konvertieren auf und wählen Sie das gewünschte Format. Um Zoom, Qualität oder Hintergrundfarbe anzupassen, verwenden Sie das Symbol Zahnrad oder die Schaltfläche JPG darunter.
Schritt 3: Wenn alles eingestellt ist, tippen Sie auf die Schaltfläche Export, um abzuschließen.

3D-Maker
Dieses Programm ermöglicht das Erstellen von 3D-Videos und sorgt für mehr Spaß.
Schritt 1: Fügen Sie Ihr Video nach Bedarf hinzu.

Schritt 2: Nachdem Sie das 3D-Markierungsfenster aufgerufen haben, können Sie das Video bearbeiten, indem Sie Anaglyph, Format, Split Screen, Qualität und Tiefe zurücksetzen. Sehen Sie sich gleichzeitig den oben gezeigten Effekt an.
Schritt 3: Wählen Sie einen geeigneten Speicherpfad für Ihre angepasste Datei und klicken Sie dann auf 3D erzeugen, um die neue Version zu erstellen.

Videotrimmer
Verwenden Sie dieses Tool, um Ihr Video auf die perfekte Länge zu trimmen oder zu schneiden.
Schritt 1: Laden Sie ein Video im zentralen Bereich hoch.

Schritt 2: Ziehen Sie den Fortschrittsbalken unter dem Vorschauvideo, um die Länge anzupassen. Alternativ können Sie die Zeit auch in Start festlegen und Ende festlegen ändern und Segment hinzufügen oder mittels Schnell teilen die Videoclips aufteilen. Aktivieren Sie danach bei Bedarf das Kontrollkästchen Zu einem zusammenführen und klicken Sie auf die Schaltfläche Export.

Video-Fusion
Integrieren Sie Ihre Videoclips einfach und schnell.
Schritt 1: Wählen Sie ein Video aus und fügen Sie es dem zentralen Bereich hinzu.

Schritt 2: Um zusätzliche Videos zu importieren, klicken Sie auf das Plus-Symbol neben dem vorherigen Video oder auf das Zeichen Hinzufügen in der Menüleiste. Wählen Sie außerdem Bearbeiten und Zuschneiden, um die Videos zu bearbeiten, und ändern Sie die Reihenfolge mit einem Klick auf Hinter oder Rückwärts.
Schritt 3: Klicken Sie auf Export, um zu speichern.,

AI Vocal Remover
Trennen Sie Ihre menschliche Stimme mithilfe präziser und fortschrittlicher KI-Technologie von den Hintergrundgeräuschen.
Schritt 1. Wählen Sie den AI Vocal Remover unter Weitere Tools.
Schritt 2. Klicken Sie in den großen rechteckigen Bereich, um Ihre Audio- oder Videodatei hinzuzufügen.
Schritt 3. Das Programm lädt die entsprechenden KI-Modelle herunter und beginnt automatisch, Ihr Audio zu analysieren und zu trennen.
Schritt 4. Nun können Sie sich den getrennten Audioinhalt anhören und vor dem Export überprüfen.

AI Vocal Isolator
Schritt 1: Wählen Sie den AI Vocal Isolator unter Weitere Tools.
Schritt 2: Fügen Sie Ihre Audio- oder Videodatei mit Soundtrack(s) in dieses Tool ein.
Schritt 3: Die KI analysiert dann Ihr Video bzw. Ihre Musik automatisch, entfernt die Hintergrundgeräusche und behält nur die Gesangsspur bei.
Schritt 4: Klicken Sie auf das Dropdown-Menü Speichern unter, um einen Zielordner auszuwählen, und klicken Sie dann auf Exportieren, um die Datei zu speichern.”

Video-Cropper
Verwenden Sie das Tool, um Ihr Video nach Belieben zuzuschneiden.
Schritt 1: Fügen Sie das Video dem bestimmten Bereich hinzu.

Schritt 2: Platzieren Sie den Rahmen mit der Maus an den gewünschten Stellen und setzen Sie bei Bedarf die Werte für Zuschneidebereich und Seitenverhältnis zurück. Klicken Sie auf die Schaltfläche Vorschau, um das Ergebnis jederzeit anzusehen, und auf die Schaltfläche Export, um es zu erzeugen.

Video-Wasserzeichen
Dieser Abschnitt wäre eine goldene Wahl, wenn Sie sich darauf freuen, Ihr Urheberrecht besser zu schützen.
Schritt 1: Bereiten Sie eine Videodatei vor und fügen Sie sie in den zentralen Bereich ein

Schritt 2: Wählen Sie die entsprechenden Wasserzeichen aus. Hier sind insgesamt zwei Arten: Textwasserzeichen und Bildwasserzeichen.

a. Klicken Sie auf die Schaltfläche Text-Wasserzeichen, wenn Sie ein Textwasserzeichen möchten.

Dann sehen Sie ein Fenster, in dem Sie den Inhalt, den Schriftstil und mehr bearbeiten können.

b. Wenn Sie ein Bild als Wasserzeichen verwenden möchten, wählen Sie die Schaltfläche Bild-Wasserzeichen.

Im folgenden Popup-Fenster können Sie Ihr Wasserzeichen anpassen, indem Sie die Einstellungen für Drehen, Deckkraft und Größe ändern.

Schritt 3: Klicken Sie auf die Schaltfläche Export, um die angepasste Datei zu erzeugen.
Farbkorrektur
Geben Sie diesen Abschnitt ein und korrigieren Sie Ihre Videofarben unter verschiedenen Aspekten.
Schritt 1: Tippen Sie auf das +-Zeichen, um Ihr Video hinzuzufügen.

Schritt 2: Suchen Sie den Arbeitsbereich unten und korrigieren Sie die Farben Ihres Videos über Kontrast, Sättigung, Farbton und Helligkeit, indem Sie den Regler verschieben oder Zahlen in das folgende Feld eingeben. Klicken Sie anschließend auf die Schaltfläche Export, um den Vorgang abzuschließen.

Videogeschwindigkeitsregler
Verwenden Sie dieses Tool, um Ihre Datei bequem zu beschleunigen oder zu verlangsamen.
Schritt 1: Importieren Sie die Videodatei auf dem Controller.

Schritt 2: Klicken Sie unten auf die gewünschte Geschwindigkeit und sehen Sie sich den Effekt in der Vorschau an. Tippen Sie anschließend auf die Schaltfläche Export, um zu speichern.

Videoumkehrer
Kehren Sie Ihr Video mit diesem One-Stop-Service um.
Schritt 1: Fügen Sie das Video, das Sie umkehren möchten, im mittleren Bereich hinzu.

Schritt 2: Wenn Sie die Zeit ändern müssen, ziehen Sie den Fortschrittsbalken oder stellen Sie Start festlegen und Ende festlegen neu ein, um die gewünschten Teile auszuwählen. Tippen Sie dann auf Export, um das Endergebnis zu speichern.
Hinweis: Das Umkehren von Audiospuren ist derzeit nicht verfügbar. Fügen Sie die Audiospur stattdessen im Tab Konverter hinzu.

Videorotator
Starten Sie das Programm und drehen Sie Ihr Video durch einfache Schritte.
Schritt 1: Fügen Sie dem zentralen Bereich ein Video hinzu.

Schritt 2: Gehen Sie zu Rotation und wählen Sie die Richtung aus, die Sie für die neue Version wünschen. Die Ausgabe lässt sich direkt darüber in der Vorschau ansehen.
Wechseln Sie zum Schluss zu Export und erzeugen Sie das gedrehte Video.

Lautstärke-Booster
Geben Sie diesen Kanal ein, um Ihre Videolautstärke anzupassen.
Schritt 1: Wählen Sie ein Video aus und fügen Sie es mit der Schaltfläche + hinzu.

Schritt 2: Prüfen Sie die verfügbaren Optionen und passen Sie Audiospur, Lautstärke und Verzögerung nach Bedarf an. Wählen Sie dann einen Speicherpfad für Ihr Profil und klicken Sie auf Export.

Audio-Synchronisierung
Finden Sie einfache Lösungen zum Synchronisieren von Video und Audio.
Schritt 1: Laden Sie Ihr Video in dieses Tool hoch.

Schritt 2: Klicken Sie auf die Audiokurve und ziehen Sie sie, bis sie zur Bewegung im Video passt. Tippen Sie anschließend auf Export, um die neue Version fertigzustellen.

Dateidatumswechsler
Setzen Sie die Dateidatumsangaben für Ihre persönlichen Anforderungen einzeln oder stapelweise zurück.
Schritt 1: Fügen Sie Ihre Datei dem spezifischen Bereich hinzu.

Schritt 2: Wählen Sie das Datumsfeld und ändern Sie es nach Ihren Bedürfnissen. Es ist erwähnenswert, dass Sie oben auf Stapeländerung zurückgreifen können, wenn Sie eine schnellere Lösung wünschen.
Schritt 3: Klicken Sie auf die Schaltfläche Anwenden, um die neueste Datei aufzurufen.

Videoplayer
Spielen Sie Ihr Video in verschiedenen Formaten ab.
Schritt 1: Wählen Sie ein Video aus und fügen Sie es dem Player hinzu.

Schritt 2: Bewegen Sie Ihre Maus und klicken Sie auf die Schaltflächen, um das Video zu Wiedergeben und zu Pausieren oder zu Stoppen. Oder wählen Sie Vorherige 5 Sekunden bzw. Nächste 5 Sekunden, um zu verschiedenen Stellen zu springen. Gleichzeitig können Sie rechts Optionen für Kanal, Text, Wiedergabegeschwindigkeit und mehr festlegen.
Wenn Sie ein anderes Video abspielen möchten, tippen Sie auf Quelldatei ändern und wechseln Sie zu einem neuen Ziel.


