


So blenden Sie Audio in Premiere Pro professionell ein [2024]
Perfektes Audiotiming ist für ein Video unerlässlich. Es ist aufregend, wenn der Ton im Video genau an der richtigen Stelle ein- und ausblendet. Deshalb arbeiten viele Nutzer – von professionellen Editoren bis hin zu Enthusiasten – sehr sorgfältig daran, sicherzustellen, dass ihr Audio perfekt zum Timing jeder Szene passt. In dieser Anleitung zeigen wir dir, wie du Audio in Premiere Pro ein- und ausblendest, damit du Videos in Profiqualität mit makellosem Sound erstellen kannst. Legen wir los.

Teil 1: Was sind die Ausblend- und Einblendeffekte in Premiere Pro?
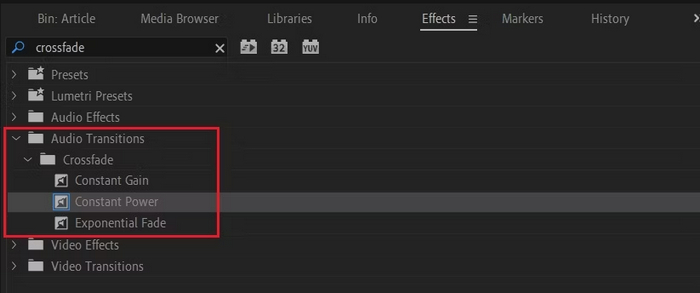
In Premiere Pro gibt es mehrere Ein- und Ausblendeffekte. Um die einzelnen Effekte unterscheiden zu können, müssen Sie sie alle kennen. Hier untersuchen wir drei primäre Einblendeffekte: Konstante Verstärkung, Konstante Leistung und Exponentielle Einblendung.
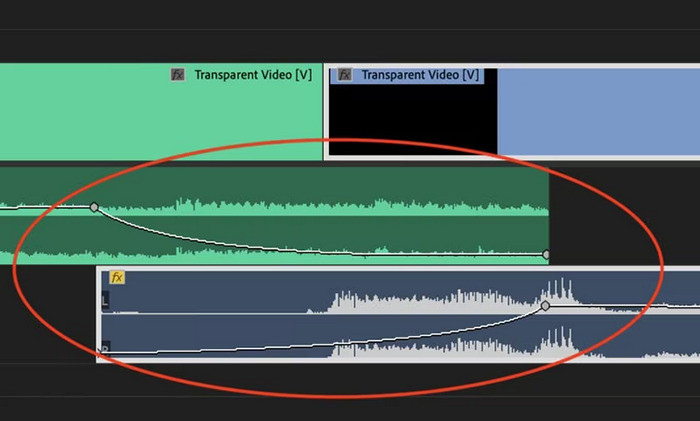
Konstante Verstärkung
Die konstante Verstärkung ändert den Ton mit konstanter Geschwindigkeit, während er beim Übergang zwischen den Clips ein- und ausgeblendet wird. Diese Methode kann manchmal zu einer abrupten Änderung führen, da kein glatter Übergang entsteht. Normalerweise werden diese Übergänge manuell mithilfe von Keyframes angepasst, um den Ein- und Ausblendvorgang besser steuern zu können.
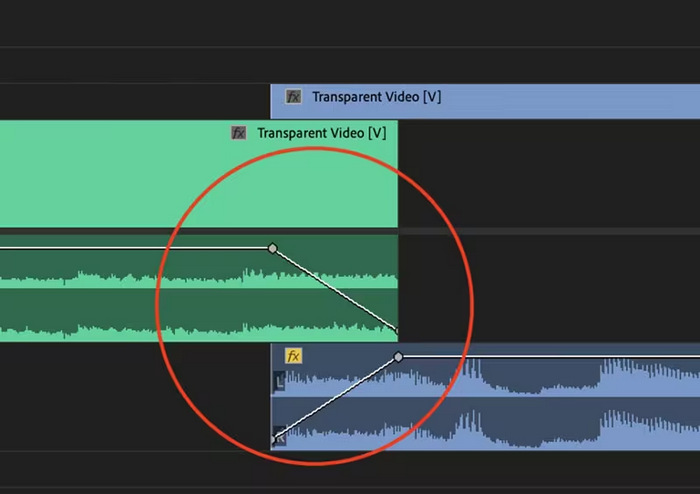
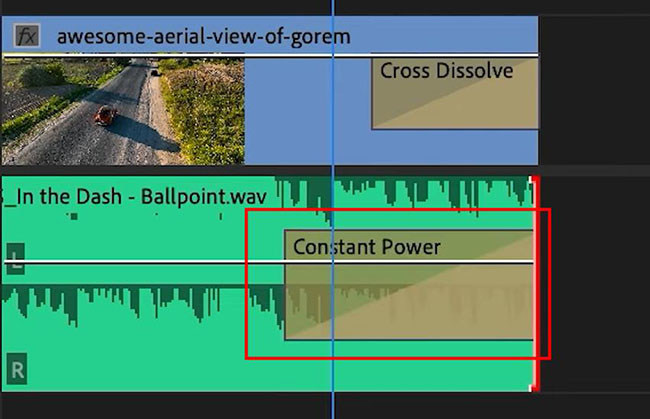
Konstante Leistung
Die Überblendung mit konstanter Leistung erzeugt einen sanften, allmählichen Übergangseffekt, der einer visuellen Überblendung zwischen Clips ähnelt. Bei dieser Methode wird der Ton zunächst ausgeblendet und am Ende des Clips ausgeblendet. Wie dargestellt, werden die Keyframes im ersten Clip allmählich kleiner und im zweiten Clip gleichmäßiger. Im Vergleich zu anderen Überblendungen wird die Überblendung mit konstanter Leistung oft als die beste Methode für Audioübergänge angesehen, da sie einen sanfteren Effekt und eine allmählichere Verstärkungsverschiebung zwischen den Clips ermöglicht, ohne dass während des Übergangs merkliche Änderungen auftreten.
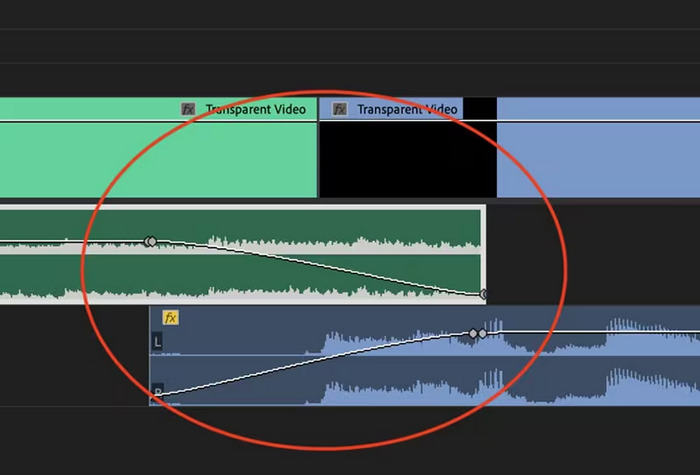
Exponentielles Verblassen
Der Exponential Fade-Crossfade ist das Gegenteil von Constant Power. Er blendet im ersten Clip aus und im zweiten Clip ein, wodurch eine glatte, logarithmische Kurve entsteht. Diese Art von Fade bietet ein anderes Hörerlebnis und ist daher für verschiedene Audioübergänge nützlich. Er bietet einen nahtlosen und natürlich klingenden Fade, der besonders bei komplexeren Audiospuren effektiv ist.
Teil 2: Audio in Premiere Pro ein- oder ausblenden
Nachdem wir nun die verschiedenen Ein- und Ausblendeffekte in Premiere Pro kennen, wollen wir uns nun damit befassen, wie man sie nutzt.
So blenden Sie Audio in Premiere Pro aus:
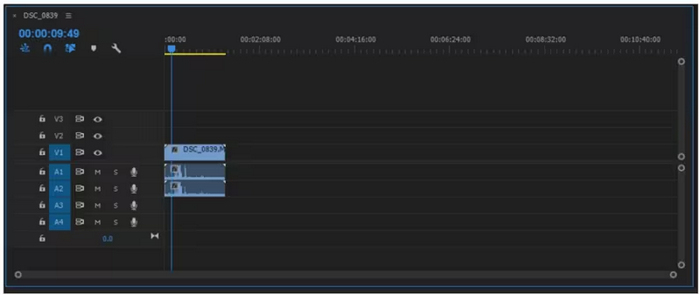
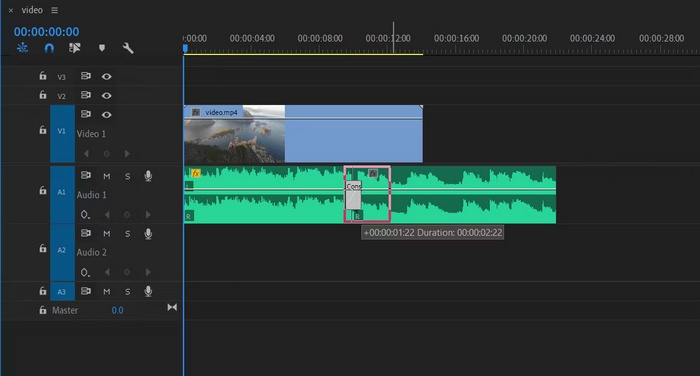
Schritt 1. Um den Audioclip, den du ausblenden möchtest, in die Timeline zu importieren, gehe zum Reiter Import im Datei-Menü oder ziehe die Datei einfach in die Hauptoberfläche des Tools.
Schritt 2. Wechsle zum Effekte-Bedienfeld und klappe den Ordner „Audioblenden“ auf, um einen Crossfade-Effekt auszuwählen. Du kannst Konstante Verstärkung, Konstante Stromstärke oder Exponentielle Verstärkung wählen.
Schritt 3. Um den gewünschten Ein- oder Ausblendtyp anzuwenden, klicke auf den gewählten Effekt oder ziehe ihn in die Timeline.
Schritt 4. Gib im erscheinenden Pop-up-Fenster eine Dauer für die Ein- oder Ausblendung ein und klicke auf OK.
Die verschiedenen Optionen von Premiere Pro zum Ausblenden und Einblenden von Audio machen es zu einem unverzichtbaren Tool für alle, die nach einer professionellen Möglichkeit suchen, plötzliche Starts und Stopps in ihrem Audio zu vermeiden. Diese Funktionen ermöglichen sanfte Übergänge und verbessern das Gesamterlebnis jedes Projekts. Darüber hinaus bietet dieses Tool Flexibilität und Präzision und ist daher sowohl für neue als auch für fortgeschrittene Benutzer geeignet. Die Verwendung dieses speziellen Tools kann jedoch zeitaufwändige manuelle Anpassungen erfordern, wobei Anfänger die Verwendung bestimmter Effekte möglicherweise kompliziert finden. Dennoch ist dies immer noch eines der besten Tools, um Ausblenden und Einblenden professionell hinzuzufügen.
Teil 3: Einfachere Premiere Pro-Alternative zum Ausblenden oder Einblenden von Audio
Wenn du wegen der komplexen Oberfläche von Premiere Pro nach einem alternativen Tool suchst, ist das von FVC empfohlene Video Converter Ultimate die beste Wahl. Dieser All-in-One‑Video- und Audiokonverter verfügt über eine sehr benutzerfreundliche und intuitive Oberfläche, sodass Nutzer Audio schnell und einfach ein- oder ausblenden können. Außerdem unterstützt dieses Tool eine große Bandbreite an Audioformaten, wodurch Kompatibilitätsprobleme deutlich reduziert werden.
So blenden Sie Audio mit Video Converter Ultimate aus:
Schritt 1. Installiere den Video Converter Ultimate auf deinem Computer.
Gratis DownloadFür Windows 7 oder neuerSicherer Download
Gratis DownloadFür MacOS 10.7 oder neuerSicherer Download
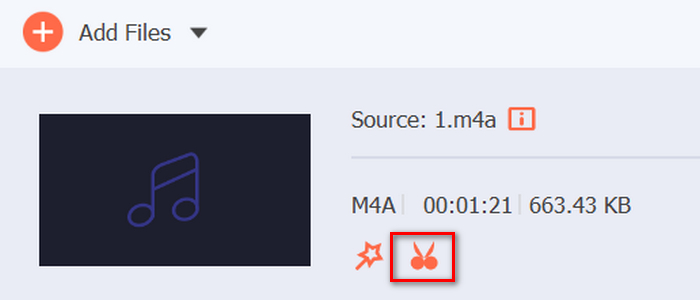
Schritt 2. Klicke anschließend auf die Schaltfläche Dateien hinzufügen, um die Audiodatei zu importieren, die du bearbeiten möchtest.

Schritt 3. Klicke nun auf die Schaltfläche Schneiden; daraufhin öffnet sich ein neues Fenster, in dem du das Ein- und Ausblenden deiner Audiodatei festlegen kannst.
Schritt 4. Aktiviere die Kästchen für Einblenden und Ausblenden und lege die Dauer für jeden Effekt nach deinen Vorstellungen fest.
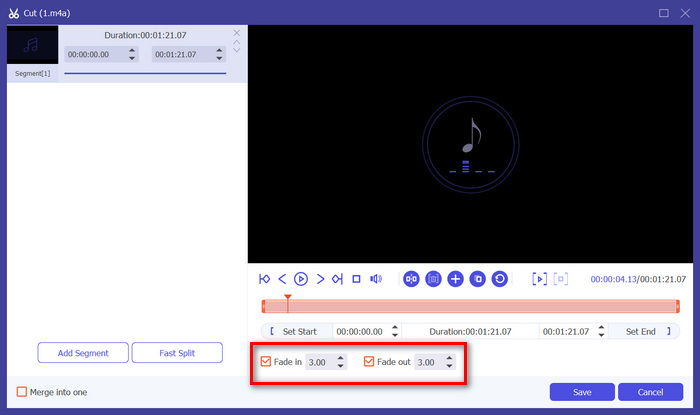
Schritt 5. Wenn du fertig bist, kannst du dein Audio abspielen, um eine Vorschau zu erhalten und zu prüfen, ob die von dir vorgenommenen Änderungen genau und korrekt sind.
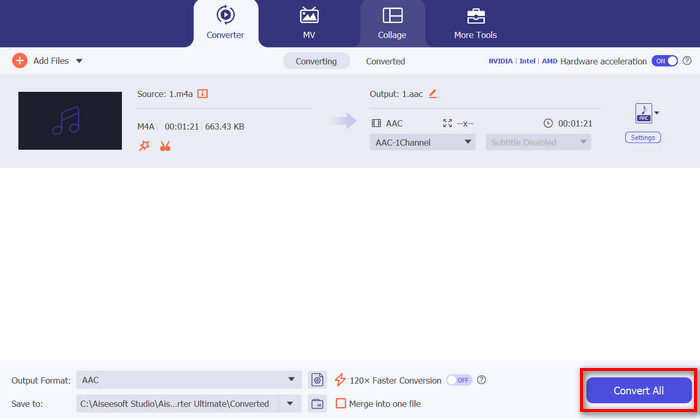
Schritt 6. Klicke abschließend auf die Schaltfläche Speichern. Du gelangst zurück zur Hauptoberfläche, wo du auf die Schaltfläche Alles konvertieren klickst, um die Audiodatei zu exportieren.
Was den Video Converter Ultimate zum besten alternativen Tool zum Ein- oder Ausblenden von Audio macht, sind seine einfache Handhabung und hohe Effizienz. Nutzer können damit schnell sanfte, professionelle Audioblenden erzielen, ohne sich mit der Komplexität fortgeschrittenerer Software auseinandersetzen zu müssen. So ist es eine zuverlässige und benutzerfreundliche Wahl für alle, die ihren Audio‑Bearbeitungsprozess verbessern möchten. Darüber hinaus bietet es weitere Audio‑Bearbeitungsfunktionen wie Audio komprimieren, Audio schneiden, Audio beschleunigen/verlangsamen und mehr, bevor du die gewünschte Audiodatei exportierst.
Teil 4: Häufig gestellte Fragen zum Ausblenden von Audio in Premiere Pro
Was ist Ein- und Ausblenden bei Audiodaten?
Ein- und Ausblenden sind beides Audiobearbeitungstechniken, mit denen die Lautstärke einer Audiospur erhöht oder verringert wird, um einen sanften Übergang zu erzielen. Ein Einblendeffekt beginnt mit Stille und steigert sich allmählich bis zur vollen Lautstärke, während ein Ausblendeffekt mit voller Lautstärke beginnt und allmählich bis zur Stille abnimmt.
Was ist die Tastenkombination zum Ausblenden in Premiere Pro?
Unter dem Mac lautet die Tastenkombination zum Herausnehmen in Premiere Pro Umschalt+Befehl+D, unter Windows hingegen Umschalt+Strg+D.
Wie kann ich Audio auf dem iPhone ausblenden?
Um Audio auf einem iPhone auszublenden, kannst du die iMovie‑App verwenden.
So gehst du vor:
Schritt 1. Öffne iMovie und lade dein Projekt.
Schritt 2. Klicke in der Timeline mit der rechten Maustaste auf die Audiospur.
Schritt 3. Tippe auf die Schaltfläche „Audio“.
Schritt 4. Tippe auf „Ausblenden“, um die Fade‑Griffe am Anfang und Ende deines Clips einzublenden.
Schritt 5. Ziehe den Fade‑Griff am Ende des Clips, um die Dauer des Ausblendens festzulegen.
Fazit
Premiere Pro ist tatsächlich ein vielseitiges Tool, mit dem Nutzer ihre Audiodateien leicht bearbeiten können. Jetzt, da du weißt, wie man Audio in Premiere ein- und ausblendet, gibt es keinen Grund mehr, mit nahtlosen und professionellen Übergängen in deinen Projekten aufzuhören. Du kannst außerdem den Video Converter Ultimate als Alternative ausprobieren, wenn du Premiere Pro als schwierig empfindest und eine benutzerfreundlichere Lösung suchst. Auf sanfte Audioblenden!
-
 Die 10 besten GIF-Kompressoren für Desktop- und Online-Benutzer
 In diesem Beitrag erfahren Sie mehr über die besten GIF-Kompressoren, die Ihnen bei der Behebung Ihres Problems mit großen GIF-Dateien helfen. Schauen Sie sich diese an und erhalten Sie die besten Einblicke.
-
 Die 5 beliebtesten Audiorecorder-Apps für Android und iOS [2023 aktualisiert]
 Sie wissen nicht, welche Audiorecorder-App Sie verwenden sollten? Wenn ja, hilft Ihnen dieser Artikel bei der Auswahl der App, die Ihnen bei Ihrer Audioaufnahme hilft.
-
 Tolle MP4-zu-MP3-Konverter-Tools, die Sie in Betracht ziehen sollten
 Nutzen Sie die Vielseitigkeit von Audio mit unseren erstklassigen MP4-zu-MP3-Konvertern. Erleben Sie nahtlose Konvertierung, außergewöhnliche Klangqualität und blitzschnelle Verarbeitung.