


4 Ways to Fade Music in Audacity: Beginner’s Ultimate Guide
Audacity is a great open-source audio editing tool, especially if you’re a Windows, macOS, or Linux user. This tool allows users to play with their audio by editing it, adding effects, and more. One of the best features of this tool is its ability to fade out music, where users can fade their audio in 3 different ways.
So, if you’re someone who’s curious about this and wonder how Audacity fades out music, consider reading this entire article. This comprehensive guide will teach you three various fade-out/in methods and one alternative to help you find the best method for you to enhance your audio.

Part 1. What Are Fade-in and Out Effects in Audacity
There are three various ways Audacity fades out much as sic, the Linear Fades, Studio Fades, and Crossfades. Each of these methods offers distinct characteristics and is suited to different audio editing scenarios.
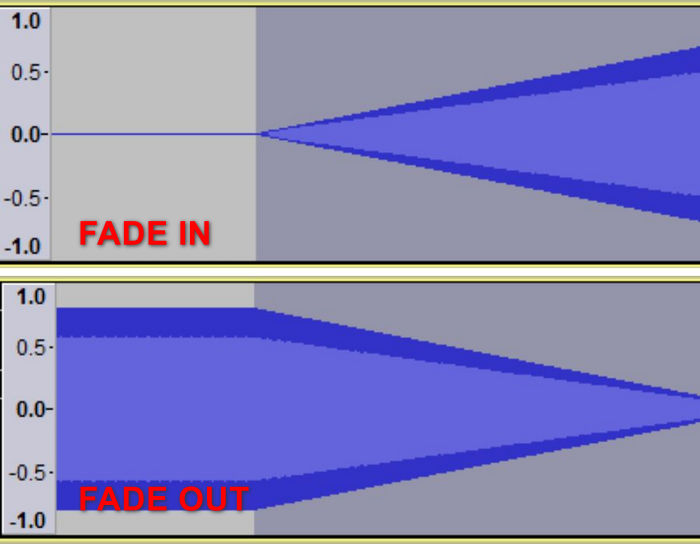
Linear Fade
A linear fade method fades audio from absolute silence to its original volume or from its original volume to absolute silence. When viewed in the linear Waveform View Mode, this fade appears as a straight line, indicating a constant fade speed throughout the selected length.
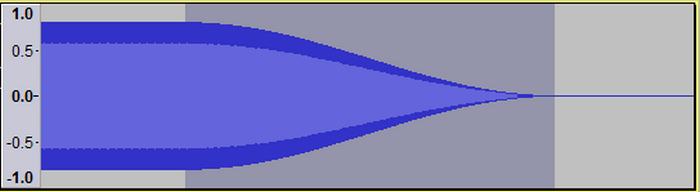
Studio Fade Out
A studio fade-out generates a smooth, musical fade from the original volume to silence using an S-shaped curve. This method fades out higher frequencies slightly quicker than lower frequencies, giving the sound a natural, receding effect, as though it is moving into the distance.
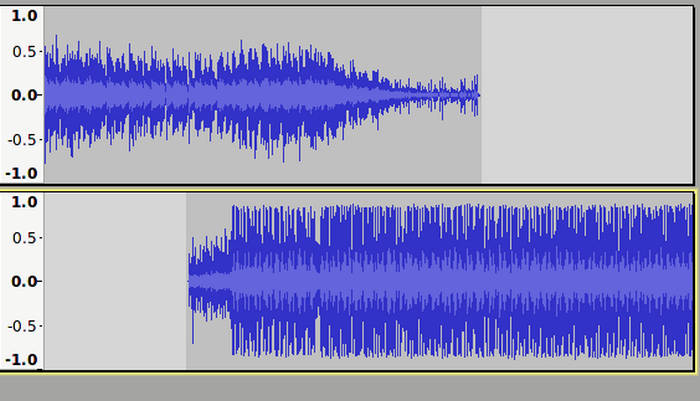
Crossfade
A crossfade creates a seamless transition between two audio sections by overlapping them. One section fades out while the other fades in, resulting in a smooth blend without abrupt changes.
Part 2. Fade in/ out Audio in Audacity
The need to fade audio in or out can arise in various scenarios, and different methods may be required to achieve the desired effect. Whether you are aiming for a smooth transition, a professional-quality fade, or a simple volume adjustment, Audacity provides multiple techniques to cater to your specific needs. Here are three different ways to fade in or out audio in Audacity.
Linear Fade
Step 1. First, you need to click the track that you want to fade out/in.
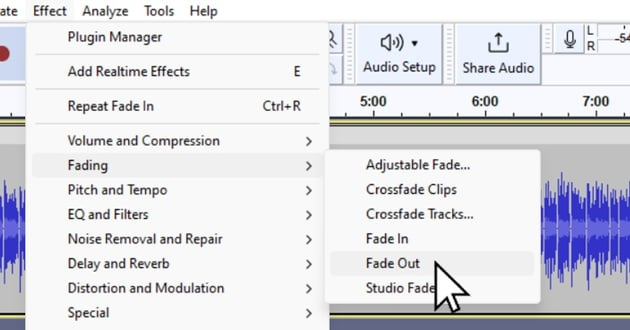
Step 2. Go to the Effect menu and choose Fading.
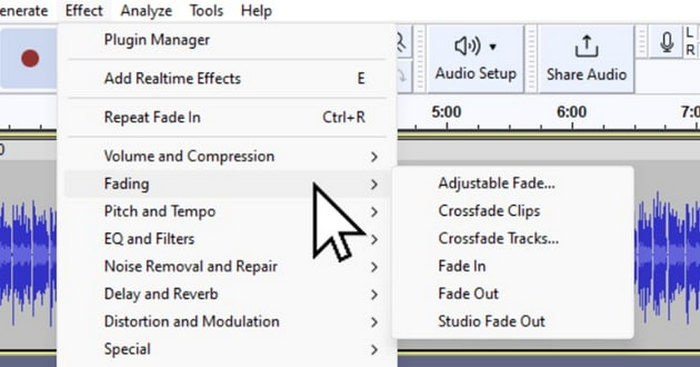
Step 3. To fade in your audio, choose Fade In among the fading options.
Step 4. Meanwhile, if you want to fade out your audio, choose Fade Out.
This method is used for brief audio selections, typically under a second, providing a smooth entry for sounds. For a more musical effect, apply the linear fade multiple times on the same selection to approximate an exponential fade, and for longer selections, up to ten seconds, creating a gradual and even reduction to silence.
Crossfade
Step 1. First, you need to align the two tracks.
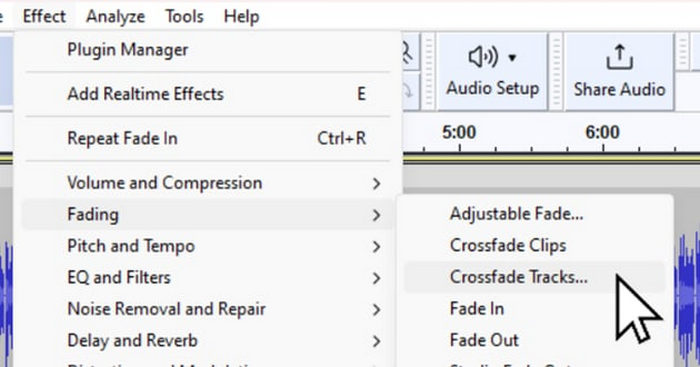
Step 2. After that, use the Selection tool to select the area to be crossfaded, click Effect, and choose Crossfade Tracks. This automatically fades out the upper track while fading in the lower track over the overlapping section.
This method is Ideal for blending different audio tracks in a project, ensuring a smooth and continuous listening experience.
Studio Fade
Step 1. Just like in the linear fade, click the track that you want to fade out.
Step 2. Lastly, go to the Effect menu and choose Studio Fade Out to apply the effect.
This method is usually used by professional recording studios for CD and LP tracks, providing a polished and natural end to a track.
Part 3. Fade Audio with Audacity Alternative
If you’re looking for an alternative tool because you find Audacity’s fade-out feature as somehow complex to utilize and requires a powerful operating system, the FVC-picked Video Converter Ultimate is the best choice. This all-in video and audio converter has a very user-friendly and intuitive interface, making it easy and efficient for users to fade in or fade out audio. Also, this tool supports a wide range of audio formats, making compatibility issues less stressful.
Here’s how to use this Audacity alternative to fade audio:
Step 1. On your computer device, install the Video Converter Ultimate.
Free DownloadFor Windows 7 or laterSecure Download
Free DownloadFor MacOS 10.7 or laterSecure Download
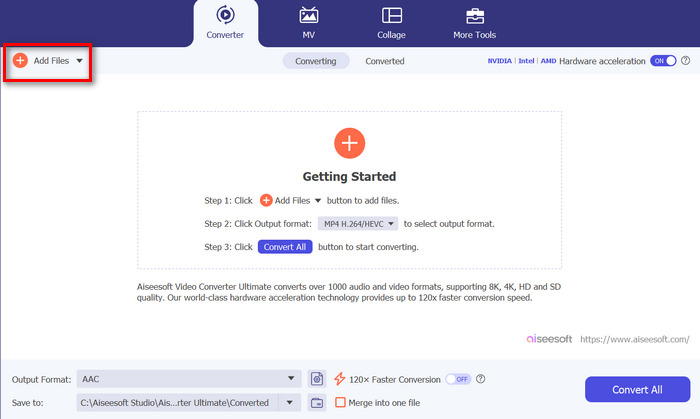
Step 2. Next, to import the audio file that you want to modify, click on the Add Files button.
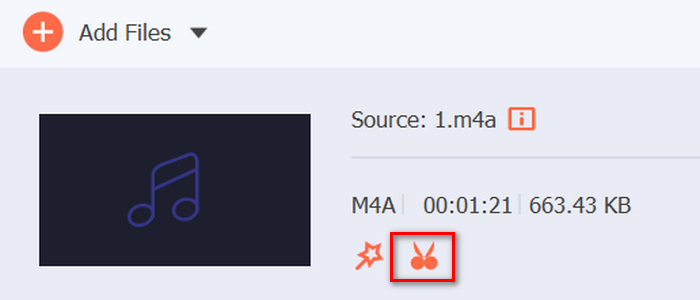
Step 3. Now click on the Cut button and this will head you to another window where you can set the fade in and fade out of your audio file.
Step 4. Click the boxes for Fade In and Fade Out options and set the duration for each effect according to your preference.
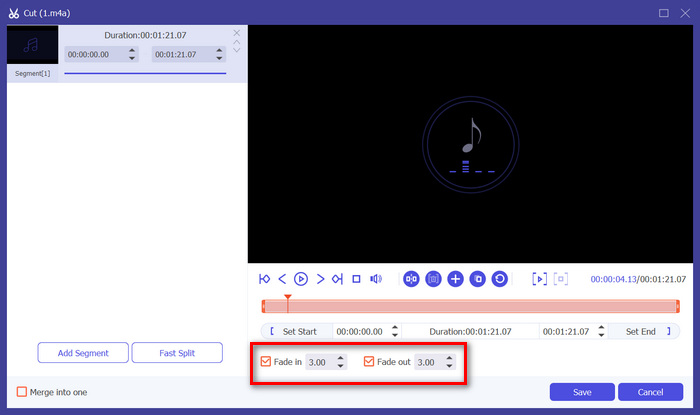
Step 5. Once done, you can preview your audio by playing it to check if the changes you’ve made are accurate and precise.
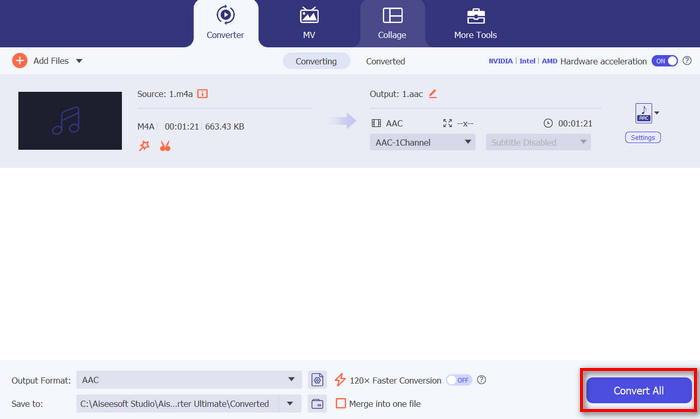
Step 6. Lastly, click the Save button. This will lead you back to the main interface, where you will click the Convert All button to export the audio file.
What makes this FVC-picked Video Converter Ultimate the best alternative for Audacity to fade out or fade in audio is its ease of use and efficiency. It allows users to achieve smooth, professional audio transitions quickly without the complexity of more advanced software. This makes it a reliable and user-friendly choice for anyone looking to enhance their audio editing process. Besides, before exporting, you can even enhance your faded audio file by using its editing features like compressing, cutting, speeding up audio, and more.
Part 4. FAQs about Fading Music in Audacity
How do you fade between clips in Audacity?
To fade between clips in Audacity, use the Crossfade feature. Align the two tracks you want to crossfade, select the overlapping area with the Selection tool, then go to the Effect menu and choose Crossfade Tracks. This will smoothly transition the audio from one track to the other, fading out the upper track while fading in the lower track.
What does crossfade mean in Audacity?
In Audacity, a crossfade refers to a seamless transition between two audio sections. This effect overlaps the sections so that as one track fades out, the other fades in. This technique is ideal for creating smooth transitions without abrupt changes and is often used in music mixing and podcast production.
What is the best volume for Audacity?
The best volume for your project in Audacity depends on the context and intended use. Generally, aim for a peak volume of around -1 dB to -3 dB to prevent clipping while maintaining audio clarity. If you ever find the audio volume unsatisfying, use Audacity to increase the volume.
Conclusion
Learning how to fade out an audio in Audacity is truly a valuable skill, especially when you like editing audio. Now, you have the background to what fade out/in method to use when you want to add fade effects to your audio. Additionally, for those seeking an alternative to Audacity, the FVC-picked Video Converter Ultimate provides an intuitive and user-friendly interface for achieving high-quality audio fades. Ready to enhance your audio editing skills? Try experimenting with these fade techniques in Audacity or Video Converter Ultimate today!
-
 Best 10 GIF Compressors for Desktop and Online Users
 In this post, you will learn about the best GIF compressors to help you fix your problem with large GIF files. Check them out and get the best insights.
-
 5 Most Pick Audio Recorder Apps on Android & iOS [2024 Updated]
 Doesn’t know what audio recorder app you should use? If so, this article will help you pick which app will help you with your audio recording task.
-
 Great MP4 to MP3 Converter Tools You Should Consider Using
 Unlock the power of audio versatility with our top-rated MP4 to MP3 converters. Experience seamless conversion, exceptional sound quality, and lightning-fast processing.