

إصلاح سريع وسهل – كيفية اقتصاص الصور في برنامج فوتوشوب
تُعَدّ صعوبة استخدام برنامج فوتوشوب للمبتدئين تحديًا حقيقيًا، فهو يحتوي على الكثير من الميزات المفيدة التي يجب أن يتعرّفوا عليها. وقصّ الصور ليس أمرًا بسيطًا؛ فتعلّم القصّ ضروري لتحسين التكوين، وإبراز العناصر الرئيسية، وضبط نِسَب الأبعاد، وتحسين الدقة، والتعبير الإبداعي، وتعزيز سرد القصة البصرية، وتصحيح الأخطاء، وتهيئة الصور لمنصات معيّنة. لذلك، إن كنت تتساءل: كيف أقصّ الصور في فوتوشوب؟ فأنت في المكان الصحيح. هذا الدليل مُعدّ ليقدّم لك شرحًا تفصيليًا خطوة بخطوة حول كيفية القص في فوتوشوب. سواء كنت مبتدئًا تبحث عن دليل بسيط، أو شخصًا يرغب في استكشاف تقنيات متقدمة، فستجد ما تحتاجه هنا. لنحوّل صورك ونُطلِق أفكارك الإبداعية إلى الواقع بقوّة القصّ الدقيق في فوتوشوب.

الجزء 1. كيفية قص الصور في برنامج فوتوشوب؟
يوجد أدناه دليل خطوة بخطوة حول كيفية قص الصور في Photoshop.
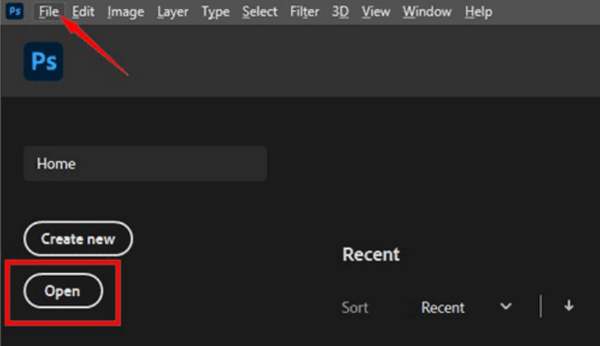
الخطوة 1. افتح برنامج فوتوشوب واستورد الصورة التي تريد قصّها عن طريق الذهاب إلى تبويب File (ملف).
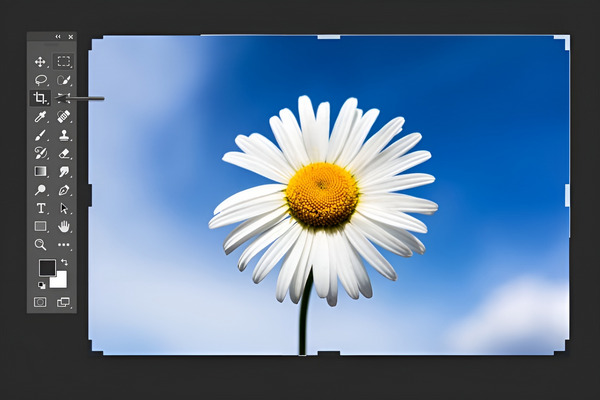
الخطوة 2. استخدم أداة Crop Tool (أداة القصّ) من شريط الأدوات الموجود على اليسار.
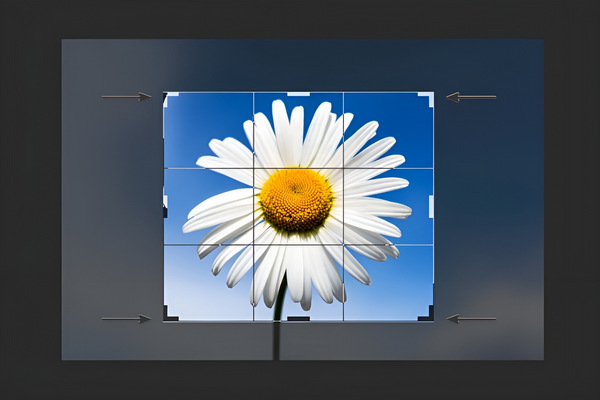
الخطوة 3. الآن ارسم مساحة القصّ أو اسحب مقابض الزوايا والحواف لتحديد حدود القص في صورتك، أو يمكنك من أعلى الشاشة العثور على خيارات خاصة بأداة القصّ. أدخل أبعادًا معيّنة أو نسب أبعاد محددة إذا لزم الأمر.
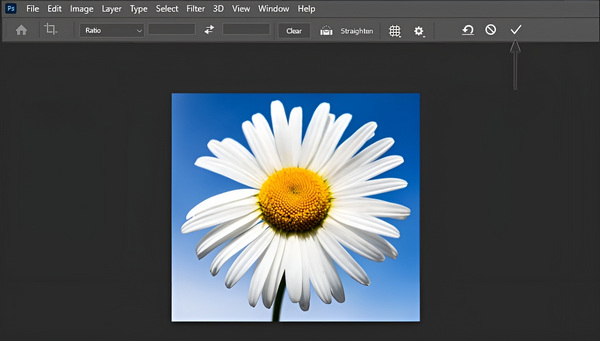
الخطوة 4. إذا وصلت إلى النتيجة المطلوبة، فقط انقر على زر Check (علامة الصح) ثم احفظ الصورة المقصوصة عن طريق الذهاب إلى File (ملف) واختيار خيار Save as (حفظ باسم) لحفظ الصورة بعد قصّها.
تذكر أن الاقتصاص في Photoshop غير مدمر، لذا يمكنك دائمًا الرجوع وإعادة ضبط الاقتصاص أو العودة إلى الصورة الأصلية. ما عليك سوى تحديد أداة الاقتصاص مرة أخرى وتعديلها حسب الحاجة. كما يتيح لك Photoshop أيضًا تغيير حجم الصورة وضغطها عند محاولة تصديرها.
الجزء 2. لماذا يظهر الاقتصاص باللون الرمادي في Photoshop؟ - الأسباب والحلول
قد تكون أداة Crop في Photoshop باللون الرمادي لعدة أسباب. إذا لم تقم باختيار طبقة في لوحة الطبقات أو إذا كانت صورتك عبارة عن طبقة خلفية، فقد تظل أداة الاقتصاص غير نشطة، وهكذا. يوضح الجدول أدناه الأسباب المحتملة لتحول لون المحصول إلى اللون الرمادي، بالإضافة إلى الحلول الممكنة لإصلاحها.
| الأسباب المحتملة لأداة القطع ذات اللون الرمادي في Photoshop | حلول |
| 1. لا توجد طبقة نشطة | تأكد من تحديد طبقة في لوحة الطبقات لتنشيط أداة الاقتصاص. |
| 2. طبقة الخلفية | لفتح الاقتصاص، انقر نقرًا مزدوجًا على طبقة الخلفية وقم بتحويلها إلى طبقة عادية. |
| 3. تم تحديد طبقة النص أو الشكل | لكي تعمل أداة Crop، اختر طبقة مبنية على البكسل بدلاً من طبقة النص أو الشكل. |
| 4. الطبقة المقفلة | قم بفحص الطبقة وفتحها في لوحة الطبقات لتمكين أداة الاقتصاص. |
| 5. الصورة هي كائن ذكي | لتمكين الاقتصاص، انقر نقرًا مزدوجًا فوق الكائن الذكي، وقم بإجراء التغييرات اللازمة، ثم احفظه. |
| 6. طبقة فارغة أو مخفية | تأكد من أن الطبقة تحتوي على محتوى مرئي وليست مخفية لتنشيط أداة الاقتصاص. |
| 7. طبقة الخلفية مقفلة في أوضاع معينة | اضبط وضع المزج لطبقة الخلفية لفتح أداة الاقتصاص. |
الجزء 3. نصائح لتصغير الصورة دون قصها عبر الإنترنت
لتصغير حجم الصورة دون قصّها، عليك استخدام أداة ضغط صور أو أداة تغيير حجم عبر الإنترنت. واحدة من أفضل أدوات ضغط الصور التي يمكن لأي شخص استخدامها الآن هي أداة FVC Free Image Compressor. هذه الأداة سهلة الاستخدام للغاية، ومصمَّمة لتقليل حجم صور JPEG وPNG وSVG وGIF دون التأثير في جودتها. إضافةً إلى ذلك، تستخدم هذه الأداة خوارزميات متقدمة للتحسين والضغط لتحقيق أفضل نسبة ضغط ممكنة.
الخصائص الرئيسية:
الضغط على دفعات: يمكن للمستخدمين ضغط عدّة صور في الوقت نفسه، مع دعم ما يصل إلى 40 صورة، بحجم أقصى 5 ميجابايت لكل صورة. تضمن الأداة ضغطًا فعّالًا دون فقدان ملحوظ في الجودة.
الضغط التلقائي: جميع الصور التي يتم رفعها تخضع للضغط التلقائي، مما يجعل العملية سريعة وفعّالة. يمكن للمستخدمين ببساطة رفع الصور، وضغطها، ثم تنزيلها دون أي تدخل يدوي.
توافق واسع: يدعم FVC Free Image Compressor العديد من تنسيقات الصور، بما في ذلك JPEG وPNG وSVG وGIF. يكون تنسيق الإخراج بصيغة PNG. اطّلع على هذه المقالة لمعرفة كيفية ضغط صور GIF هنا.
لا حاجة لحساب: على عكس بعض الأدوات الأخرى، لا يتطلّب FVC Free Image Compressor أي تسجيل أو تسجيل دخول أو إنشاء حساب. إنها أداة بسيطة وخالية من التعقيدات، ومجانية تمامًا دون أي رسوم مخفية.
حماية الخصوصية: يمكن للمستخدمين الوثوق بأن الصور التي يرفعونها محمية؛ إذ تضمن الأداة الحفاظ على الخصوصية ومنع الوصول غير المصرح به إلى الصور المرفوعة.
آراء العملاء: أشاد المستخدمون بالأداة نظرًا لسرعة الضغط المذهلة فيها، وبساطة واجهتها، وفعاليتها في تقليل أحجام الملفات مع الحفاظ على جودة الصورة.
دليل خطوة بخطوة لاقتصاص صورة عبر الإنترنت:
الخطوة 1. أولًا، توجّه إلى موقعهم الرسمي.
الخطوة 2. الآن، استورد صورك بالضغط على زر Upload Images (رفع الصور).
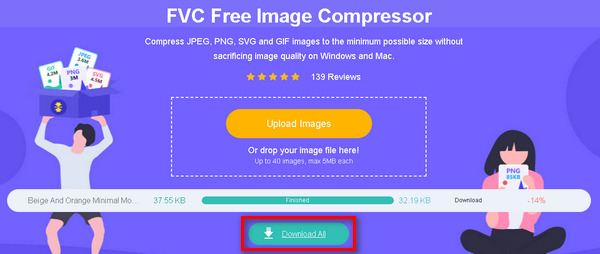
الخطوة 3. يُرجى الانتظار حتى تكتمل عملية المعالجة والضغط. عند الانتهاء، سيتم إعلامك بشريط حالة يوضّح نسبة الاكتمال وتفاصيل حجم الصورة بعد ضغطها. اضغط على زر Download (تنزيل) لحفظ صورتك.
يعد FVC Free Image Compressor بالفعل حلاً موثوقًا للأفراد الذين يسعون إلى تحسين أحجام الصور لأغراض مختلفة، بما في ذلك زيادة سرعة موقع الويب ومشاركة الصور وتوفير مساحة التخزين. إنه يتميز بواجهته سهلة الاستخدام، والضغط التلقائي، والالتزام بالحفاظ على مخرجات عالية الجودة.
الجزء 4. الأسئلة الشائعة حول قص صورة في Photoshop
أين توجد أداة القطع في Photoshop CC؟
في Photoshop CC، يمكنك العثور على أداة Crop في شريط الأدوات الموجود على الجانب الأيسر من الشاشة. يتم تمثيله برمز يشبه إطار الاقتصاص. إذا لم تتمكن من تحديد موقعه، فاضغط على المفتاح C بلوحة المفاتيح لتنشيط أداة الاقتصاص.
كيف يمكنني الاقتصاص في Photoshop باستخدام أداة التحديد السريع؟
تُستخدم أداة التحديد السريع (Quick Selection) في الأساس لإنشاء التحديدات، وليس للقص مباشرة. لاستخدامها في القص، اتبع الخطوات التالية:
1. أولًا، استخدم أداة Quick Selection لإجراء التحديد الذي تريده.
2. بعد الانتهاء من التحديد، انتقل إلى قائمة Select (تحديد) واختر “Inverse” (عكس التحديد) لعكس التحديد.
3. اضغط على Ctrl + Shift + I في نظام ويندوز أو Cmd + Shift + I في نظام ماك لعكس التحديد.
4. أخيرًا، انتقل إلى قائمة Image (صورة)، واختر Crop (قصّ)، وستتم عملية قصّ الصورة تلقائيًا بناءً على المنطقة المحددة.
كيف أقوم بقص التحديد ونقله في Photoshop؟
لقصّ تحديد ما ونقله في فوتوشوب، استخدم الخطوات التالية:
1. أنشئ التحديد باستخدام أي أداة من أدوات التحديد مثل المستطيل (Rectangular Marquee) أو أداة اللاسو (Lasso).
2. اضغط على Ctrl + X في نظام ويندوز أو Cmd + X في نظام ماك لقصّ المنطقة المحددة.
3. انتقل إلى الموضع الذي تريد وضع التحديد فيه داخل الصورة.
4. اضغط على Ctrl + V في نظام ويندوز أو Cmd + V في نظام ماك للصق التحديد المقصوص في الموضع الجديد.
هل يمكنني قص عدة صور مرة واحدة في Photoshop؟
لا يحتوي Photoshop على ميزة مضمنة لاقتصاص صور متعددة في وقت واحد. ومع ذلك، يمكنك إنشاء إجراء لأتمتة عملية الاقتصاص لمجموعة من الصور. قم بتسجيل إجراء اقتصاص على صورة واحدة، ثم قم بتطبيقه على مجلد الصور باستخدام أمر Batch ضمن قائمة File.
هل هناك طريقة لاقتصاص الصورة دون فقدان الدقة الأصلية في Photoshop؟
نعم، في Photoshop، يمكنك استخدام ميزة Content-Aware Crop لتوسيع اللوحة القماشية مع الحفاظ على الدقة الأصلية. يتيح لك ذلك اقتصاص الصورة دون التخلص نهائيًا من أي وحدات بكسل، مما يمنحك المرونة اللازمة لإعادة ضبط الاقتصاص لاحقًا دون فقدان الجودة.
خاتمة
أصبحت الآن مُلمًّا بمعرفة كيفية القص في فوتوشوب. سواء كنت مبتدئًا أو محترفًا، فقد غطّى هذا الدليل كل ما تحتاجه، من الأساسيات إلى حل المشكلات، بالإضافة إلى أداة مساعدة لتغيير حجم الصور دون فقدان الجودة. هل أنت مستعد لإطلاق العنان لإبداعك؟ انطلق واستكشف الإمكانيات الكبيرة التي يقدّمها لك فوتوشوب.
-
 كيفية قص ملف MP4 دون فقدان أي جودة للفيديو [2025]
 تعرف على كيفية قص ملفات MP4 من خلال الخطوات السهلة المتوفرة لك فقط. لذا، استمر في الوتيرة لأننا نقدم لك أفضل أدوات الاقتصاص التي يمكنك استخدامها.
-
 دليل خطوة بخطوة لقص صورة في Photoshop
 هل تستخدم الفوتوشوب؟ قد تكون هذه المقالة لك. تعرف على كيفية قص الصورة في Photoshop بسرعة وسهولة. اقرأها الآن واكتشف شيئًا ما.
-
 كيفية إزالة العلامة المائية من الصورة بالفوتوشوب [بالخطوات]
 يعد Photoshop أحد أدوات التحرير الشائعة. احصل على البرنامج التعليمي المجاني هنا باستخدام Photoshop لإزالة العلامة المائية من الصور. أيضا ، اكتشف طرق بديلة.