


How to Compress an Image in Photoshop: Lossless Result
Photoshop is a commonly and widely used photo editing software. Because of its incredible and useful features, this software app became a go-to tool for professional photo editors to enhance their photos.
Now, if you’re dealing with large image files and you find them challenging to handle, you can actually compress them. With that, this article will teach you three different methods and one alternative on how to shrink an image in Photoshop. We understand that using this tool might be overwhelming for some, but this guide will make it easy for you to compress your photos. Let’s not make this any longer. Let’s get started!

Part 1. How to Shrink an Image in Photoshop by Converting Image Format
Yes! You can shrink an image in Photoshop by converting its image format. It is an effective way to compress images as different image formats have varying levels of compression. So, by choosing the right format for your needs, you can optimize images for various purposes.
Here’s how you can shrink an image in Photoshop:
Step 1. In your Photoshop, open the file that you want to convert. To do this, go to the File tab and click on the Open option.
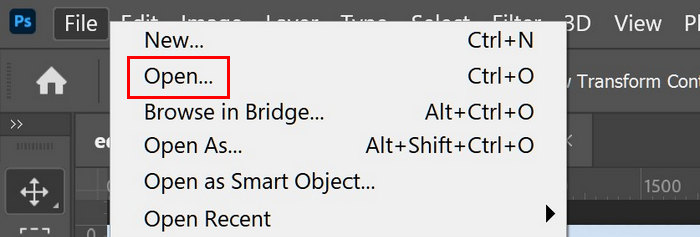
Step 2. Next, go back to the File tab, scroll down, and look for the Save As button in the menu.

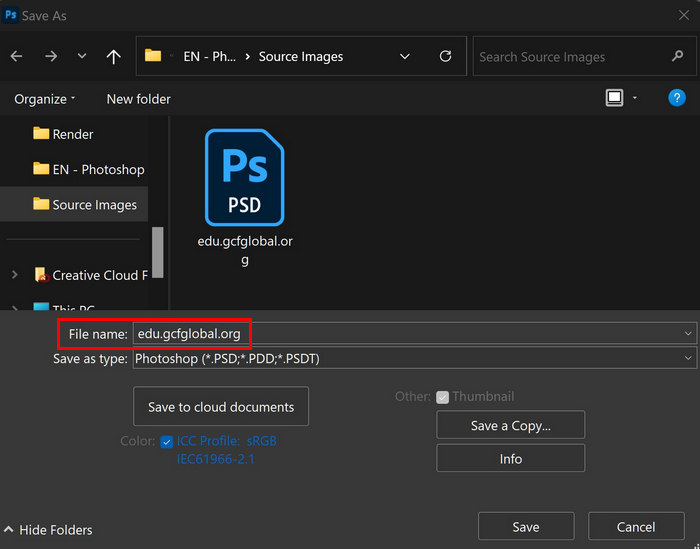
Step 3. Now, type your desired file name, then choose a location for the file.
Step 4. After that, choose among the list of file formats you want your photo to be converted to.
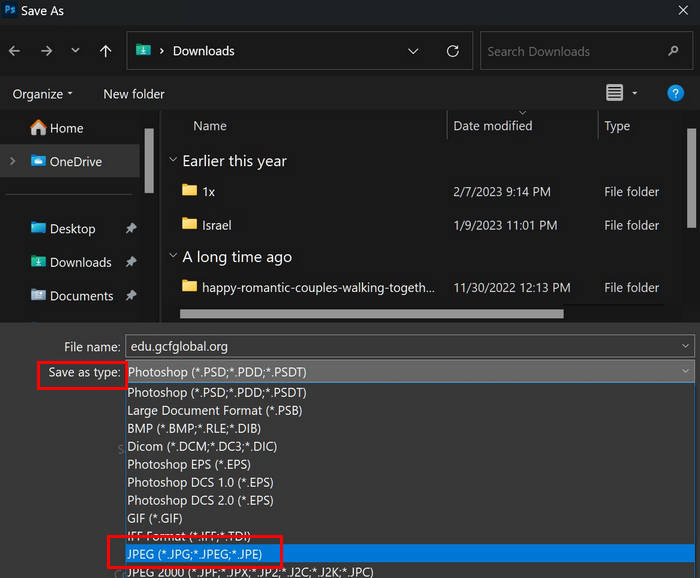
Step 5. Once done, just click Save.
Converting the format of your image can indeed shrink its size. So with this method, it will be easy for you to optimize your images for various needs. But take note, if you’re saving a storage for doing this method. Simply converteting the format of your photo can’t cause a significant loss in size.
Part 2. How to Reduce File Size in Photoshop by Reducing Resolution or Quality
Another method of reducing an image file size in Photoshop is through powerful editing features. Users can change their image sizes, as well as their quality and format settings, to achieve a desirable file size without experiencing a significant loss of quality.
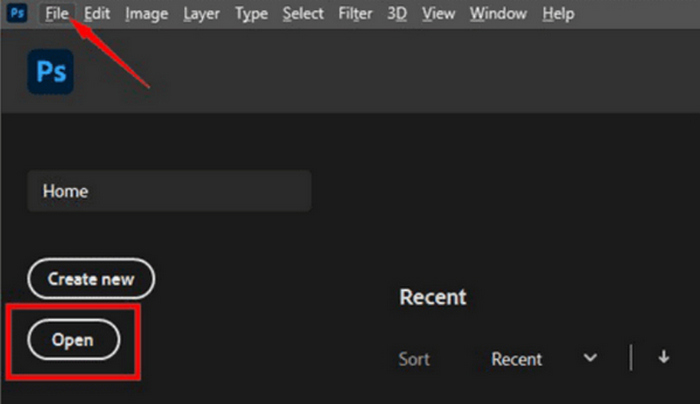
Step 1. Open your image in Photoshop by clicking Open or go to File and select the image files that you want to resize.
Step 2. Now, go to the Image tab and select Image Size.

Step 3. In the Image Size dialog box, choose Pixels from the drop-down menu. To set specific dimensions to compress your image files, enter values in width and height text boxes and click OK to resize the image.
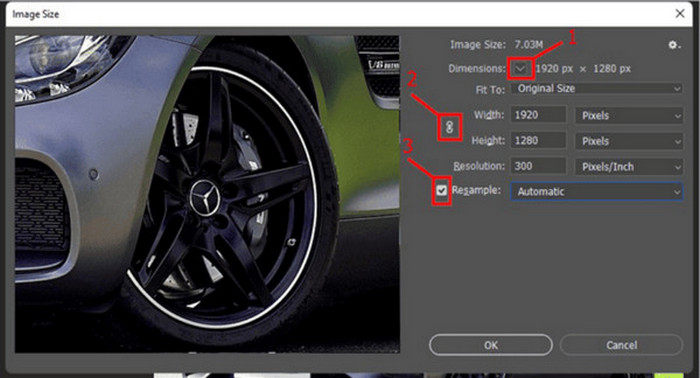
Step 4. Lastly, save your compressed PNG by clicking the Save As button under the File tab.
Save the PSD file in PNG format before saving it.
Step 1. Open your image in Photoshop by clicking Open or go to File and select the image files that you want to compress.
Step 2. Now, go to the Image tab and select Image Size.
Step 3. In the Image Size dialog box, choose Inches from the drop-down menu. To set specific dimensions in order to compress your image files, enter values in width and height text boxes and click OK to resize the image.
photoshop-image-size-inchesStep 4. Lastly, click the Save As button under the File tab to save the final image.
Both of these methods can significantly help compress an image file in Photoshop. However, you need to trial and error the size you input into the settings to achieve the best size and quality of your photos.
Part 3. How to Batch Compress Images in Photoshop
Another way to compress images in Photoshop is to do them in batch. This method is particularly helpful for those who need to compress a bunch of image files. In order to streamline this process, users can batch-compress their photos in Photoshop. Here’s how:
Step 1. You need to save first all the photos you want to batch compress in a single folder.
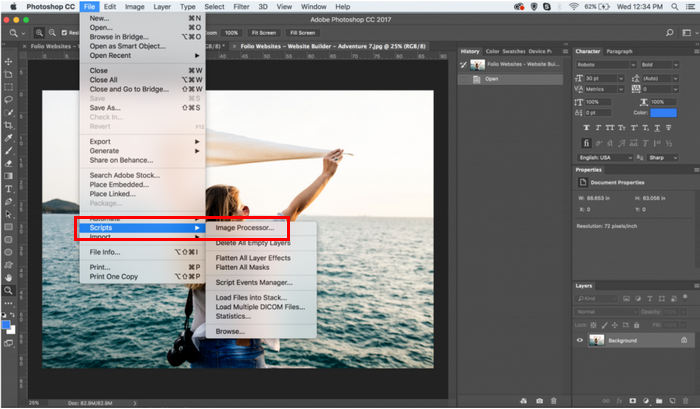
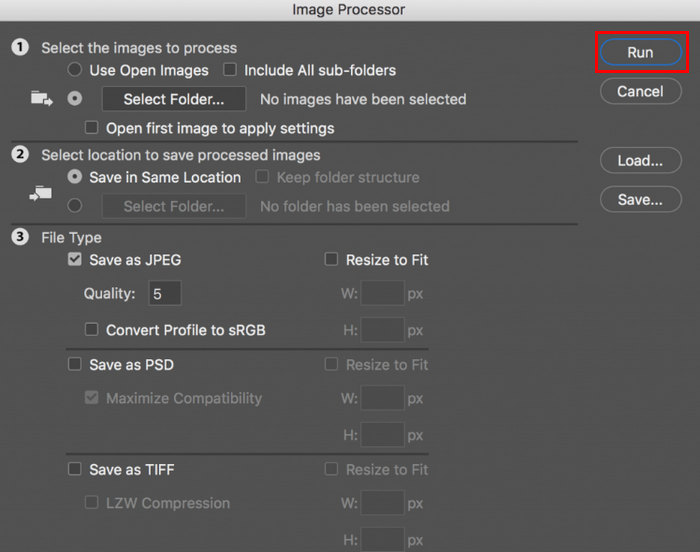
Step 2. Open your Photoshop and then go to the File tab, click Script, and choose Image Processor.
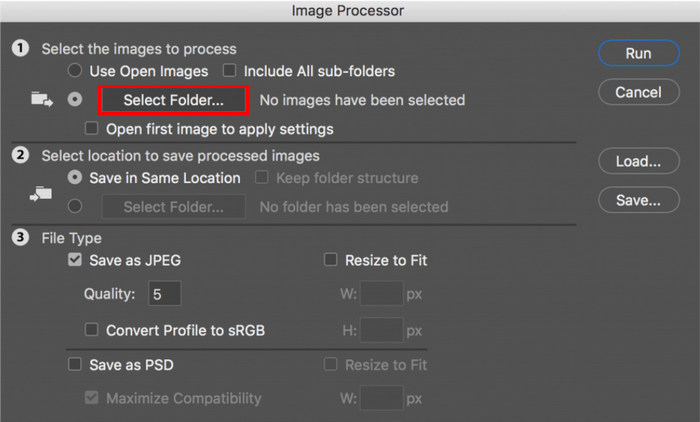
Step 3. Next, import the photos that you want to compress by clicking the Select Folder under the Select the images to process.
Step 4. After that, a new folder will be automatically created in the original folder, and this is where the compressed images will be stored or saved.
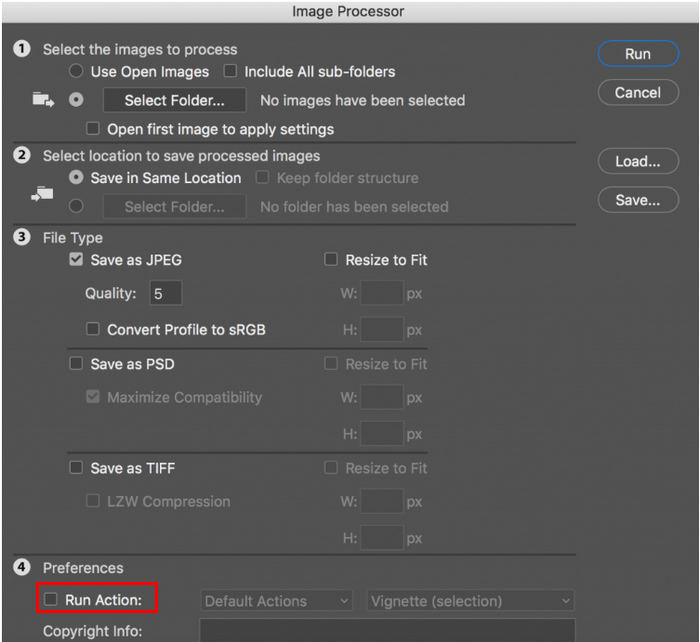
Step 5. Under the File Type section, adjust the settings to resize your image file. Tick the Resize to Fit box and set the maximum height and width of your compressed photo.

Step 6. In the Quality field, enter a number between 1 and 12. Take note that the higher the number, the bigger the file size. Meanwhile, if you are compressing JPG file formats, remember to tick the Save as JPEG box.
Step 7. Now, click the Run Action button to view the actions available.
Step 8. Once done, click the Run button. The images in your folder will be processed and saved to the specified destination folder.
This method is really great when dealing with a number of files that need to be compressed. However, some users might find this method a little challenging as it may require complex steps.
Part 4. Easier Photoshop Alternative to Compress an Image
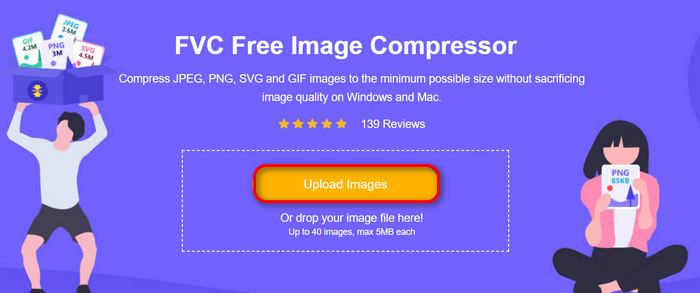
If you’re looking for an easier alternative to shrink an image in Photoshop, you can use the FVC Free Image Compressor. This tool is free and will automatically compress your photos, resulting in a significant loss of size but almost lossless quality. Moreover, just like Photoshop, you can also batch compress up to 40 images in just one click using this tool. To use this tool, follow the steps below:
Step 1. On your browser, type in FVC Free Image Compressor and look for it.
Step 2. After that, once you’re on its main interface, click Upload Images to import the images that you want to compress.
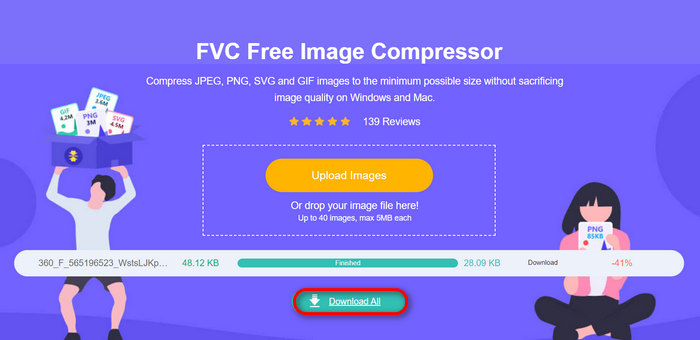
Step 3. After compressing your images, you can preview them by reviewing their new sizes after the compression. Lastly, click Download All to save your image.
This alternative tool can help you in a lot of aspects. It’s free compared to Photoshop, easy to use, and supports batch compression. So, if you’re looking for an on-the-go compression tool, this image compressor is the one for you.
Part 5. FAQs about Shrinking an Image in Photoshop
How to see the actual size of an image in Photoshop?
To see the actual size of an image in Photoshop, you need to go to the image tab and click on the image size to check the dimensions.
What is a good image size for Photoshop?
A good image size in Photoshop depends on your intended use. For web use, images should generally be under 2000 pixels and saved in a format like JPEG with medium quality to balance quality and loading speed. For print, the image resolution should be at least 300 DPI (dots per inch), and the dimensions should match the print size.
What is the default image size in Photoshop in inches?
The default image size in Photoshop typically depends on the settings configured during the new document creation. By default, Photoshop may start with a document size of 8.5x11 inches at a resolution of 300 DPI, which is suitable for print.
Conclusion
Now that you know the different methods of how to shrink an image in Photoshop, you can easily optimize your photos for storage, web use, or sharing without compromising quality. Start using these techniques today to streamline your workflow and enhance your image editing skills.
-
 How to Reduce Photo File Size on iPhone: Steps for All iOS
 Dealing with large image files on your iPhone and finding it hard to upload them? This article will be your guide on how to reduce photo file size on iPhone.
-
 Does Google Drive Compress Photos? What’s the Truth?
 Are you also wondering if Google Drive Compresses Photos? Read our comprehensive review to uncover the truth and learn how it affects your image quality.
-
 3 Ways to Compress Images for Discord Emoji [Guide]
 If you’re looking for a method to compress images for Discord emojis due to their strict file size restriction, read this article and be guided by 3 easy ways.