Detailed Guide on How to Reverse Audio in Audacity [2024]
Reversing audio tracks can add a unique dimension and color to your music productions, generating captivating sound effects for creative storytelling. This style is widely used and is getting popular when it comes to enriching audio projects with depth and originality. So, if you’re editing audio in Audacity and looking to add a twist by reversing it, you’re in the right place!
In this article, we will walk you through detailed steps on how to reverse audio in Audacity and share valuable tips to help you make the most of this feature. By the end of this guide, you'll be ready to reverse your audio tracks and explore new creative horizons easily. So, get ready to transform your audio projects and discover the exciting potential of reversed audio!

Part 1. How to Reverse Audio in Audacity
Audacity is a program designed to empower users to edit audio files without the need for expensive premium tools, ensuring high-quality output at no cost. As an open-source tool, it is freely accessible to everyone and offers a long list of features typically found in paid software. Among its array of capabilities, Audacity stands out with its ability to reverse audio tracks. This feature allows users to just be creative with how they want their audio to sound. Usually, editors reverse their audio because it adds a unique effect to their projects.
Here’s how you can reverse audio in Audacity.
Step 1. Download and install Audacity on your computer.
Step 2. Launch the tool, go to the File menu in the top-left corner, and select Open. From there, browse your computer to locate and select the audio file or drag and drop the audio file that you want to reverse into the program.
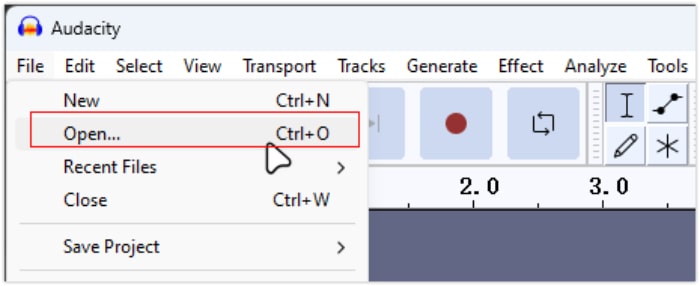
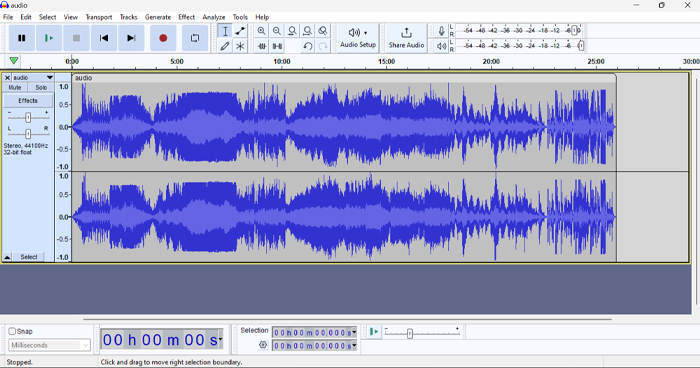
Step 3. Now, click on the audio track, go to the Select tab, and choose All to select the entire audio file.
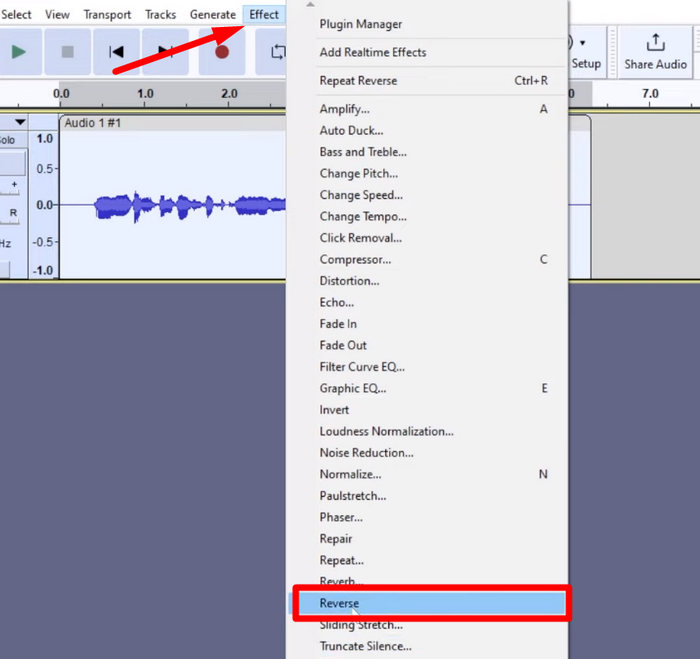
Step 4. To reverse the Audio, go to the Effect tab and select Reverse from the drop-down menu. Audacity will process and reverse the selected audio clip.
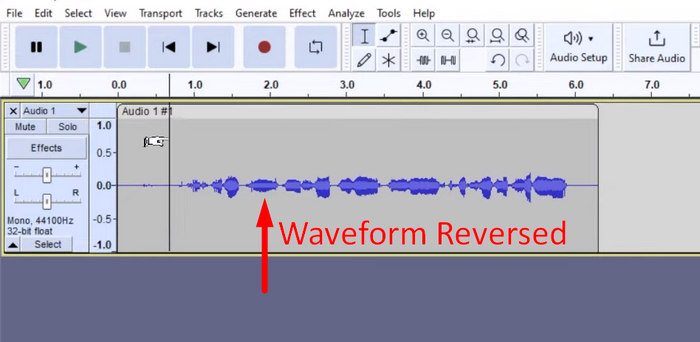
Step 5. You can preview the reversed audio by pressing the Spacebar on your keyboard. Alternatively, use the playback controls at the top left of the Audacity window and click the Play button.
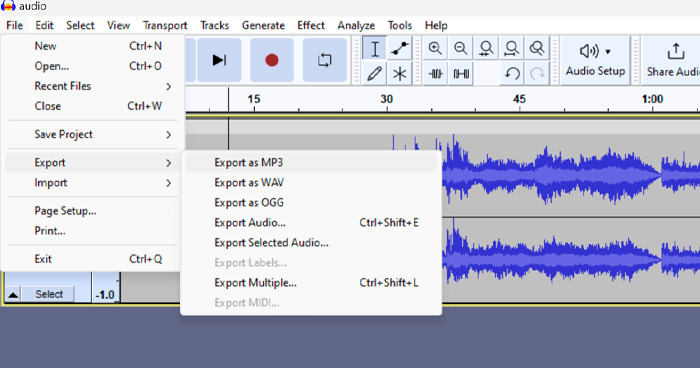
Step 6. Lastly, to export the reversed audio file, go back to the File menu, under it choose Export. That way, your audio will be saved as a new file. Meanwhile, don’t forget to choose your preferred audio file format before exporting them.
Due to some issues regarding losing work unexpectedly, regularly save your project while editing to prevent any loss of progress. You can quickly save your work by using Ctrl + S on Windows or Cmd + S on Mac. Additionally, consider using descriptive filenames and organizing your files in a dedicated folder to keep your projects well-organized and easily accessible.
Part 2. How to Reverse Part of Audio in Audacity
There are instances where users only wanted to reverse a part of audio in Audacity, maybe because there are only specific sections they want to emphasize or create a distinct effect. The steps below are almost the same as how to reverse an entire track. However, selecting a part of an audio is a bit tricky and needs emphasis in the steps to avoid confusion, especially for beginners.
Here’s how to reverse a part of audio in Audacity.
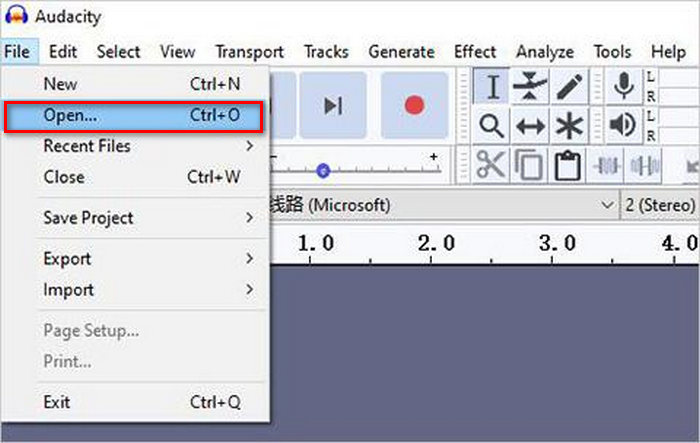
Step 1. When you’re on the main interface of the tool, go to the File menu in the top-left corner and select Open. From there, browse your computer to locate and select the audio file or drag and drop the audio file that you want to reverse into the program.

Step 2. Now, to select a part of audio that you want to reverse, utilize the Zoom feature to zoom in on the wave track and drag your mouse to select the section or part of the audio that you only want to reverse.
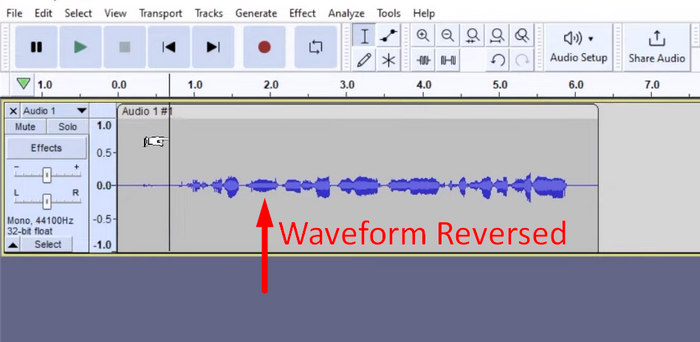
Step 3. To reverse the Audio, go to the Effect tab and select Reverse from the drop-down menu. Audacity will process and reverse the selected audio clip.

Step 4. You can preview the reversed audio by pressing the Spacebar on your keyboard. Alternatively, use the playback controls at the top left of the Audacity window and click the Play button.
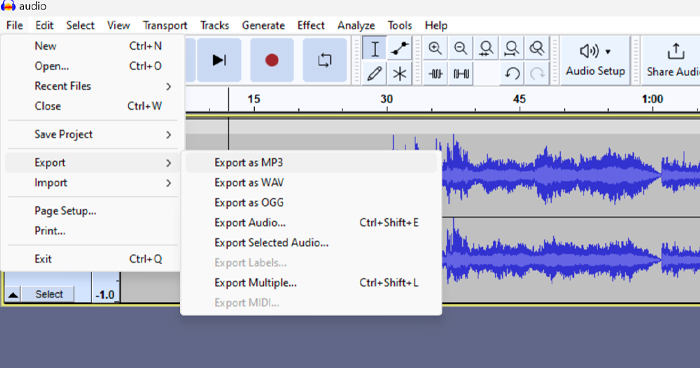
Step 5. Lastly, to export the reversed audio file, select Export under the File menu. Choose Export as and select your preferred audio file format before finally exporting them.
When selecting a specific part of the audio to reverse in Audacity, ensure that you accurately zoom in on the waveform to see where the section begins and ends clearly. This helps in making precise selections and avoids including unintended parts of the audio. Additionally, before reversing, use the Clip Split tool if needed to divide the audio into chunk segments, for example, cutting an MP3 audio, making it easier to manipulate and edit specific sections independently. This approach enhances control over your edits and ensures that the reversed audio achieves the desired effect seamlessly.
Part 3. Reverse Audio/Video with Audacity Alternative
Meanwhile, if you prefer a simpler and easier way to reverse audio or video, you can use this Audacity alternative, which is the FVC-picked Video Converter Ultimate. This total package video and audio tool may be known for its powerful conversion capabilities, but beyond that, this tool is also great for users who need a convenient way of reversing audio or video.
Step 1. On your computer, download and install the FVC-picked Video Converter Ultimate.
Free DownloadFor Windows 7 or laterSecure Download
Free DownloadFor MacOS 10.7 or laterSecure Download
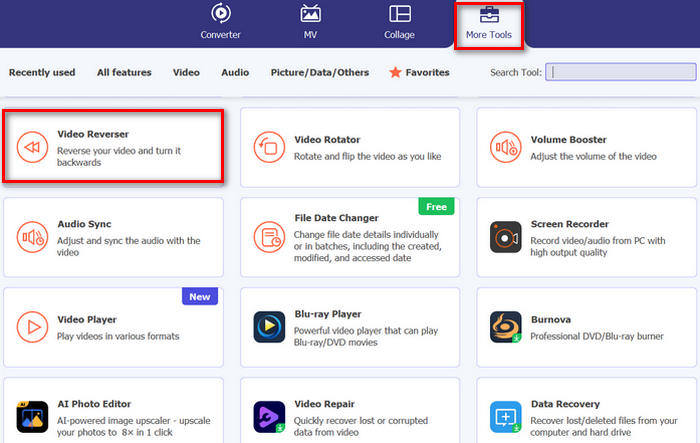
Step 2. Launch the tool and go to the Moretools tab. From there, select Video Reverser.
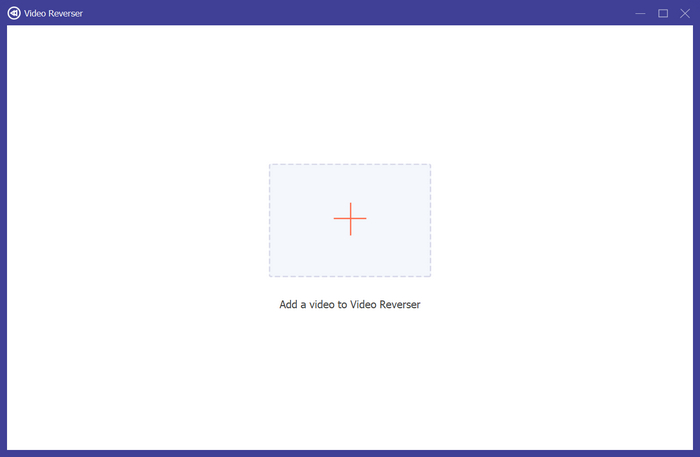
Step 3. Now, import the audio or video that you want to reverse by clicking the Add a Video to Video Reverser button.
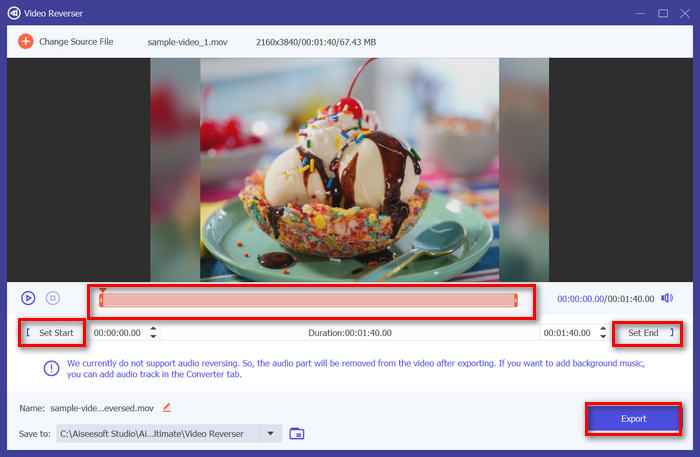
Step 4. Once you’re in the Video Reverser interface, if you wish to reverse the entire track, you can simply head over to the Export button to automatically reverse your file. But if you wish to reverse only a part, you can slide the bar and carefully choose the part of the audio or video that you want to reverse. Alternatively, you can simply encode the start time and time of the file part that you want to reverse. Once done, just click the Export button.
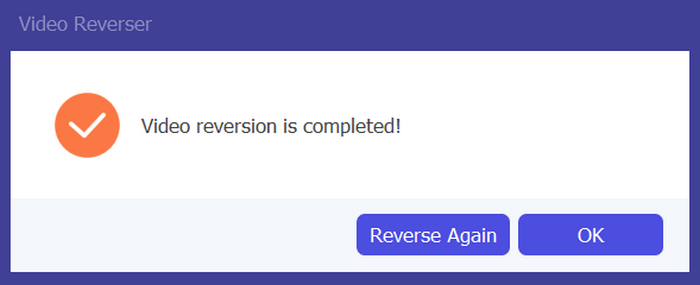
Step 5. When the exploring is complete, you’ll get this message, and you can access your reversed video in the folder on your computer.
There you have it! Easy peasy, right? You don’t need to get confused with a complex interface. With FVC-picked Video Converter Ultimate, everything you need is right at your fingertips.
Part 4. FAQs about Reversing Audio in Audacity
How to undo the reverse audio effect in Audacity?
If you have reversed an in Audacity and wish to undo it, you can easily revert to the original audio. Simply go to the Edit menu in the top-left corner of the Audacity interface and select Undo Reverse. Moreover, you can use the keyboard shortcut Ctrl + Z for Windows or Cmd + Z for Mac to undo the last action. This will revert the audio to its original state before the reverse effect is applied.
What audio formats does Audacity support for reversing audio?
Audacity supports various popular audio formats, such as WAV, MP3, FLAC, AIFF, and OGG.
Can you distort audio in Audacity?
Yes. You can distort audio in Audacity. Audacity offers several effects and tools that allow you to apply distortion to your audio tracks. To add this, go to Effect, click the Distortion and Modulation, and choose Distortion.
Can you convert audio in Audacity?
Yes, you can. Audacity supports plenty of audio formats. If you find any of your audio file is not compatible with your device, for example, you can use Audacity to convert AIFF to MP3 easily.
Conclusion
In conclusion, learning how to reverse audio in Audacity is simple and adds unique effects to your audio or video projects. Follow the detailed steps to start reversing your audio tracks today. For an easier alternative, try the FVC-picked Video Converter Ultimate. Ready to get creative? Try any of these methods now!


 Video Converter Ultimate
 Screen Recorder


