4 Ways to Screen Capture in Windows Media Player
Windows Media Player is a popular player that lets you display all sorts of media. The player comes with features such as viewing photos, a music player, watching videos, and a music collection organizer. The usage of Windows Media Player helps users to do tasks dealing with media, and in this article, we shed light on how to screen capture in Windows Media Player. Playing a memorable scene from a movie, a snippet of a tutorial, or a funny moment using the player lets you have the freedom to screenshot and save these moments at your convenience. However, many users might not be aware of the built-in tools and techniques available for capturing screenshots within this versatile player. Browse your way through the end of this article to learn four easy and effective methods to screen capture in Windows Media Player, which includes the use of software, shortcut keys, a snipping tool, and its built-in tool empowering you to capture those moments with ease.

Part 1. How to Take A Screenshot in Windows Media Player
Taking a screenshot in Windows Media Player is easy and should not consume your time in doing or learning about it. There are tons of ways to do it, and the recommended way to screenshot media players in Windows 11 or lower is the use of software tools like FVC picked Screen Recorder. This software is a versatile tool designed to meet the need for capturing screens of all types of media, particularly on Windows Media Player. With this software, users can perform on-screen tasks and record videos, audio, and games in one place, unlike other tools that focus on only one specific feature. Moreover, this software offers user-friendly, time-saving features. Its editing tools make it easy for users to edit their screenshots the moment they take them.
Step 1. Begin by downloading and installing this screenshot tool on your computer. Once the installation process is complete, open the software.
Free DownloadFor Windows 7 or laterSecure Download
Free DownloadFor MacOS 10.7 or laterSecure Download
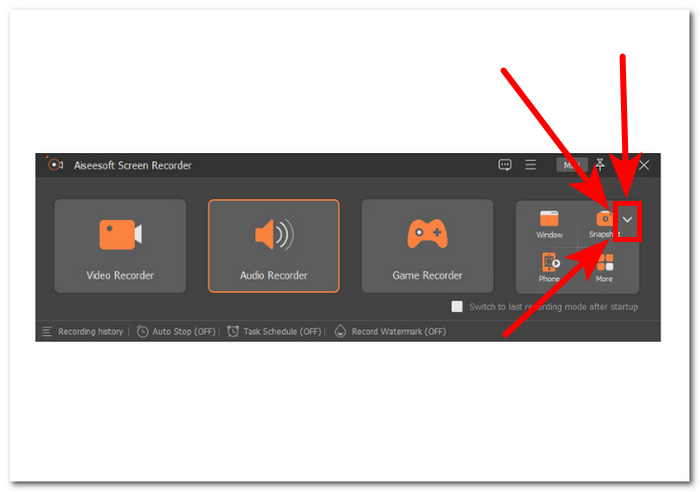
Step 2. Once the software is open, you will see an icon with a Snapshot arrow-down button located on the right side. Click on this button to proceed.
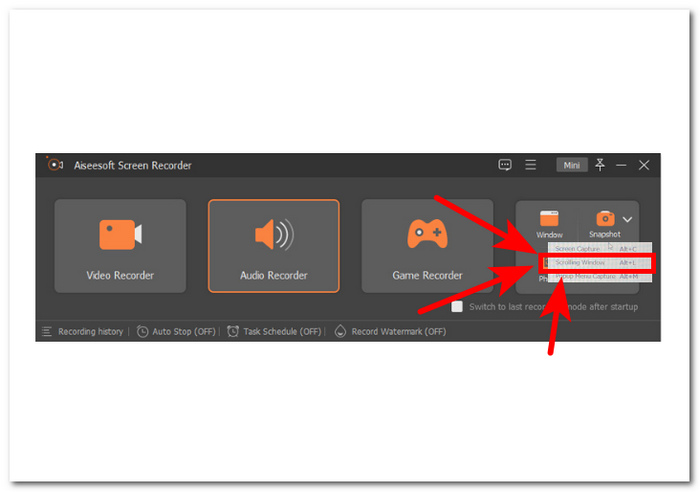
Step 3. Select the Scrolling Window option under the drop-down menu, Alternatively, shortcut Alt+L can be used on your keyboard.
Step 4. With the Scrolling Window option selected, the software will automatically take a screenshot. You can now scroll down to capture all the information you need. The software will capture the entire length of the page or document, allowing you to save or share it as needed.
FVC recommended Screen Recorder is a dependable tool that can be used to take a screenshot of a video on Windows Media Player. This software is available for free on both Mac and Windows devices, ensuring a wide user base. With its variety of screen recording and capturing features, this screenshot tool is perfect for anyone in need of a reliable and multi-purpose tool for capturing their computer screen.
Part 2. Screenshot in Windows Media Player With Windows Shortcuts
If you're using Windows Media Player and you need to take a screenshot, there's no need to download any third-party tools. To capture pictures from a video Windows Media Player, you can use shortcut keys to quickly and easily capture a screenshot of the video you're watching. This can be a great way to grab a still image from a video for reference or sharing with others. Simply use the appropriate shortcut keys and your screenshot will be saved for easy transfer to document or image editing software.
Step 1. To start, launch the Windows Media Player on your computer. Select the video you want to take a screenshot.
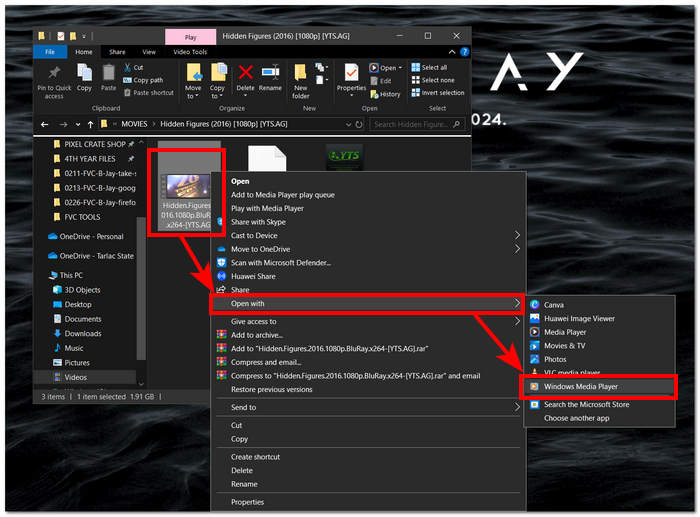
Step 2. When you reach the exact frame in the video that you want to capture as a screenshot, pause the video by clicking on the Pause button.
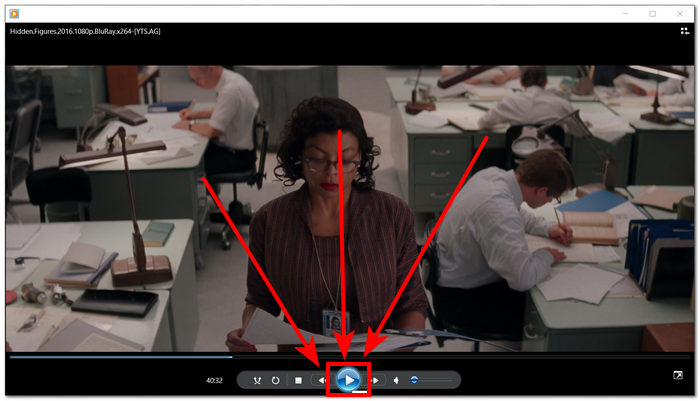
Step 3. Look for the PrtScn button on your keyboard and press it. This will screenshot the screen and save it as an image file. (How to take a screenshot without PrtSc?)
Step 4. The screenshot is automatically saved in your computer's default storage location. To find it, look for a pop-up window that says screenshot saved.
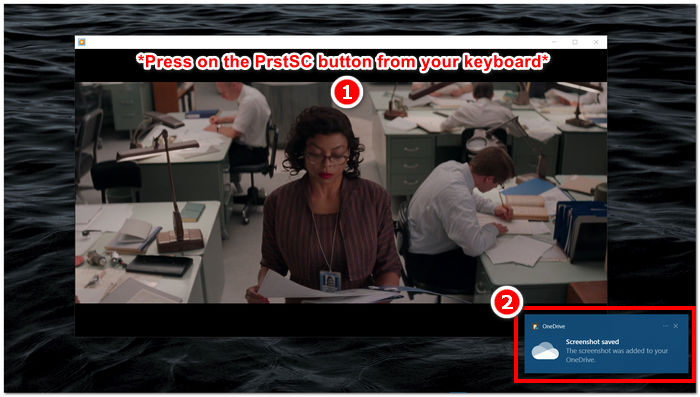
When taking a screenshot in Windows Media Player, using shortcut keys can save users time and eliminate the need to use a tool. While this method is efficient and beneficial for those in a hurry, it's important to note that it doesn't allow for any editing of the screenshot.
Part 3. How to Take A Screenshot in Windows Media Player with Snipping Tool
If you want to capture a screenshot while playing a video on Windows Media Player, you can easily do so without having to install any additional software. Windows Snipping tool, which is already built-in to all Windows devices, can be used to take screenshots of any part of your screen, including the video playback window on the media player. This feature can come in handy if you need to quickly capture a still image from a video for reference or sharing purposes.
Step 1. Open the video you wanted to screenshot with Windows Media Player.
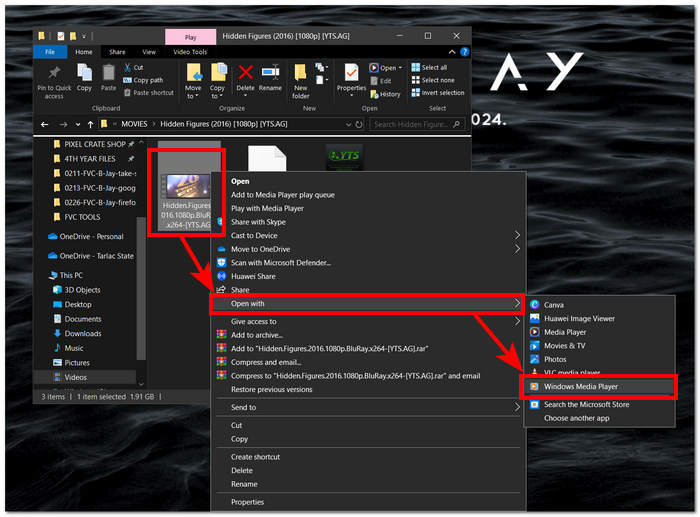
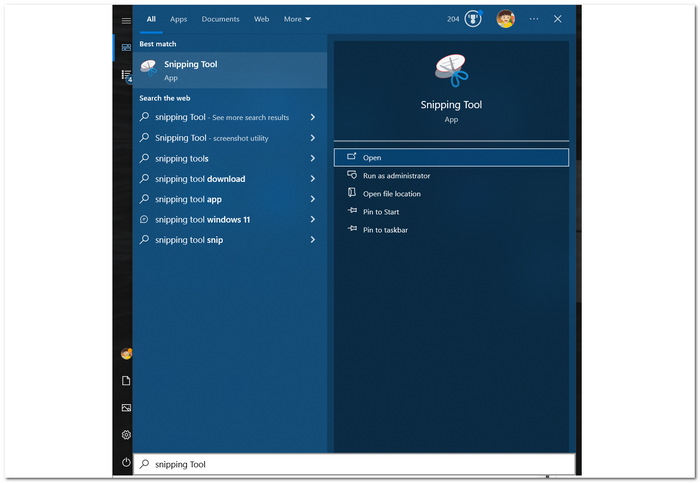
Step 2. Find the Snipping Tool on your Windows device by searching for it in the Start menu and then open it.
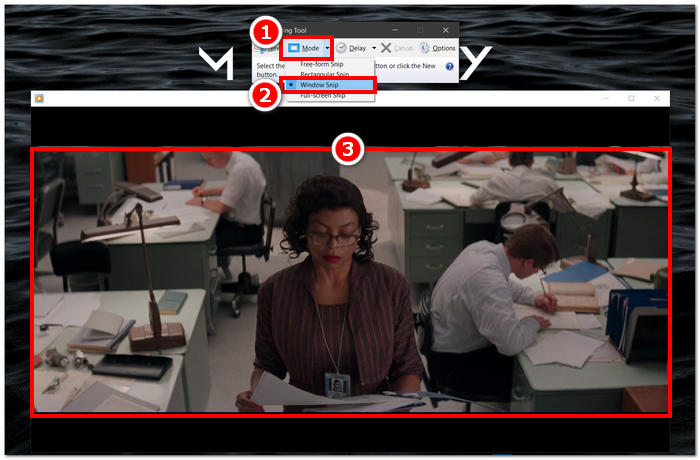
Step 3. On its interface, click on the Window Snip under the Mode section, then manually select the area you want to screenshot.
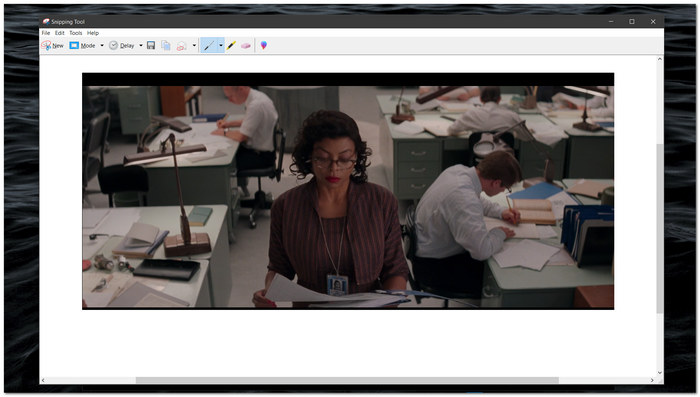
Step 4. After clicking on the area, a new window will open, allowing you to annotate and save to your computer.
Capturing screenshots while watching videos in Windows Media Player is made easy, thanks to the native capabilities of the Windows Snipping Tool. By leveraging the Windows Snipping Tool, users can enhance their media experience and streamline the process of capturing and sharing content seamlessly.
Part 4. How to Take A Screenshot in Windows Media Player with Its Built-In Tool
Windows Media Player does not come with a built-in feature, resulting in it not allowing users to take screenshots within the player. However, there is still one shortcut key that can be used, in addition to the ones mentioned above, to take screenshots in Windows Media Player.
Step 1. To take a screenshot of a video playing in Windows Media Player, first open the video in the player.
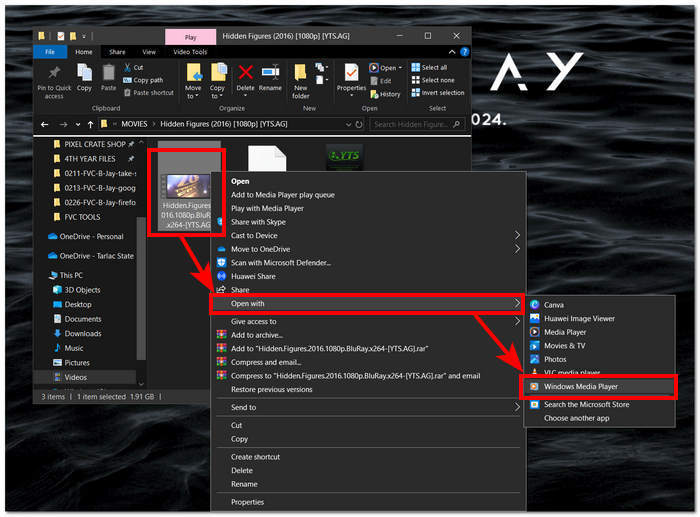
Step 2. You'll need to first Pause the player at the exact moment that you want to capture.
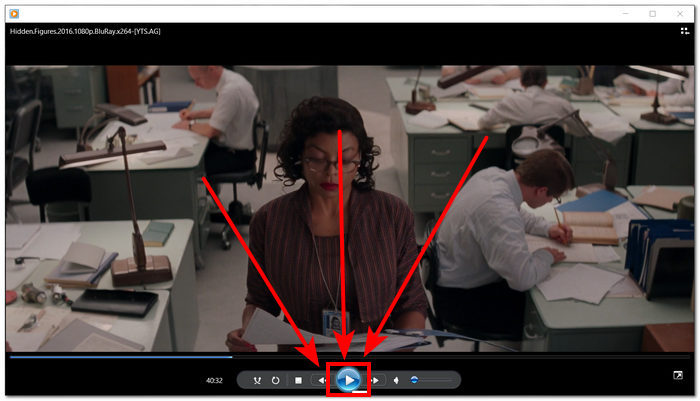
Step 3. To take a screenshot of a paused video on your computer, you can use the combination key of Windows Logo + Shift + S on your keyboard.
Step 4. After manually selecting the part you want to screenshot, it will be automatically saved to your clipboard. You can easily use it by pasting it into your desired email, messaging platform, or note-taking app.
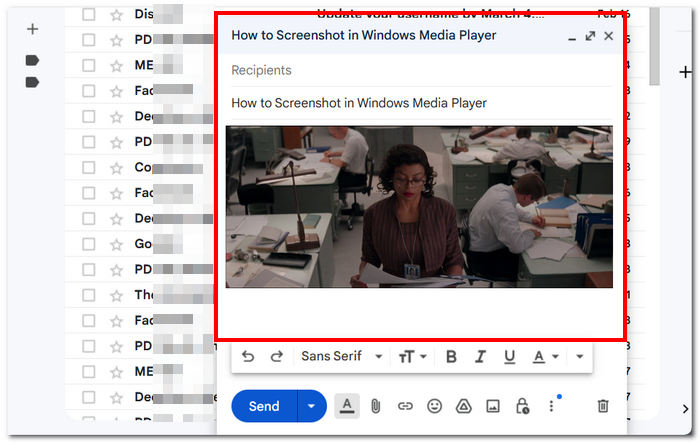
The Windows Media Player may not have a built-in feature to take screenshots. However, unlike the VLC screenshot, it is still a reliable and powerful media player, considering that it is free and pre-installed on your device.
Part 5. FAQs About How to Screenshot in Windows Media Player
Can I take screenshots in Windows Media Player without using any additional software?
It is possible to capture screenshots in Windows Media Player without any additional software. Windows has a built-in tool called the Snipping Tool that allows you to take screenshots of any part of your screen, including the video playback window in Windows Media Player.
Can I customize the settings of the Snipping Tool for better screenshotting?
The Snipping Tool offers customizable settings such as the default mode (e.g., rectangular snip, free-form snip), delay before capturing, and format in which screenshots are saved (e.g., PNG, JPEG).
Is there a faster way to take screenshots in Windows Media Player?
There are third-party screenshotting tools available that offer more advanced features and faster methods for taking screenshots. If you frequently need to take screenshots while using Windows Media Player, you can explore these options.
Can I capture screenshots of videos that are playing in full-screen mode?
Yes, it is possible to use the Snipping Tool to take screenshots even while videos are playing in full-screen mode. Simply switch to the Snipping Tool and capture the desired area of the screen containing the video.
What is the recommended method for taking high-quality screenshots in Windows Media Player?
The recommended method for taking high-quality screenshots in Windows Media Player is by using the software method. This tool allows users to select and capture specific areas of the screen, including the video playback window, ensuring clarity and accuracy in the screenshot. By leveraging the features of the software tool, users can effortlessly take crisp and detailed screenshots without the need for third-party software.
Conclusion
We've explored the various methods of capturing screenshots in Windows Media Player, ranging from software-based solutions to built-in tools like the Snipping Tool and shortcut keys. These techniques are accessible and can empower users to preserve and share significant moments from their media experiences effortlessly. With the functionalities explored herein, users can seamlessly integrate screen capturing into their Windows Media Player usage and elevate their media interactions.


 Video Converter Ultimate
 Screen Recorder

