How to Make a GIF from Your Photos Saved into Your iPhone
We used GIFs to make our plain text more engaging and became a better version than the images. Because they are moving animated static images. Also, because of the format's popularity a lot of users already try creating their own GIFs as well, whether on computers or phones. So now, we will be going to talk about how to make a GIF on an iPhone from photos you saved on your storage. Continue reading this write-up as we explain how to make GIFs and what are the different software you can use.

Part 1. How to Save Live Photo as GIF in Photos App
Did you know that you can create simple GIFs through your photos on iPhone? By using Photos. This pre-installed app stores a lot of images and videos on your phone. Basically, it is a storage of photos you take like Gallery on Android. But this tool does provide editing features that you might not know. Although it has that GIF maker like it still lacks some major editing features. To make your GIFs great and new to the eyes. Moreover, if you want to try the tool then follow the steps below and learn how to make a gif on iPhone from Photos.
Step 1. Open your pre-installed Camera on your iPhone.
Step 2. Then click the Live Photo on the top center and click the Capture button.
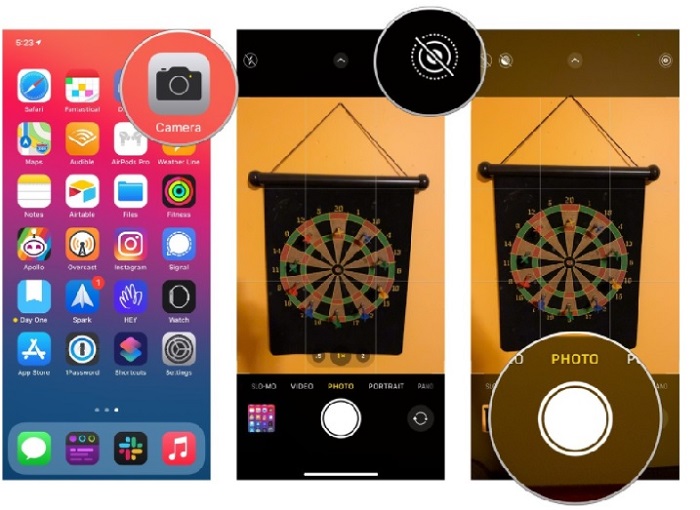
Step 3. After that, click the small square photo on the lower left side of the camera's interface. Then swipe the photo up and choose the GIF effects in there. After selecting it will automatically be saved and ready to share to the other people or social media.
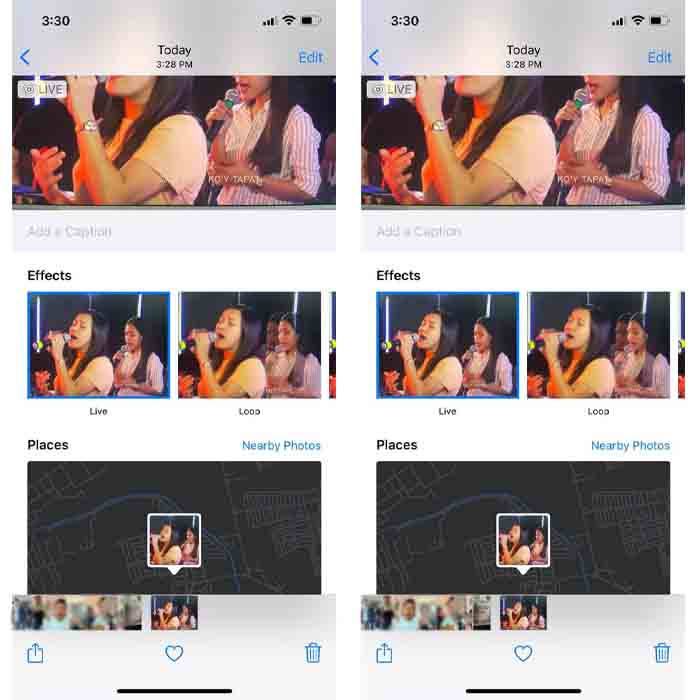
Pros
- No need to download because it is already pre-installed to your iPhone.
- Simple to use as an editing tool.
Cons
- You can't turn images into GIFs if it is not a live photo.
- It doesn't provide a lot of editing features to make your GIF amazing.
Part 2. How to Make a GIF on iPhone with GIPHY
GIPHY is the gigantic GIF storage you can access for free but if you register. And also, you can share your pre-made GIFs here to help other people by using your own made GIFs. But the tool doesn't support multiple images to make it as one. However, the filters in here are great and easy to use. So, if you want to GIPHY and create GIFs then follow the steps below.
Step 1. Download the GIPHY on your iPhone first and launch it after.
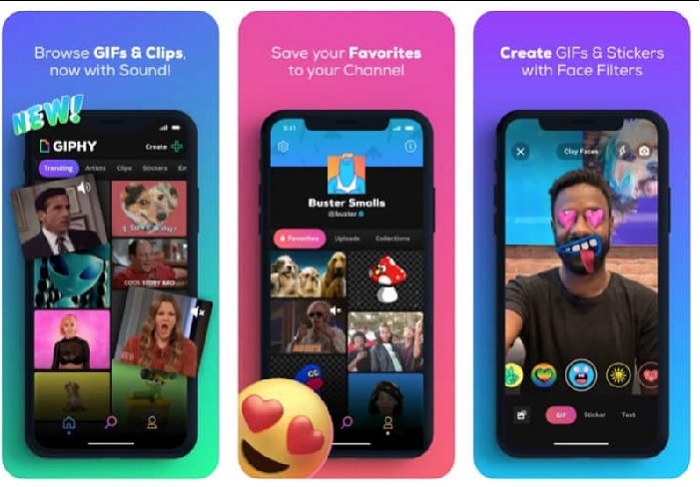
Step 2. Click the Create and on the upper left side click the album button and allow the tool to access your images.
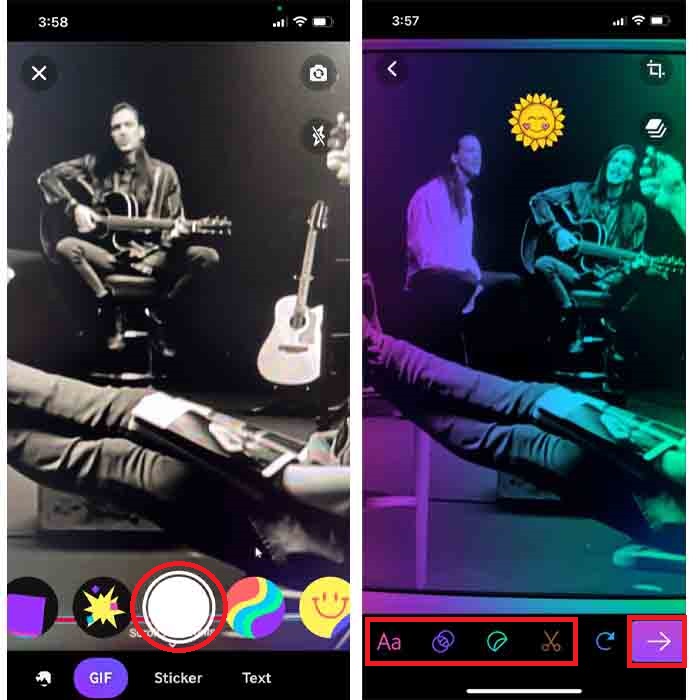
Then select your image you want to be turned into GIF and do the editing in the interface.
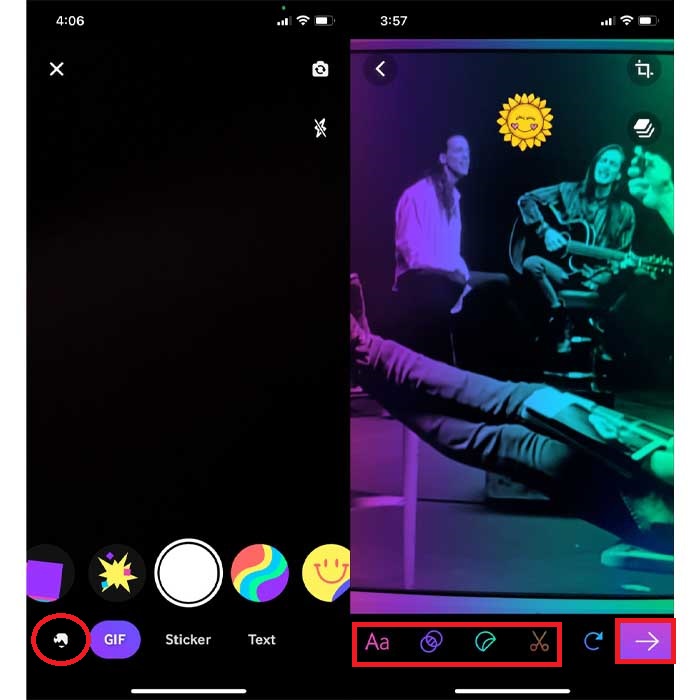
Step 3. You can't save the GIF directly to your iPhone, so you have two options. The first is to upload it to the GIPHY cloud storage then make it public or private or share it immediately.
Pros
- It is a huge library of GIFs.
- It has a better effect than the Photos can offer.
Cons
- You can't save the finished GIF directly to your storage. It is either you will save it to the account you've made on GIPHY or share it.
- Can't compile images to make GIFs.
Part 3. The Most Professional Tool to Make GIFs from Multiple Photos
If the tool presented first doesn't achieve the GIFs you want to make then try to use the Video Converter Ultimate. As this tool can create your photo GIFs better than the other two native apps and downloadable presents. But the tool is only available on desktop so you must transfer the multiple photos first to your desktop before you can make GIFs. Also, the filters you can use here are phenomenal that can make you amaze. So, to learn how to make a GIF on iPhone from multiple photos then follow the steps provided below.
Step 1. Download the Video Converter Ultimate first and install it.
Free DownloadFor Windows 7 or laterSecure Download
Free DownloadFor MacOS 10.7 or laterSecure Download
Step 2. And on the Toolbox section click the GIF Maker.
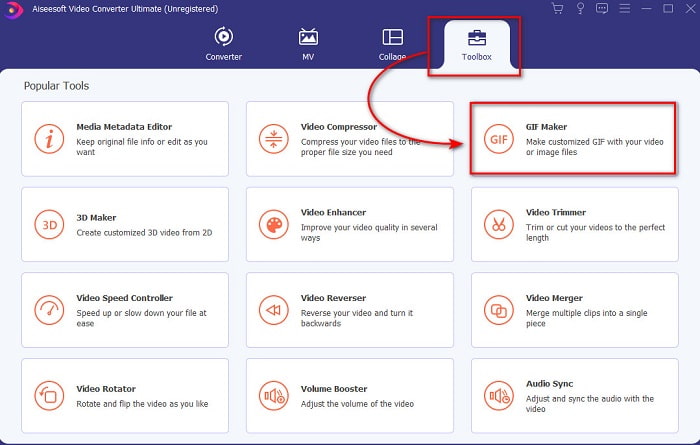
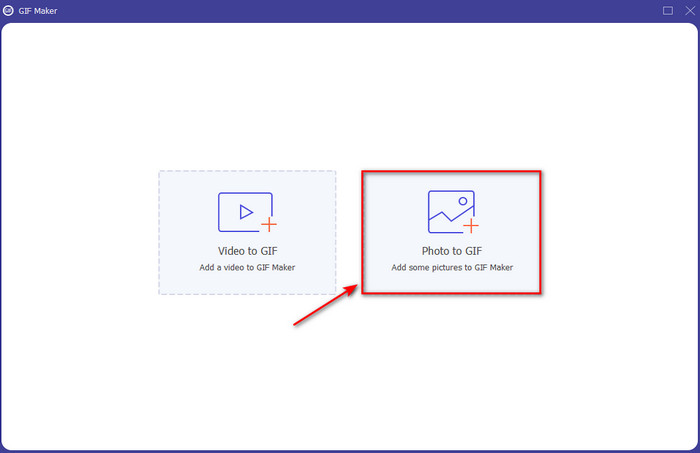
Step 3. Click the Photos to GIF and select the photo you want to be turned into GIF and click Open. Additionally, you can't add multiple images at first but you can add later. Then change the Output Settings for the GIF and click OK.
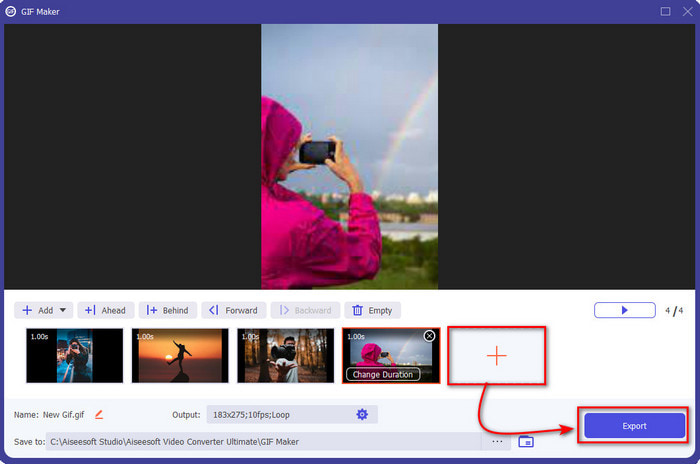
Step 4. To add the other images, you'll need to click the + button and select. Then after all the images have already been inserted, click the Export.
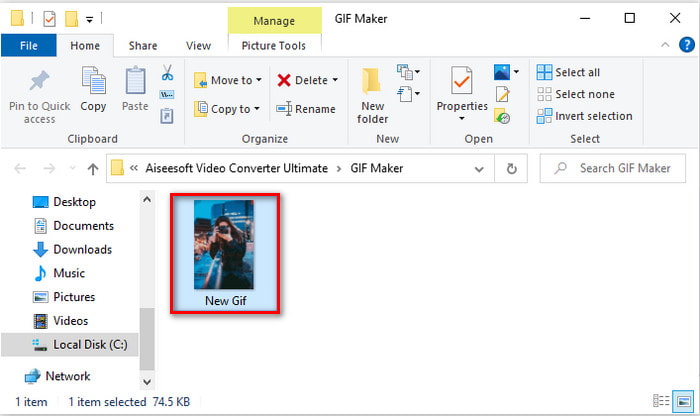
Step 5. Wait for several seconds, and a folder will show to your screen with the GIF you did earlier.
Pros
- The phenomenal editor that you can rely on to make your GIF outstanding.
- It has a lot of advanced features you can use.
- Learning how to use this tool is easier because of its on-point.
Cons
- You will need to transfer the images on your iPhone to the desktop.
- Need to be downloaded on your desktop first before you can access.
Part 4. FAQs about Make GIF from Photos on iPhone
How to make a GIF on Android from photos?
You can repeat the steps on Part 3 and just do the same thing. Basically, you will need to transfer all the video you want to be turned into GIFs to your drive. Then follow the steps provided below.
What is a GIF?
GIFs are very popular nowadays because they can make our plain message more meaningful than ever. So, to know more about what a GIF is, click this link and read what it is.
Why do my images become blurry when I turn them into GIFs?
Because GIFs support just 256 different colors in maximum. Unlike JPEG and PNG this image format supports over 16 million color combinations. So, JPEG and PNG are producing the highest image quality compared to GIFs. But JPEG and PNG can't contain moving animation like GIFs do.
Conclusion
As we come to an end, it is now easier for us to manage and create GIFs even on our iPhones. Although all of the tools mentioned in this article can help you to create simple GIFs, still Video Converter Ultimate is the best. As it presents a lot of different features you can use to make your video even more amazing that you can't believe you did that GIF. So, don't settle on a simple software if you can have the best tool you can use on. Download the tool right now and turn your compilation of images into GIFs.


 Video Converter Ultimate
 Screen Recorder